mirror of
https://github.com/imfing/hextra.git
synced 2025-07-01 11:57:24 -04:00
Compare commits
5 Commits
v0.9.3
...
9d350812f2
| Author | SHA1 | Date | |
|---|---|---|---|
| 9d350812f2 | |||
| 06eb8a66a1 | |||
| 081ad8b84f | |||
| 7593ef4ae4 | |||
| b70d729283 |
@ -839,9 +839,6 @@ video {
|
||||
-moz-appearance: none;
|
||||
appearance: none;
|
||||
}
|
||||
.hx-grid-cols-1 {
|
||||
grid-template-columns: repeat(1, minmax(0, 1fr));
|
||||
}
|
||||
.hx-flex-col {
|
||||
flex-direction: column;
|
||||
}
|
||||
@ -3261,14 +3258,6 @@ body:is(html[class~="dark"] *) {
|
||||
--tw-ring-opacity: 1;
|
||||
--tw-ring-color: hsl(var(--primary-hue) var(--primary-saturation) calc(calc(var(--primary-lightness) / 50) * 32) / var(--tw-ring-opacity));
|
||||
}
|
||||
.data-\[state\=selected\]\:dark\:hx-border-primary-500:is(html[class~="dark"] *)[data-state="selected"] {
|
||||
--tw-border-opacity: 1;
|
||||
border-color: hsl(var(--primary-hue) var(--primary-saturation) calc(calc(var(--primary-lightness) / 50) * 50) / var(--tw-border-opacity));
|
||||
}
|
||||
.data-\[state\=selected\]\:dark\:hx-text-primary-600:is(html[class~="dark"] *)[data-state="selected"] {
|
||||
--tw-text-opacity: 1;
|
||||
color: hsl(var(--primary-hue) var(--primary-saturation) calc(calc(var(--primary-lightness) / 50) * 45) / var(--tw-text-opacity));
|
||||
}
|
||||
@media (prefers-contrast: more) {
|
||||
|
||||
.contrast-more\:dark\:hx-border-current:is(html[class~="dark"] *) {
|
||||
@ -3430,10 +3419,6 @@ body:is(html[class~="dark"] *) {
|
||||
flex-shrink: 0;
|
||||
}
|
||||
|
||||
.md\:hx-grid-cols-2 {
|
||||
grid-template-columns: repeat(2, minmax(0, 1fr));
|
||||
}
|
||||
|
||||
.md\:hx-justify-start {
|
||||
justify-content: flex-start;
|
||||
}
|
||||
@ -3463,21 +3448,11 @@ body:is(html[class~="dark"] *) {
|
||||
font-size: .875rem;
|
||||
}
|
||||
}
|
||||
@media (min-width: 1024px) {
|
||||
|
||||
.lg\:hx-grid-cols-3 {
|
||||
grid-template-columns: repeat(3, minmax(0, 1fr));
|
||||
}
|
||||
}
|
||||
@media (min-width: 1280px) {
|
||||
|
||||
.xl\:hx-block {
|
||||
display: block;
|
||||
}
|
||||
|
||||
.xl\:hx-grid-cols-4 {
|
||||
grid-template-columns: repeat(4, minmax(0, 1fr));
|
||||
}
|
||||
}
|
||||
.ltr\:hx-right-1\.5:where([dir="ltr"], [dir="ltr"] *) {
|
||||
right: 0.375rem;
|
||||
|
||||
@ -1,8 +1,43 @@
|
||||
document.addEventListener("DOMContentLoaded", function () {
|
||||
scrollToActiveItem();
|
||||
enableCollapsibles();
|
||||
initializeSidebar();
|
||||
});
|
||||
|
||||
function initializeSidebar() {
|
||||
const sidebarScrollbar = document.querySelector("aside.sidebar-container > .hextra-scrollbar");
|
||||
if (!sidebarScrollbar) return;
|
||||
|
||||
enableCollapsibles();
|
||||
restoreSidebarPosition(sidebarScrollbar);
|
||||
|
||||
const debouncedSave = debounce((position) => {
|
||||
saveSidebarPosition(position);
|
||||
}, 150);
|
||||
|
||||
sidebarScrollbar.addEventListener('scroll', function() {
|
||||
debouncedSave(this.scrollTop);
|
||||
});
|
||||
|
||||
document.querySelectorAll('a').forEach(link => {
|
||||
if (link.hostname === window.location.hostname) {
|
||||
link.addEventListener('click', function(e) {
|
||||
saveSidebarPosition(sidebarScrollbar.scrollTop);
|
||||
});
|
||||
}
|
||||
});
|
||||
}
|
||||
|
||||
function debounce(func, wait) {
|
||||
let timeout;
|
||||
return function executedFunction(...args) {
|
||||
const later = () => {
|
||||
clearTimeout(timeout);
|
||||
func(...args);
|
||||
};
|
||||
clearTimeout(timeout);
|
||||
timeout = setTimeout(later, wait);
|
||||
};
|
||||
}
|
||||
|
||||
function enableCollapsibles() {
|
||||
const buttons = document.querySelectorAll(".hextra-sidebar-collapsible-button");
|
||||
buttons.forEach(function (button) {
|
||||
@ -16,21 +51,16 @@ function enableCollapsibles() {
|
||||
});
|
||||
}
|
||||
|
||||
function scrollToActiveItem() {
|
||||
const sidebarScrollbar = document.querySelector("aside.sidebar-container > .hextra-scrollbar");
|
||||
const activeItems = document.querySelectorAll(".sidebar-active-item");
|
||||
const visibleActiveItem = Array.from(activeItems).find(function (activeItem) {
|
||||
return activeItem.getBoundingClientRect().height > 0;
|
||||
});
|
||||
|
||||
if (!visibleActiveItem) {
|
||||
return;
|
||||
}
|
||||
|
||||
const yOffset = visibleActiveItem.clientHeight;
|
||||
const yDistance = visibleActiveItem.getBoundingClientRect().top - sidebarScrollbar.getBoundingClientRect().top;
|
||||
sidebarScrollbar.scrollTo({
|
||||
behavior: "instant",
|
||||
top: yDistance - yOffset
|
||||
});
|
||||
function saveSidebarPosition(scrollPosition) {
|
||||
localStorage.setItem('sidebarScrollPosition', scrollPosition);
|
||||
}
|
||||
|
||||
function restoreSidebarPosition(sidebarScrollbar) {
|
||||
const savedPosition = localStorage.getItem('sidebarScrollPosition');
|
||||
|
||||
if (savedPosition !== null) {
|
||||
requestAnimationFrame(() => {
|
||||
sidebarScrollbar.scrollTop = parseInt(savedPosition);
|
||||
});
|
||||
}
|
||||
}
|
||||
@ -1,76 +0,0 @@
|
||||
---
|
||||
title: Hextra テーマ
|
||||
layout: hextra-home
|
||||
---
|
||||
|
||||
{{< hextra/hero-badge >}}
|
||||
<div class="hx-w-2 hx-h-2 hx-rounded-full hx-bg-primary-400"></div>
|
||||
<span>無料、オープンソース</span>
|
||||
{{< icon name="arrow-circle-right" attributes="height=14" >}}
|
||||
{{< /hextra/hero-badge >}}
|
||||
|
||||
<div class="hx-mt-6 hx-mb-6">
|
||||
{{< hextra/hero-headline >}}
|
||||
MarkdownとHugoで <br class="sm:hx-block hx-hidden" />モダンなウェブサイトを構築
|
||||
{{< /hextra/hero-headline >}}
|
||||
</div>
|
||||
|
||||
<div class="hx-mb-12">
|
||||
{{< hextra/hero-subtitle >}}
|
||||
美しい静的ウェブサイトを作るための <br class="sm:hx-block hx-hidden" />高速でバッテリー同梱型のHugoテーマ
|
||||
{{< /hextra/hero-subtitle >}}
|
||||
</div>
|
||||
|
||||
<div class="hx-mb-6">
|
||||
{{< hextra/hero-button text="始める" link="docs" >}}
|
||||
</div>
|
||||
|
||||
<div class="hx-mt-6"></div>
|
||||
|
||||
{{< hextra/feature-grid >}}
|
||||
{{< hextra/feature-card
|
||||
title="高速かつ多機能"
|
||||
subtitle="シンプルで使いやすく、それでいて強力で豊富な機能を備えています。"
|
||||
class="hx-aspect-auto md:hx-aspect-[1.1/1] max-md:hx-min-h-[340px]"
|
||||
image="/images/hextra-doc.webp"
|
||||
imageClass="hx-top-[40%] hx-left-[24px] hx-w-[180%] sm:hx-w-[110%] dark:hx-opacity-80"
|
||||
style="background: radial-gradient(ellipse at 50% 80%,rgba(194,97,254,0.15),hsla(0,0%,100%,0));"
|
||||
>}}
|
||||
{{< hextra/feature-card
|
||||
title="MarkdownだけでOK"
|
||||
subtitle="Markdownだけで作成可能。ショートコードコンポーネントで充実させることもできます。"
|
||||
class="hx-aspect-auto md:hx-aspect-[1.1/1] max-lg:hx-min-h-[340px]"
|
||||
image="/images/hextra-markdown.webp"
|
||||
imageClass="hx-top-[40%] hx-left-[36px] hx-w-[180%] sm:hx-w-[110%] dark:hx-opacity-80"
|
||||
style="background: radial-gradient(ellipse at 50% 80%,rgba(142,53,74,0.15),hsla(0,0%,100%,0));"
|
||||
>}}
|
||||
{{< hextra/feature-card
|
||||
title="全文検索"
|
||||
subtitle="FlexSearchによる全文検索が内蔵されており、追加の設定は不要です。"
|
||||
class="hx-aspect-auto md:hx-aspect-[1.1/1] max-md:hx-min-h-[340px]"
|
||||
image="/images/hextra-search.webp"
|
||||
imageClass="hx-top-[40%] hx-left-[36px] hx-w-[110%] sm:hx-w-[110%] dark:hx-opacity-80"
|
||||
style="background: radial-gradient(ellipse at 50% 80%,rgba(221,210,59,0.15),hsla(0,0%,100%,0));"
|
||||
>}}
|
||||
{{< hextra/feature-card
|
||||
title="羽のように軽量"
|
||||
subtitle="Hextraを使用するために依存関係やNode.jsは必要ありません。Hugoによって動力を得ており、単一のバイナリで数秒でサイトを構築できます。"
|
||||
>}}
|
||||
{{< hextra/feature-card
|
||||
title="レスポンシブ対応とダークモード"
|
||||
subtitle="さまざまな画面サイズで美しく見えます。内蔵のダークモードサポートにより、ユーザーのシステム設定に基づいて自動切り替えが可能です。"
|
||||
>}}
|
||||
{{< hextra/feature-card
|
||||
title="無料で構築とホスティング"
|
||||
subtitle="GitHub Actionsを使って構築し、GitHub Pagesで無料でホスティングできます。また、他の静的ホスティングサービスでもホスティング可能です。"
|
||||
>}}
|
||||
{{< hextra/feature-card
|
||||
title="簡単な多言語対応"
|
||||
subtitle="Markdownファイルにロケールサフィックスを追加するだけで多言語ページを作成できます。i18nサポートの追加も直感的です。"
|
||||
>}}
|
||||
{{< hextra/feature-card
|
||||
title="さらに多くの機能"
|
||||
icon="sparkles"
|
||||
subtitle="構文ハイライト / 目次 / SEO / RSS / LaTeX / Mermaid / カスタマイズ可能 / など多数..."
|
||||
>}}
|
||||
{{< /hextra/feature-grid >}}
|
||||
@ -1,40 +0,0 @@
|
||||
---
|
||||
linkTitle: "ドキュメンテーション"
|
||||
title: イントロダクション
|
||||
---
|
||||
|
||||
👋 こんにちは!Hextraのドキュメンテーションへようこそ!
|
||||
|
||||
<!--more-->
|
||||
|
||||
## Hextraとは?
|
||||
|
||||
Hextraは、[Tailwind CSS][tailwind-css]を使用して構築された、モダンで高速かつ機能豊富な[Hugo][hugo]テーマです。ドキュメンテーション、ブログ、ウェブサイトのための美しいウェブサイトを構築するために設計されており、さまざまな要件に対応するための機能と柔軟性を提供します。
|
||||
|
||||
## 特徴
|
||||
|
||||
- **美しいデザイン** - Nextraにインスパイアされ、Tailwind CSSを活用してモダンなデザインを提供し、サイトを際立たせます。
|
||||
- **レスポンシブレイアウトとダークモード** - モバイル、タブレット、デスクトップなど、すべてのデバイスで美しく表示されます。また、ダークモードもサポートされており、さまざまな照明条件に対応します。
|
||||
- **高速で軽量** - 単一のバイナリファイルに収められた超高速の静的サイトジェネレータであるHugoを採用し、Hextraはそのフットプリントを最小限に抑えています。JavaScriptやNode.jsは必要ありません。
|
||||
- **全文検索** - FlexSearchを利用したオフライン全文検索が組み込まれており、追加の設定は不要です。
|
||||
- **機能豊富** - Markdown、シンタックスハイライト、LaTeX数式、ダイアグラム、ショートコード要素など、コンテンツを強化するための機能を提供します。目次、パンくずリスト、ページネーション、サイドバーナビゲーションなどが自動生成されます。
|
||||
- **多言語対応とSEO対応** - Hugoの多言語モードを使用して、多言語サイトを簡単に作成できます。SEOタグ、Open Graph、Twitter Cardsのサポートも標準で提供されます。
|
||||
|
||||
## 質問やフィードバックは?
|
||||
|
||||
{{< callout emoji="❓" >}}
|
||||
Hextraはまだ活発に開発中です。
|
||||
質問やフィードバックがありますか?[issueを開いて](https://github.com/imfing/hextra/issues)お気軽にお知らせください!
|
||||
{{< /callout >}}
|
||||
|
||||
## 次に
|
||||
|
||||
以下のセクションに進んで、すぐに始めましょう:
|
||||
|
||||
{{< cards >}}
|
||||
{{< card link="getting-started" title="はじめに" icon="document-text" subtitle="Hextraを使用してウェブサイトを作成する方法を学ぶ" >}}
|
||||
{{< /cards >}}
|
||||
|
||||
[hugo]: https://gohugo.io/
|
||||
[flex-search]: https://github.com/nextapps-de/flexsearch
|
||||
[tailwind-css]: https://tailwindcss.com/
|
||||
@ -7,29 +7,29 @@ title: 介绍
|
||||
|
||||
<!--more-->
|
||||
|
||||
## 什么是 Hextra?
|
||||
## Hextra 是什么?
|
||||
|
||||
Hextra 是一个现代、快速且功能齐全的 [Hugo][hugo] 主题,基于 [Tailwind CSS][tailwind-css] 构建。专为构建美观的文档、博客和网站而设计,它提供了开箱即用的功能和灵活性,以满足各种需求。
|
||||
Hextra 是一款现代、快速且内置丰富功能的 [Hugo][hugo] 主题,它是用 [Tailwind CSS][tailwind-css] 构建的。该主题旨在创建美观的文档、博客和网站,提供了开箱即用的功能和灵活性以满足各种需求。
|
||||
|
||||
## 特性
|
||||
## 功能特点
|
||||
|
||||
- **精美设计** - 灵感源自 Nextra,Hextra 利用 Tailwind CSS 提供现代设计,使您的网站脱颖而出。
|
||||
- **响应式布局与暗黑模式** - 在所有设备上都能完美呈现,从手机、平板到桌面。暗黑模式也得到支持,以适应不同的光照条件。
|
||||
- **快速且轻量** - 由 Hugo 驱动,这是一个闪电般快速的静态网站生成器,仅需一个二进制文件,Hextra 保持其占用空间最小。无需 JavaScript 或 Node.js 即可使用。
|
||||
- **全文搜索** - 内置离线全文搜索,由 FlexSearch 提供支持,无需额外配置。
|
||||
- **功能齐全** - Markdown、语法高亮、LaTeX 数学公式、图表和 Shortcodes 元素,丰富您的内容。目录、面包屑导航、分页、侧边栏导航等均自动生成。
|
||||
- **多语言与 SEO 就绪** - 通过 Hugo 的多语言模式轻松创建多语言网站。开箱即用支持 SEO 标签、Open Graph 和 Twitter Cards。
|
||||
- **优美的设计** - 受到 Nextra 的启发,Hextra 利用 Tailwind CSS 提供了一种现代设计,使您的网站看起来出色。
|
||||
- **响应式布局和深色模式** - 无论是在移动设备、平板还是桌面上,都表现出色。同时支持深色模式以适应各种光线条件。
|
||||
- **快速和轻量级** - 由 Hugo 驱动,一个轻量级且超快的静态网站生成器,封装在一个单一的二进制文件中,Hextra 保持其占用极小。使用它不需要 Javascript 或 Node.js。
|
||||
- **全文搜索** - 内置的离线全文搜索由 FlexSearch 提供支持,无需额外配置。
|
||||
- **功能全面** - 支持 Markdown、语法高亮、LaTeX 数学公式、图表以及 Shortcodes 元素以增强您的内容。目录、面包屑、分页、侧边栏导航等都会自动生成。
|
||||
- **多语言和 SEO 支持** - Hugo 的多语言模式轻松支持多语言网站。对于 SEO 标签、Open Graph 和 Twitter 卡片,也提供了开箱即用的支持。
|
||||
|
||||
## 有问题或反馈?
|
||||
|
||||
{{< callout emoji="❓" >}}
|
||||
Hextra 仍在积极开发中。
|
||||
有问题或反馈?欢迎[提交问题](https://github.com/imfing/hextra/issues)!
|
||||
有问题或反馈?请随时[提出问题](https://github.com/imfing/hextra/issues)!
|
||||
{{< /callout >}}
|
||||
|
||||
## 下一步
|
||||
## 接下来
|
||||
|
||||
立即深入以下部分,开始使用:
|
||||
直接进入以下部分开始:
|
||||
|
||||
{{< cards >}}
|
||||
{{< card link="getting-started" title="入门指南" icon="document-text" subtitle="学习如何使用 Hextra 创建网站" >}}
|
||||
|
||||
@ -1,16 +0,0 @@
|
||||
---
|
||||
linkTitle: 上級者向け
|
||||
title: 上級者向けトピック
|
||||
prev: /docs/guide/shortcodes/tabs
|
||||
next: /docs/advanced/multi-language
|
||||
---
|
||||
|
||||
このセクションでは、テーマの上級者向けトピックをカバーします。
|
||||
|
||||
<!--more-->
|
||||
|
||||
{{< cards >}}
|
||||
{{< card link="multi-language" title="多言語対応" icon="translate" >}}
|
||||
{{< card link="customization" title="カスタマイズ" icon="pencil" >}}
|
||||
{{< card link="comments" title="コメントシステム" icon="chat-alt" >}}
|
||||
{{< /cards >}}
|
||||
@ -1,16 +1,15 @@
|
||||
---
|
||||
linkTitle: 高级
|
||||
title: 高级主题
|
||||
linkTitle: 高级配置
|
||||
title: 高级配置
|
||||
prev: /docs/guide/shortcodes/tabs
|
||||
next: /docs/advanced/multi-language
|
||||
---
|
||||
|
||||
本节涵盖了一些主题的高级内容。
|
||||
此部分提供了 Hextra 的一些高级配置。
|
||||
|
||||
<!--more-->
|
||||
|
||||
{{< cards >}}
|
||||
{{< card link="multi-language" title="多语言" icon="translate" >}}
|
||||
{{< card link="customization" title="自定义" icon="pencil" >}}
|
||||
{{< card link="comments" title="评论系统" icon="chat-alt" >}}
|
||||
{{< card link="customization" title="定制化" icon="pencil" >}}
|
||||
{{< /cards >}}
|
||||
@ -1,39 +0,0 @@
|
||||
---
|
||||
title: コメントシステム
|
||||
linkTitle: コメント
|
||||
---
|
||||
|
||||
Hextraは、サイトにコメントシステムを追加することをサポートしています。
|
||||
現在、[giscus](https://giscus.app/)がサポートされています。
|
||||
|
||||
<!--more-->
|
||||
|
||||
## giscus
|
||||
|
||||
[giscus](https://giscus.app/)は、[GitHub Discussions](https://docs.github.com/ja/discussions)を利用したコメントシステムです。無料でオープンソースです。
|
||||
|
||||
giscusを有効にするには、サイトの設定ファイルに以下を追加する必要があります:
|
||||
|
||||
```yaml {filename="hugo.yaml"}
|
||||
params:
|
||||
comments:
|
||||
enable: false
|
||||
type: giscus
|
||||
|
||||
giscus:
|
||||
repo: <リポジトリ>
|
||||
repoId: <リポジトリID>
|
||||
category: <カテゴリ>
|
||||
categoryId: <カテゴリID>
|
||||
```
|
||||
|
||||
giscusの設定は、[giscus.app](https://giscus.app/)のウェブサイトから構築できます。詳細もそこで確認できます。
|
||||
|
||||
特定のページでコメントを有効または無効にするには、ページのフロントマターに以下を追加します:
|
||||
|
||||
```yaml {filename="content/docs/about.md"}
|
||||
---
|
||||
title: について
|
||||
comments: true
|
||||
---
|
||||
```
|
||||
@ -1,18 +1,18 @@
|
||||
---
|
||||
title: 评论系统
|
||||
linkTitle: 评论
|
||||
linkTitle: Comments
|
||||
---
|
||||
|
||||
Hextra 支持为您的网站添加评论系统。
|
||||
目前支持 [giscus](https://giscus.app/)。
|
||||
Hextra 支持在你的网站中添加评论系统。
|
||||
目前已经支持 [giscus](https://giscus.app/).
|
||||
|
||||
<!--more-->
|
||||
|
||||
## giscus
|
||||
|
||||
[giscus](https://giscus.app/) 是一个由 [GitHub Discussions](https://docs.github.com/en/discussions) 提供支持的评论系统。它是免费且开源的。
|
||||
[giscus](https://giscus.app/) 是由 [GitHub Discussions](https://docs.github.com/en/discussions)驱动的评论系统。Giscus 免费并且开源。
|
||||
|
||||
要启用 giscus,您需要在网站配置文件中添加以下内容:
|
||||
如需启用 Giscus, 你需要在配置文件中添加以下内容:
|
||||
|
||||
```yaml {filename="hugo.yaml"}
|
||||
params:
|
||||
@ -21,19 +21,19 @@ params:
|
||||
type: giscus
|
||||
|
||||
giscus:
|
||||
repo: <仓库>
|
||||
repoId: <仓库 ID>
|
||||
category: <分类>
|
||||
categoryId: <分类 ID>
|
||||
repo: <repository>
|
||||
repoId: <repository ID>
|
||||
category: <category>
|
||||
categoryId: <category ID>
|
||||
```
|
||||
|
||||
giscus 的配置可以从 [giscus.app](https://giscus.app/) 网站生成。更多详细信息也可以在那里找到。
|
||||
Giscus 配置可以参考 [giscus.app](https://giscus.app/),还可以在那里找到更多详细信息。
|
||||
|
||||
可以在页面的 front matter 中为特定页面启用或禁用评论:
|
||||
可以在 front matter 中启用或禁用特定页面的评论:
|
||||
|
||||
```yaml {filename="content/docs/about.md"}
|
||||
---
|
||||
title: 关于
|
||||
title: About
|
||||
comments: true
|
||||
---
|
||||
```
|
||||
@ -1,211 +0,0 @@
|
||||
---
|
||||
title: Hextraのカスタマイズ
|
||||
linkTitle: カスタマイズ
|
||||
---
|
||||
|
||||
Hextraは、`hugo.yaml`設定ファイル内でいくつかのデフォルトのカスタマイズオプションを提供し、テーマを設定できます。
|
||||
このページでは、利用可能なオプションと、テーマをさらにカスタマイズする方法について説明します。
|
||||
|
||||
<!--more-->
|
||||
|
||||
## カスタムCSS
|
||||
|
||||
カスタムCSSを追加するには、サイト内に`assets/css/custom.css`ファイルを作成する必要があります。Hextraはこのファイルを自動的に読み込みます。
|
||||
|
||||
### フォントファミリー
|
||||
|
||||
コンテンツのフォントファミリーは、以下のようにカスタマイズできます:
|
||||
|
||||
```css {filename="assets/css/custom.css"}
|
||||
.content {
|
||||
font-family: "Times New Roman", Times, serif;
|
||||
}
|
||||
```
|
||||
|
||||
### インラインコード要素
|
||||
|
||||
`other text`と混在するテキストの色は、以下のようにカスタマイズできます:
|
||||
|
||||
```css {filename="assets/css/custom.css"}
|
||||
.content code:not(.code-block code) {
|
||||
color: #c97c2e;
|
||||
}
|
||||
```
|
||||
|
||||
### プライマリカラー
|
||||
|
||||
テーマのプライマリカラーは、`--primary-hue`、`--primary-saturation`、`--primary-lightness`変数を設定することでカスタマイズできます:
|
||||
|
||||
```css {filename="assets/css/custom.css"}
|
||||
:root {
|
||||
--primary-hue: 100deg;
|
||||
--primary-saturation: 90%;
|
||||
--primary-lightness: 50%;
|
||||
}
|
||||
```
|
||||
|
||||
### テーマのさらなるカスタマイズ
|
||||
|
||||
テーマは、公開されているCSSクラスを介してデフォルトのスタイルをオーバーライドすることでさらにカスタマイズできます。フッター要素をカスタマイズする例:
|
||||
|
||||
```css {filename="assets/css/custom.css"}
|
||||
.hextra-footer {
|
||||
/* フッター要素に適用されるスタイル */
|
||||
}
|
||||
|
||||
.hextra-footer:is(html[class~="dark"] *) {
|
||||
/* ダークモードでのフッター要素に適用されるスタイル */
|
||||
}
|
||||
```
|
||||
|
||||
以下のクラスを使用して、テーマのさまざまな部分をカスタマイズできます。
|
||||
|
||||
#### 一般
|
||||
|
||||
- `hextra-scrollbar` - スクロールバー要素
|
||||
- `content` - ページコンテンツコンテナ
|
||||
|
||||
#### ショートコード
|
||||
|
||||
##### バッジ
|
||||
|
||||
- `hextra-badge` - バッジ要素
|
||||
|
||||
##### カード
|
||||
|
||||
- `hextra-card` - カード要素
|
||||
- `hextra-card-image` - カード画像要素
|
||||
- `hextra-card-icon` - カードアイコン要素
|
||||
- `hextra-card-subtitle` - カードサブタイトル要素
|
||||
|
||||
##### カードグリッド
|
||||
|
||||
- `hextra-cards` - カードグリッドコンテナ
|
||||
|
||||
##### Jupyter Notebook
|
||||
|
||||
- `hextra-jupyter-code-cell` - Jupyterコードセルコンテナ
|
||||
- `hextra-jupyter-code-cell-outputs-container` - Jupyterコードセル出力コンテナ
|
||||
- `hextra-jupyter-code-cell-outputs` - Jupyterコードセル出力div要素
|
||||
|
||||
##### PDF
|
||||
|
||||
- `hextra-pdf` - PDFコンテナ要素
|
||||
|
||||
##### ステップ
|
||||
|
||||
- `steps` - ステップコンテナ
|
||||
|
||||
##### タブ
|
||||
|
||||
- `hextra-tabs-panel` - タブパネルコンテナ
|
||||
- `hextra-tabs-toggle` - タブトグルボタン
|
||||
|
||||
##### ファイルツリー
|
||||
|
||||
- `hextra-filetree` - ファイルツリーコンテナ
|
||||
|
||||
##### フォルダ
|
||||
|
||||
- `hextra-filetree-folder` - ファイルツリーフォルダコンテナ
|
||||
|
||||
#### ナビゲーションバー
|
||||
|
||||
- `nav-container` - ナビゲーションバーコンテナ
|
||||
- `nav-container-blur` - ナビゲーションバーコンテナのぼかし要素
|
||||
- `hamburger-menu` - ハンバーガーメニューボタン
|
||||
|
||||
#### フッター
|
||||
|
||||
- `hextra-footer` - フッター要素
|
||||
- `hextra-custom-footer` - カスタムフッターセクションコンテナ
|
||||
|
||||
#### 検索
|
||||
|
||||
- `search-wrapper` - 検索ラッパーコンテナ
|
||||
- `search-input` - 検索入力要素
|
||||
- `search-results` - 検索結果リストコンテナ
|
||||
|
||||
#### 目次
|
||||
|
||||
- `hextra-toc` - 目次コンテナ
|
||||
|
||||
#### サイドバー
|
||||
|
||||
- `mobile-menu-overlay` - モバイルメニューのオーバーレイ要素
|
||||
- `sidebar-container` - サイドバーコンテナ
|
||||
- `sidebar-active-item` - サイドバーのアクティブアイテム
|
||||
|
||||
#### 言語スイッチャー
|
||||
|
||||
- `language-switcher` - 言語スイッチャーボタン
|
||||
- `language-options` - 言語オプションコンテナ
|
||||
|
||||
#### テーマトグル
|
||||
|
||||
- `theme-toggle` - テーマトグルボタン
|
||||
|
||||
#### コードコピーボタン
|
||||
|
||||
- `hextra-code-copy-btn-container` - コードコピーボタンコンテナ
|
||||
- `hextra-code-copy-btn` - コードコピーボタン
|
||||
|
||||
#### コードブロック
|
||||
|
||||
- `hextra-code-block` - コードブロックコンテナ
|
||||
|
||||
#### フィーチャーカード
|
||||
|
||||
- `hextra-feature-card` - フィーチャーカードリンク要素
|
||||
|
||||
#### フィーチャーグリッド
|
||||
|
||||
- `hextra-feature-grid` - フィーチャーグリッドコンテナ
|
||||
|
||||
#### パンくずリスト
|
||||
|
||||
パンくずリスト用の特定のクラスはありません。
|
||||
|
||||
### シンタックスハイライト
|
||||
|
||||
利用可能なシンタックスハイライトテーマのリストは、[Chroma Styles Gallery](https://xyproto.github.io/splash/docs/all.html)で確認できます。スタイルシートは以下のコマンドで生成できます:
|
||||
|
||||
```shell
|
||||
hugo gen chromastyles --style=github
|
||||
```
|
||||
|
||||
デフォルトのシンタックスハイライトテーマをオーバーライドするには、生成されたスタイルをカスタムCSSファイルに追加します。
|
||||
|
||||
## カスタムスクリプト
|
||||
|
||||
すべてのページのheadの最後にカスタムスクリプトを追加するには、以下のファイルを追加します:
|
||||
|
||||
```
|
||||
layouts/partials/custom/head-end.html
|
||||
```
|
||||
|
||||
## フッターのカスタムセクション
|
||||
|
||||
フッターに追加のセクションを追加するには、サイト内に`layouts/partials/custom/footer.html`ファイルを作成します。
|
||||
|
||||
```html {filename="layouts/partials/custom/footer.html"}
|
||||
<!-- ここにフッター要素を追加 -->
|
||||
```
|
||||
|
||||
追加されたセクションは、フッターの著作権セクションの前に追加されます。
|
||||
[HTML](https://developer.mozilla.org/ja/docs/Web/HTML)と[Hugoテンプレート構文](https://gohugo.io/templates/)を使用して、独自のコンテンツを追加できます。
|
||||
|
||||
フッターセクションで利用可能なHugo変数は、`.switchesVisible`と`.copyrightVisible`です。
|
||||
|
||||
## カスタムレイアウト
|
||||
|
||||
テーマのレイアウトは、サイトの`layouts`ディレクトリ内に同じ名前のファイルを作成することでオーバーライドできます。
|
||||
例えば、ドキュメント用の`single.html`レイアウトをオーバーライドするには、サイト内に`layouts/docs/single.html`ファイルを作成します。
|
||||
|
||||
詳細については、[Hugoテンプレート][hugo-template-docs]を参照してください。
|
||||
|
||||
## さらなるカスタマイズ
|
||||
|
||||
探しているものが見つかりませんでしたか?[ディスカッションを開く](https://github.com/imfing/hextra/discussions)か、テーマに貢献してください!
|
||||
|
||||
[hugo-template-docs]: https://gohugo.io/templates/
|
||||
@ -44,128 +44,6 @@ The primary color of the theme can be customized by setting the `--primary-hue`,
|
||||
}
|
||||
```
|
||||
|
||||
### Further Theme Customization
|
||||
|
||||
The theme can be further customized by overriding the default styles via the exposed css classes. An example for customizing the footer element:
|
||||
|
||||
```css {filename="assets/css/custom.css"}
|
||||
.hextra-footer {
|
||||
/* Styles will be applied to the footer element */
|
||||
}
|
||||
|
||||
.hextra-footer:is(html[class~="dark"] *) {
|
||||
/* Styles will be applied to the footer element in dark mode */
|
||||
}
|
||||
```
|
||||
|
||||
The following classes can be used to customize various parts of the theme.
|
||||
|
||||
#### General
|
||||
|
||||
- `hextra-scrollbar` - The scrollbar element
|
||||
- `content` - Page content container
|
||||
|
||||
#### Shortcodes
|
||||
|
||||
##### Badge
|
||||
|
||||
- `hextra-badge` - The badge element
|
||||
|
||||
##### Card
|
||||
|
||||
- `hextra-card` - The card element
|
||||
- `hextra-card-image` - The card image element
|
||||
- `hextra-card-icon` - The card icon element
|
||||
- `hextra-card-subtitle` - The card subtitle element
|
||||
|
||||
##### Cards
|
||||
|
||||
- `hextra-cards` - The cards grid container
|
||||
|
||||
##### Jupyter Notebook
|
||||
|
||||
- `hextra-jupyter-code-cell` - The Jupyter code cell container
|
||||
- `hextra-jupyter-code-cell-outputs-container` - The Jupyter code cell outputs container
|
||||
- `hextra-jupyter-code-cell-outputs` - The Jupyter code cell output div element
|
||||
|
||||
##### PDF
|
||||
|
||||
- `hextra-pdf` - The PDF container element
|
||||
|
||||
##### Steps
|
||||
|
||||
- `steps` - The steps container
|
||||
|
||||
##### Tabs
|
||||
|
||||
- `hextra-tabs-panel` - The tabs panel container
|
||||
- `hextra-tabs-toggle` - The tabs toggle button
|
||||
|
||||
##### Filetree
|
||||
|
||||
- `hextra-filetree` - The filetree container
|
||||
|
||||
##### Folder
|
||||
|
||||
- `hextra-filetree-folder` - The filetree folder container
|
||||
|
||||
#### Navbar
|
||||
|
||||
- `nav-container` - The navbar container
|
||||
- `nav-container-blur` - The navbar container in blur element
|
||||
- `hamburger-menu` - The hamburger menu button
|
||||
|
||||
#### Footer
|
||||
|
||||
- `hextra-footer` - The footer element
|
||||
- `hextra-custom-footer` - The custom footer section container
|
||||
|
||||
#### Search
|
||||
|
||||
- `search-wrapper` - The search wrapper container
|
||||
- `search-input` - The search input element
|
||||
- `search-results` - The search results list container
|
||||
|
||||
#### Table of Contents
|
||||
|
||||
- `hextra-toc` - The table of contents container
|
||||
|
||||
#### Sidebar
|
||||
|
||||
- `mobile-menu-overlay` - The overlay element for the mobile menu
|
||||
- `sidebar-container` - The sidebar container
|
||||
- `sidebar-active-item` - The active item in the sidebar
|
||||
|
||||
#### Language Switcher
|
||||
|
||||
- `language-switcher` - The language switcher button
|
||||
- `language-options` - The language options container
|
||||
|
||||
#### Theme Toggle
|
||||
|
||||
- `theme-toggle` - The theme toggle button
|
||||
|
||||
#### Cody Copy Button
|
||||
|
||||
- `hextra-code-copy-btn-container` - The code copy button container
|
||||
- `hextra-code-copy-btn` - The code copy button
|
||||
|
||||
#### Code Block
|
||||
|
||||
- `hextra-code-block` - The code block container
|
||||
|
||||
#### Feature Card
|
||||
|
||||
- `hextra-feature-card` - The feature card link element
|
||||
|
||||
#### Feature Grid
|
||||
|
||||
- `hextra-feature-grid` - The feature grid container
|
||||
|
||||
#### Breadcrumbs
|
||||
|
||||
No specific class is available for breadcrumbs.
|
||||
|
||||
### Syntax Highlighting
|
||||
|
||||
List of available syntax highlighting themes are available at [Chroma Styles Gallery](https://xyproto.github.io/splash/docs/all.html). The stylesheet can be generated using the command:
|
||||
@ -184,28 +62,13 @@ You may add custom scripts to the end of the head for every page by adding the f
|
||||
layouts/partials/custom/head-end.html
|
||||
```
|
||||
|
||||
## Custom Extra Section in Footer
|
||||
|
||||
You can add extra section in the footer by creating a file `layouts/partials/custom/footer.html` in your site.
|
||||
|
||||
```html {filename="layouts/partials/custom/footer.html"}
|
||||
<!-- Your footer element here -->
|
||||
```
|
||||
|
||||
The added section will be added before the copyright section in the footer.
|
||||
You can use [HTML](https://developer.mozilla.org/en-US/docs/Web/HTML) and [Hugo template syntax](https://gohugo.io/templates/) to add your own content.
|
||||
|
||||
Hugo variables available in the footer section are: `.switchesVisible` and `.copyrightVisible`.
|
||||
|
||||
## Custom Layouts
|
||||
|
||||
The layouts of the theme can be overridden by creating a file with the same name in the `layouts` directory of your site.
|
||||
For example, to override the `single.html` layout for docs, create a file `layouts/docs/single.html` in your site.
|
||||
|
||||
For further information, refer to the [Hugo Templates][hugo-template-docs].
|
||||
For further information, refer to the [Hugo Templates](https://gohugo.io/templates/).
|
||||
|
||||
## Further Customization
|
||||
|
||||
Didn't find what you were looking for? Feel free to [open a discussion](https://github.com/imfing/hextra/discussions) or make a contribution to the theme!
|
||||
|
||||
[hugo-template-docs]: https://gohugo.io/templates/
|
||||
|
||||
@ -3,18 +3,14 @@ title: 自定义 Hextra
|
||||
linkTitle: 自定义
|
||||
---
|
||||
|
||||
Hextra 在 `hugo.yaml` 配置文件中提供了一些默认的自定义选项,用于配置主题。
|
||||
本页描述了可用的选项以及如何进一步自定义主题。
|
||||
Hextra 在 `hugo.yaml` 中提供了一些自定义选项来配置主题。
|
||||
本页介绍了可用选项以及如何进一步自定义主题。
|
||||
|
||||
<!--more-->
|
||||
|
||||
## 自定义 CSS
|
||||
|
||||
要添加自定义 CSS,我们需要在站点中创建一个文件 `assets/css/custom.css`。Hextra 会自动加载此文件。
|
||||
|
||||
### 字体
|
||||
|
||||
内容的字体可以通过以下方式自定义:
|
||||
要添加自定义 CSS,我们需要在站点中创建一个文件 `assets/css/custom.css`。Hextra 将自动加载该文件,比如自定义字体:
|
||||
|
||||
```css {filename="assets/css/custom.css"}
|
||||
.content {
|
||||
@ -22,190 +18,41 @@ Hextra 在 `hugo.yaml` 配置文件中提供了一些默认的自定义选项,
|
||||
}
|
||||
```
|
||||
|
||||
### 内联代码元素
|
||||
### 主题色
|
||||
|
||||
与 `其他文本` 混合的文本颜色可以通过以下方式自定义:
|
||||
|
||||
```css {filename="assets/css/custom.css"}
|
||||
.content code:not(.code-block code) {
|
||||
color: #c97c2e;
|
||||
}
|
||||
```
|
||||
|
||||
### 主色调
|
||||
|
||||
主题的主色调可以通过设置 `--primary-hue`、`--primary-saturation` 和 `--primary-lightness` 变量来自定义:
|
||||
主题色可以通过设置 `--primary-hue` 变量来自定义:
|
||||
|
||||
```css {filename="assets/css/custom.css"}
|
||||
:root {
|
||||
--primary-hue: 100deg;
|
||||
--primary-saturation: 90%;
|
||||
--primary-lightness: 50%;
|
||||
}
|
||||
```
|
||||
|
||||
### 进一步的主题自定义
|
||||
### 代码高亮
|
||||
|
||||
可以通过覆盖暴露的 CSS 类来进一步自定义主题。以下是一个自定义页脚元素的示例:
|
||||
|
||||
```css {filename="assets/css/custom.css"}
|
||||
.hextra-footer {
|
||||
/* 样式将应用于页脚元素 */
|
||||
}
|
||||
|
||||
.hextra-footer:is(html[class~="dark"] *) {
|
||||
/* 样式将应用于暗模式下的页脚元素 */
|
||||
}
|
||||
```
|
||||
|
||||
以下类可用于自定义主题的各个部分。
|
||||
|
||||
#### 通用
|
||||
|
||||
- `hextra-scrollbar` - 滚动条元素
|
||||
- `content` - 页面内容容器
|
||||
|
||||
#### 短代码
|
||||
|
||||
##### 徽章
|
||||
|
||||
- `hextra-badge` - 徽章元素
|
||||
|
||||
##### 卡片
|
||||
|
||||
- `hextra-card` - 卡片元素
|
||||
- `hextra-card-image` - 卡片图片元素
|
||||
- `hextra-card-icon` - 卡片图标元素
|
||||
- `hextra-card-subtitle` - 卡片副标题元素
|
||||
|
||||
##### 卡片组
|
||||
|
||||
- `hextra-cards` - 卡片网格容器
|
||||
|
||||
##### Jupyter Notebook
|
||||
|
||||
- `hextra-jupyter-code-cell` - Jupyter 代码单元容器
|
||||
- `hextra-jupyter-code-cell-outputs-container` - Jupyter 代码单元输出容器
|
||||
- `hextra-jupyter-code-cell-outputs` - Jupyter 代码单元输出 div 元素
|
||||
|
||||
##### PDF
|
||||
|
||||
- `hextra-pdf` - PDF 容器元素
|
||||
|
||||
##### 步骤
|
||||
|
||||
- `steps` - 步骤容器
|
||||
|
||||
##### 标签页
|
||||
|
||||
- `hextra-tabs-panel` - 标签页面板容器
|
||||
- `hextra-tabs-toggle` - 标签页切换按钮
|
||||
|
||||
##### 文件树
|
||||
|
||||
- `hextra-filetree` - 文件树容器
|
||||
|
||||
##### 文件夹
|
||||
|
||||
- `hextra-filetree-folder` - 文件树文件夹容器
|
||||
|
||||
#### 导航栏
|
||||
|
||||
- `nav-container` - 导航栏容器
|
||||
- `nav-container-blur` - 导航栏模糊元素
|
||||
- `hamburger-menu` - 汉堡菜单按钮
|
||||
|
||||
#### 页脚
|
||||
|
||||
- `hextra-footer` - 页脚元素
|
||||
- `hextra-custom-footer` - 自定义页脚部分容器
|
||||
|
||||
#### 搜索
|
||||
|
||||
- `search-wrapper` - 搜索包装容器
|
||||
- `search-input` - 搜索输入元素
|
||||
- `search-results` - 搜索结果列表容器
|
||||
|
||||
#### 目录
|
||||
|
||||
- `hextra-toc` - 目录容器
|
||||
|
||||
#### 侧边栏
|
||||
|
||||
- `mobile-menu-overlay` - 移动菜单的覆盖元素
|
||||
- `sidebar-container` - 侧边栏容器
|
||||
- `sidebar-active-item` - 侧边栏中的活动项
|
||||
|
||||
#### 语言切换器
|
||||
|
||||
- `language-switcher` - 语言切换按钮
|
||||
- `language-options` - 语言选项容器
|
||||
|
||||
#### 主题切换
|
||||
|
||||
- `theme-toggle` - 主题切换按钮
|
||||
|
||||
#### 代码复制按钮
|
||||
|
||||
- `hextra-code-copy-btn-container` - 代码复制按钮容器
|
||||
- `hextra-code-copy-btn` - 代码复制按钮
|
||||
|
||||
#### 代码块
|
||||
|
||||
- `hextra-code-block` - 代码块容器
|
||||
|
||||
#### 功能卡片
|
||||
|
||||
- `hextra-feature-card` - 功能卡片链接元素
|
||||
|
||||
#### 功能网格
|
||||
|
||||
- `hextra-feature-grid` - 功能网格容器
|
||||
|
||||
#### 面包屑导航
|
||||
|
||||
面包屑导航没有特定的类。
|
||||
|
||||
### 语法高亮
|
||||
|
||||
可用的语法高亮主题列表可在 [Chroma 样式库](https://xyproto.github.io/splash/docs/all.html) 中找到。可以使用以下命令生成样式表:
|
||||
代码高亮风格的详细信息可在 [Chroma Styles Gallery](https://xyproto.github.io/splash/docs/all.html) 中找到。可以使用以下命令生成样式表:
|
||||
|
||||
```shell
|
||||
hugo gen chromastyles --style=github
|
||||
```
|
||||
|
||||
要覆盖默认的语法高亮主题,可以将生成的样式添加到自定义 CSS 文件中。
|
||||
可将生成的样式添加到自定义 CSS 文件中以覆盖默认代码高亮样式。
|
||||
|
||||
## 自定义脚本
|
||||
## 自定义 Script
|
||||
|
||||
你可以通过添加以下文件在每个页面的 head 末尾添加自定义脚本:
|
||||
你可以添加以下文件以自定义 `script` 添加到每页的 `head` 最后:
|
||||
|
||||
```
|
||||
layouts/partials/custom/head-end.html
|
||||
```
|
||||
|
||||
## 自定义页脚额外部分
|
||||
|
||||
你可以通过在站点中创建文件 `layouts/partials/custom/footer.html` 来在页脚中添加额外部分。
|
||||
|
||||
```html {filename="layouts/partials/custom/footer.html"}
|
||||
<!-- 你的页脚元素在这里 -->
|
||||
```
|
||||
|
||||
添加的部分将出现在页脚的版权部分之前。
|
||||
你可以使用 [HTML](https://developer.mozilla.org/en-US/docs/Web/HTML) 和 [Hugo 模板语法](https://gohugo.io/templates/) 来添加自己的内容。
|
||||
|
||||
页脚部分可用的 Hugo 变量有:`.switchesVisible` 和 `.copyrightVisible`。
|
||||
|
||||
## 自定义布局
|
||||
|
||||
可以通过在站点的 `layouts` 目录中创建同名文件来覆盖主题的布局。
|
||||
例如,要覆盖文档的 `single.html` 布局,可以在站点中创建文件 `layouts/docs/single.html`。
|
||||
可以在站点的 `layouts` 目录中创建同名文件来覆盖主题的默认布局。
|
||||
例如,要覆盖文档的 `single.html` 布局,在站点中创建文件 `layouts/docs/single.html`。
|
||||
|
||||
更多信息,请参阅 [Hugo 模板文档][hugo-template-docs]。
|
||||
如需或许更多信息,转至 [Hugo Templates](https://gohugo.io/templates/)。
|
||||
|
||||
## 进一步自定义
|
||||
## 进一步定制 Hextra
|
||||
|
||||
没有找到你想要的?欢迎 [发起讨论](https://github.com/imfing/hextra/discussions) 或为主题做出贡献!
|
||||
|
||||
[hugo-template-docs]: https://gohugo.io/templates/
|
||||
没有找到你想修改的内容?在 GitHub 上[创建 Discussion](https://github.com/imfing/hextra/discussions) 或为 Hextra 贡献你的智慧!
|
||||
|
||||
@ -1,83 +0,0 @@
|
||||
---
|
||||
title: "多言語対応"
|
||||
weight: 1
|
||||
prev: /docs/advanced
|
||||
---
|
||||
|
||||
Hextraは、Hugoの[多言語モード](https://gohugo.io/content-management/multilingual/)を使用して、複数の言語でサイトを作成することをサポートしています。
|
||||
|
||||
<!--more-->
|
||||
|
||||
## 多言語対応を有効にする
|
||||
|
||||
サイトを多言語対応にするためには、Hugoにサポートする言語を伝える必要があります。サイトの設定ファイルに以下を追加します:
|
||||
|
||||
```yaml {filename="hugo.yaml"}
|
||||
defaultContentLanguage: en
|
||||
languages:
|
||||
en:
|
||||
languageName: English
|
||||
weight: 1
|
||||
fr:
|
||||
languageName: Français
|
||||
weight: 2
|
||||
ja:
|
||||
languageName: 日本語
|
||||
weight: 3
|
||||
```
|
||||
|
||||
## ファイル名による翻訳管理
|
||||
|
||||
Hugoは、ファイル名による翻訳管理をサポートしています。例えば、英語のファイル `content/docs/_index.md` がある場合、フランス語の翻訳用に `content/docs/_index.fr.md` というファイルを作成できます。
|
||||
|
||||
{{< filetree/container >}}
|
||||
{{< filetree/folder name="content" >}}
|
||||
{{< filetree/folder name="docs" state="open" >}}
|
||||
{{< filetree/file name="_index.md" >}}
|
||||
{{< filetree/file name="_index.fr.md" >}}
|
||||
{{< filetree/file name="_index.ja.md" >}}
|
||||
{{< /filetree/folder >}}
|
||||
{{< /filetree/folder >}}
|
||||
{{< /filetree/container >}}
|
||||
|
||||
注: Hugoは[コンテンツディレクトリによる翻訳](https://gohugo.io/content-management/multilingual/#translation-by-content-directory)もサポートしています。
|
||||
|
||||
## メニュー項目の翻訳
|
||||
|
||||
ナビゲーションバーのメニュー項目を翻訳するには、`identifier` フィールドを設定する必要があります:
|
||||
|
||||
```yaml {filename="hugo.yaml"}
|
||||
menu:
|
||||
main:
|
||||
- identifier: documentation
|
||||
name: Documentation
|
||||
pageRef: /docs
|
||||
weight: 1
|
||||
- identifier: blog
|
||||
name: Blog
|
||||
pageRef: /blog
|
||||
weight: 2
|
||||
```
|
||||
|
||||
そして、対応するi18nファイルで翻訳します:
|
||||
|
||||
```yaml {filename="i18n/fr.yaml"}
|
||||
documentation: Documentation
|
||||
blog: Blog
|
||||
```
|
||||
|
||||
## 文字列の翻訳
|
||||
|
||||
他の場所の文字列を翻訳するには、対応するi18nファイルに翻訳を追加する必要があります:
|
||||
|
||||
```yaml {filename="i18n/fr.yaml"}
|
||||
readMore: Lire la suite
|
||||
```
|
||||
|
||||
テーマで使用されている文字列のリストは、`i18n/en.yaml` ファイルにあります。
|
||||
|
||||
## さらに詳しく
|
||||
|
||||
- [Hugo 多言語モード](https://gohugo.io/content-management/multilingual/)
|
||||
- [Hugo 多言語 Part 1: コンテンツ翻訳](https://www.regisphilibert.com/blog/2018/08/hugo-multilingual-part-1-managing-content-translation/)
|
||||
- [Hugo 多言語 Part 2: 文字列のローカライズ](https://www.regisphilibert.com/blog/2018/08/hugo-multilingual-part-2-i18n-string-localization/)
|
||||
@ -1,16 +1,16 @@
|
||||
---
|
||||
title: "多语言支持"
|
||||
title: "多语言"
|
||||
weight: 1
|
||||
prev: /docs/advanced
|
||||
---
|
||||
|
||||
Hextra 支持使用 Hugo 的[多语言模式](https://gohugo.io/content-management/multilingual/)创建多语言网站。
|
||||
Hextra 支持使用 Hugo 的[多语言模式](https://gohugo.io/content-management/multilingual/) 创建多语言的网站。
|
||||
|
||||
<!--more-->
|
||||
|
||||
## 启用多语言
|
||||
## 启用多语言支持
|
||||
|
||||
要使我们的网站支持多语言,我们需要告诉 Hugo 支持的语言。我们需要在站点配置文件中添加:
|
||||
为了使我们的网站支持多语言,我们需要告诉 Hugo 需要支持的语言。 在站点配置文件中添加:
|
||||
|
||||
```yaml {filename="hugo.yaml"}
|
||||
defaultContentLanguage: en
|
||||
@ -26,9 +26,9 @@ languages:
|
||||
weight: 3
|
||||
```
|
||||
|
||||
## 通过文件名管理翻译
|
||||
## 按文件名管理翻译
|
||||
|
||||
Hugo 支持通过文件名管理翻译。例如,如果我们有一个英文文件 `content/docs/_index.md`,我们可以创建一个文件 `content/docs/_index.fr.md` 作为法语翻译。
|
||||
Hugo 支持按文件名管理翻译。例如,如果我们有一个英文文件 `content/docs/_index.md`,我们可以创建一个翻译为法语的文件 `content/docs/_index.fr.md`。
|
||||
|
||||
{{< filetree/container >}}
|
||||
{{< filetree/folder name="content" >}}
|
||||
@ -40,7 +40,7 @@ Hugo 支持通过文件名管理翻译。例如,如果我们有一个英文文
|
||||
{{< /filetree/folder >}}
|
||||
{{< /filetree/container >}}
|
||||
|
||||
注意:Hugo 还支持[通过内容目录进行翻译](https://gohugo.io/content-management/multilingual/#translation-by-content-directory)。
|
||||
注意:Hugo 还支持[按内容目录管理翻译](https://gohugo.io/content-management/multilingual/#translation-by-content-directory)。
|
||||
|
||||
## 翻译菜单项
|
||||
|
||||
@ -59,25 +59,16 @@ menu:
|
||||
weight: 2
|
||||
```
|
||||
|
||||
并在相应的 i18n 文件中进行翻译:
|
||||
|
||||
```yaml {filename="i18n/fr.yaml"}
|
||||
documentation: Documentation
|
||||
blog: Blog
|
||||
```
|
||||
|
||||
## 翻译字符串
|
||||
|
||||
要翻译其他地方的字符串,我们需要将翻译添加到相应的 i18n 文件中:
|
||||
要翻译其他地方的字符串,我们需要将翻译添加到相应的 `i18n` 文件中:
|
||||
|
||||
```yaml {filename="i18n/fr.yaml"}
|
||||
readMore: Lire la suite
|
||||
```
|
||||
|
||||
主题中使用的字符串列表可以在 `i18n/en.yaml` 文件中找到。
|
||||
## 更多参考
|
||||
|
||||
## 了解更多
|
||||
|
||||
- [Hugo 多语言模式](https://gohugo.io/content-management/multilingual/)
|
||||
- [Hugo 多语言第一部分:内容翻译](https://www.regisphilibert.com/blog/2018/08/hugo-multilingual-part-1-managing-content-translation/)
|
||||
- [Hugo 多语言第二部分:字符串本地化](https://www.regisphilibert.com/blog/2018/08/hugo-multilingual-part-2-i18n-string-localization/)
|
||||
- [Hugo Multilingual Mode](https://gohugo.io/content-management/multilingual/)
|
||||
- [Hugo Multilingual Part 1: Content translation](https://www.regisphilibert.com/blog/2018/08/hugo-multilingual-part-1-managing-content-translation/)
|
||||
- [Hugo Multilingual Part 2: Strings localization](https://www.regisphilibert.com/blog/2018/08/hugo-multilingual-part-2-i18n-string-localization/)
|
||||
|
||||
@ -1,192 +0,0 @@
|
||||
---
|
||||
title: はじめに
|
||||
weight: 1
|
||||
next: /docs/guide
|
||||
prev: /docs
|
||||
---
|
||||
|
||||
## テンプレートからクイックスタート
|
||||
|
||||
{{< icon "github" >}} [imfing/hextra-starter-template](https://github.com/imfing/hextra-starter-template)
|
||||
|
||||
上記のテンプレートリポジトリを使用して、すぐに始めることができます。
|
||||
|
||||
<img src="https://docs.github.com/assets/cb-77734/mw-1440/images/help/repository/use-this-template-button.webp" width="500">
|
||||
|
||||
[GitHub Actionsワークフロー](https://docs.github.com/ja/pages/getting-started-with-github-pages/configuring-a-publishing-source-for-your-github-pages-site#publishing-with-a-custom-github-actions-workflow)を提供しており、サイトを自動的にビルドしてGitHub Pagesにデプロイし、無料でホストすることができます。
|
||||
その他のオプションについては、[サイトのデプロイ](../guide/deploy-site)を確認してください。
|
||||
|
||||
[🌐 デモ ↗](https://imfing.github.io/hextra-starter-template/)
|
||||
|
||||
## 新しいプロジェクトとして始める
|
||||
|
||||
HugoプロジェクトにHextraテーマを追加する主な方法は2つあります:
|
||||
|
||||
1. **Hugoモジュール(推奨)**: 最も簡単で推奨される方法です。[Hugoモジュール](https://gohugo.io/hugo-modules/)を使用すると、テーマを直接オンラインソースから取り込むことができます。テーマは自動的にダウンロードされ、Hugoによって管理されます。
|
||||
|
||||
2. **Gitサブモジュール**: または、Hextraを[Gitサブモジュール](https://git-scm.com/book/ja/v2/Git-%E3%83%84%E3%83%BC%E3%83%AB-%E3%82%B5%E3%83%96%E3%83%A2%E3%82%B8%E3%83%A5%E3%83%BC%E3%83%AB)として追加します。テーマはGitによってダウンロードされ、プロジェクトの`themes`フォルダに保存されます。
|
||||
|
||||
### HugoモジュールとしてHextraをセットアップ
|
||||
|
||||
#### 前提条件
|
||||
|
||||
開始する前に、以下のソフトウェアがインストールされている必要があります:
|
||||
|
||||
- [Hugo(拡張版)](https://gohugo.io/installation/)
|
||||
- [Git](https://git-scm.com/)
|
||||
- [Go](https://go.dev/)
|
||||
|
||||
#### 手順
|
||||
|
||||
{{% steps %}}
|
||||
|
||||
### 新しいHugoサイトを初期化
|
||||
|
||||
```shell
|
||||
hugo new site my-site --format=yaml
|
||||
```
|
||||
|
||||
### モジュール経由でHextraテーマを設定
|
||||
|
||||
```shell
|
||||
# Hugoモジュールを初期化
|
||||
cd my-site
|
||||
hugo mod init github.com/username/my-site
|
||||
|
||||
# Hextraテーマを追加
|
||||
hugo mod get github.com/imfing/hextra
|
||||
```
|
||||
|
||||
`hugo.yaml`を設定してHextraテーマを使用するために、以下を追加します:
|
||||
|
||||
```yaml
|
||||
module:
|
||||
imports:
|
||||
- path: github.com/imfing/hextra
|
||||
```
|
||||
|
||||
### 最初のコンテンツページを作成
|
||||
|
||||
ホームページとドキュメントページの新しいコンテンツページを作成します:
|
||||
|
||||
```shell
|
||||
hugo new content/_index.md
|
||||
hugo new content/docs/_index.md
|
||||
```
|
||||
|
||||
### ローカルでサイトをプレビュー
|
||||
|
||||
```shell
|
||||
hugo server --buildDrafts --disableFastRender
|
||||
```
|
||||
|
||||
これで、新しいサイトのプレビューが`http://localhost:1313/`で利用可能です。
|
||||
|
||||
{{% /steps %}}
|
||||
|
||||
|
||||
{{% details title="テーマを更新するには?" %}}
|
||||
|
||||
プロジェクト内のすべてのHugoモジュールを最新バージョンに更新するには、次のコマンドを実行します:
|
||||
|
||||
```shell
|
||||
hugo mod get -u
|
||||
```
|
||||
|
||||
Hextraを[最新リリースバージョン](https://github.com/imfing/hextra/releases)に更新するには、次のコマンドを実行します:
|
||||
|
||||
```shell
|
||||
hugo mod get -u github.com/imfing/hextra
|
||||
```
|
||||
|
||||
詳細については、[Hugoモジュール](https://gohugo.io/hugo-modules/use-modules/#update-all-modules)を参照してください。
|
||||
|
||||
{{% /details %}}
|
||||
|
||||
### GitサブモジュールとしてHextraをセットアップ
|
||||
|
||||
#### 前提条件
|
||||
|
||||
開始する前に、以下のソフトウェアがインストールされている必要があります:
|
||||
|
||||
- [Hugo(拡張版)](https://gohugo.io/installation/)
|
||||
- [Git](https://git-scm.com/)
|
||||
|
||||
#### 手順
|
||||
|
||||
{{% steps %}}
|
||||
|
||||
### 新しいHugoサイトを初期化
|
||||
|
||||
```shell
|
||||
hugo new site my-site --format=yaml
|
||||
```
|
||||
|
||||
### HextraテーマをGitサブモジュールとして追加
|
||||
|
||||
```shell
|
||||
git submodule add https://github.com/imfing/hextra.git themes/hextra
|
||||
```
|
||||
|
||||
`hugo.yaml`を設定してHextraテーマを使用するために、以下を追加します:
|
||||
|
||||
```yaml
|
||||
theme: hextra
|
||||
```
|
||||
|
||||
### 最初のコンテンツページを作成
|
||||
|
||||
ホームページとドキュメントページの新しいコンテンツページを作成します:
|
||||
|
||||
```shell
|
||||
hugo new content/_index.md
|
||||
hugo new content/docs/_index.md
|
||||
```
|
||||
|
||||
### ローカルでサイトをプレビュー
|
||||
|
||||
```shell
|
||||
hugo server --buildDrafts --disableFastRender
|
||||
```
|
||||
|
||||
新しいサイトのプレビューが`http://localhost:1313/`で利用可能です。
|
||||
|
||||
{{% /steps %}}
|
||||
|
||||
|
||||
[CI/CD](https://ja.wikipedia.org/wiki/CI/CD)を使用してHugoウェブサイトをデプロイする場合、`hugo`コマンドを実行する前に以下のコマンドを実行することが重要です。
|
||||
|
||||
```shell
|
||||
git submodule update --init
|
||||
```
|
||||
|
||||
このコマンドを実行しないと、テーマフォルダにHextraテーマファイルが取り込まれず、ビルドが失敗します。
|
||||
|
||||
|
||||
{{% details title="テーマを更新するには?" %}}
|
||||
|
||||
リポジトリ内のすべてのサブモジュールを最新のコミットに更新するには、次のコマンドを実行します:
|
||||
|
||||
```shell
|
||||
git submodule update --remote
|
||||
```
|
||||
|
||||
Hextraを最新のコミットに更新するには、次のコマンドを実行します:
|
||||
|
||||
```shell
|
||||
git submodule update --remote themes/hextra
|
||||
```
|
||||
|
||||
詳細については、[Gitサブモジュール](https://git-scm.com/book/ja/v2/Git-%E3%83%84%E3%83%BC%E3%83%AB-%E3%82%B5%E3%83%96%E3%83%A2%E3%82%B8%E3%83%A5%E3%83%BC%E3%83%AB)を参照してください。
|
||||
|
||||
{{% /details %}}
|
||||
|
||||
## 次へ
|
||||
|
||||
以下のセクションを探索して、さらにコンテンツを追加し始めましょう:
|
||||
|
||||
{{< cards >}}
|
||||
{{< card link="../guide/organize-files" title="ファイルの整理" icon="document-duplicate" >}}
|
||||
{{< card link="../guide/configuration" title="設定" icon="adjustments" >}}
|
||||
{{< card link="../guide/markdown" title="Markdown" icon="markdown" >}}
|
||||
{{< /cards >}}
|
||||
@ -1,63 +1,49 @@
|
||||
---
|
||||
title: 入门指南
|
||||
title: 快速开始
|
||||
weight: 1
|
||||
next: /docs/guide
|
||||
prev: /docs
|
||||
---
|
||||
|
||||
## 从模板快速开始
|
||||
## 使用模板快速开始
|
||||
|
||||
{{< icon "github" >}} [imfing/hextra-starter-template](https://github.com/imfing/hextra-starter-template)
|
||||
|
||||
您可以通过使用上述模板仓库快速入门。
|
||||
通过使用上面的模板仓库,您将能够快速地开始。
|
||||
|
||||
<img src="https://docs.github.com/assets/cb-77734/mw-1440/images/help/repository/use-this-template-button.webp" width="500">
|
||||
|
||||
我们提供了一个 [GitHub Actions 工作流](https://docs.github.com/en/pages/getting-started-with-github-pages/configuring-a-publishing-source-for-your-github-pages-site#publishing-with-a-custom-github-actions-workflow),可以帮助自动构建并将您的站点部署到 GitHub Pages,并免费托管。
|
||||
更多选项,请查看 [部署站点](../guide/deploy-site)。
|
||||
我们提供了一个 [GitHub Actions 工作流](https://docs.github.com/cn/pages/getting-started-with-github-pages/configuring-a-publishing-source-for-your-github-pages-site#publishing-with-a-custom-github-actions-workflow),它可以帮助您自动构建并部署您的网站到 GitHub Pages,并免费托管。
|
||||
|
||||
[🌐 演示 ↗](https://imfing.github.io/hextra-starter-template/)
|
||||
|
||||
## 作为新项目开始
|
||||
|
||||
有两种主要方式将 Hextra 主题添加到您的 Hugo 项目中:
|
||||
### 前提条件
|
||||
|
||||
1. **Hugo 模块(推荐)**:最简单且推荐的方法。[Hugo 模块](https://gohugo.io/hugo-modules/)允许您直接从在线源拉取主题。主题会自动下载并由 Hugo 管理。
|
||||
在开始之前,请确保我们已经安装了 [Hugo](https://gohugo.io/)。
|
||||
请参考 Hugo 的[官方安装指南](https://gohugo.io/installation/)以获取更多详情。
|
||||
|
||||
2. **Git 子模块**:或者,将 Hextra 添加为 [Git 子模块](https://git-scm.com/book/en/v2/Git-Tools-Submodules)。主题由 Git 下载并存储在您项目的 `themes` 文件夹中。
|
||||
[Hugo 模块](https://gohugo.io/hugo-modules/)是管理 Hugo 主题的推荐方式。要使用 Hugo 模块,我们需要安装 [Git](https://git-scm.com/) 和 [Go](https://go.dev/)。
|
||||
|
||||
### 将 Hextra 设置为 Hugo 模块
|
||||
|
||||
#### 先决条件
|
||||
|
||||
在开始之前,您需要安装以下软件:
|
||||
|
||||
- [Hugo(扩展版)](https://gohugo.io/installation/)
|
||||
- [Git](https://git-scm.com/)
|
||||
- [Go](https://go.dev/)
|
||||
|
||||
#### 步骤
|
||||
|
||||
{{% steps %}}
|
||||
|
||||
### 初始化一个新的 Hugo 站点
|
||||
### 初始化 Hugo 站点
|
||||
|
||||
```shell
|
||||
hugo new site my-site --format=yaml
|
||||
```
|
||||
|
||||
### 通过模块配置 Hextra 主题
|
||||
### 通过 Hugo Module 安装
|
||||
|
||||
```shell
|
||||
# 初始化 Hugo 模块
|
||||
cd my-site
|
||||
hugo mod init github.com/username/my-site
|
||||
|
||||
# 添加 Hextra 主题
|
||||
# 添加 Hextra
|
||||
hugo mod get github.com/imfing/hextra
|
||||
```
|
||||
|
||||
配置 `hugo.yaml` 以使用 Hextra 主题,添加以下内容:
|
||||
编辑 `hugo.yaml` 以启用 Hextra:
|
||||
|
||||
```yaml
|
||||
module:
|
||||
@ -65,128 +51,92 @@ module:
|
||||
- path: github.com/imfing/hextra
|
||||
```
|
||||
|
||||
### 创建您的内容页面
|
||||
|
||||
为主页和文档页面创建新的内容页面:
|
||||
|
||||
```shell
|
||||
hugo new content/_index.md
|
||||
hugo new content/docs/_index.md
|
||||
```
|
||||
|
||||
### 本地预览站点
|
||||
|
||||
```shell
|
||||
hugo server --buildDrafts --disableFastRender
|
||||
```
|
||||
|
||||
恭喜,您的新站点预览可在 `http://localhost:1313/` 查看。
|
||||
|
||||
{{% /steps %}}
|
||||
|
||||
|
||||
{{% details title="如何更新主题?" %}}
|
||||
|
||||
要更新项目中所有 Hugo 模块到最新版本,请运行以下命令:
|
||||
|
||||
```shell
|
||||
hugo mod get -u
|
||||
```
|
||||
|
||||
要将 Hextra 更新到 [最新发布版本](https://github.com/imfing/hextra/releases),请运行以下命令:
|
||||
|
||||
```shell
|
||||
hugo mod get -u github.com/imfing/hextra
|
||||
```
|
||||
|
||||
有关更多详细信息,请参阅 [Hugo 模块](https://gohugo.io/hugo-modules/use-modules/#update-all-modules)。
|
||||
|
||||
{{% /details %}}
|
||||
|
||||
### 将 Hextra 设置为 Git 子模块
|
||||
### 通过 Git Submodule 安装
|
||||
|
||||
#### 先决条件
|
||||
|
||||
在开始之前,您需要安装以下软件:
|
||||
在我们开始之前,你必须先确保以下软件已经安装:
|
||||
|
||||
- [Hugo(扩展版)](https://gohugo.io/installation/)
|
||||
- [Hugo (extended version)](https://gohugo.io/installation/)
|
||||
- [Git](https://git-scm.com/)
|
||||
|
||||
#### 步骤
|
||||
|
||||
{{% steps %}}
|
||||
|
||||
### 初始化一个新的 Hugo 站点
|
||||
### 初始化 Hugo 站点
|
||||
|
||||
```shell
|
||||
hugo new site my-site --format=yaml
|
||||
```
|
||||
|
||||
### 将 Hextra 主题添加为 Git 子模块
|
||||
### 将 Hextra 添加为 Git Submodule
|
||||
|
||||
```shell
|
||||
git submodule add https://github.com/imfing/hextra.git themes/hextra
|
||||
```
|
||||
|
||||
配置 `hugo.yaml` 以使用 Hextra 主题,添加以下内容:
|
||||
添加以下内容来配置 `hugo.yaml` 以使用 Hextra:
|
||||
|
||||
```yaml
|
||||
theme: hextra
|
||||
```
|
||||
|
||||
### 创建您的内容页面
|
||||
### 创建你的第一个内容页
|
||||
|
||||
为主页和文档页面创建新的内容页面:
|
||||
让我们为主页和文档页面创建一个新的内容页面:
|
||||
|
||||
```shell
|
||||
hugo new content/_index.md
|
||||
hugo new content/docs/_index.md
|
||||
```
|
||||
|
||||
### 本地预览站点
|
||||
### 在本地预览站点
|
||||
|
||||
```shell
|
||||
hugo server --buildDrafts --disableFastRender
|
||||
```
|
||||
|
||||
您的新站点预览可在 `http://localhost:1313/` 查看。
|
||||
瞧!你现在可以在 `http://localhost:1313/` 看到你的新站点。
|
||||
|
||||
{{% /steps %}}
|
||||
|
||||
|
||||
当使用 [CI/CD](https://en.wikipedia.org/wiki/CI/CD) 部署 Hugo 网站时,确保在运行 `hugo` 命令之前执行以下命令至关重要。
|
||||
|
||||
|
||||
使用 [CI/CD](https://en.wikipedia.org/wiki/CI/CD) 进行部署时,必须确保在运行 `hugo` 命令之前执行以下命令。
|
||||
|
||||
```shell
|
||||
git submodule update --init
|
||||
```
|
||||
|
||||
如果不运行此命令,主题文件夹将不会被 Hextra 主题文件填充,导致构建失败。
|
||||
如果不运行此命令,theme 中将不会存在 Hextra 文件,进而导致构建失败。
|
||||
|
||||
|
||||
{{% details title="如何更新主题?" %}}
|
||||
|
||||
要更新仓库中所有子模块到最新提交,请运行以下命令:
|
||||
如需把项目中所有的 Hugo Modules 都升级到最新,在终端中运行此命令:
|
||||
|
||||
```shell
|
||||
git submodule update --remote
|
||||
hugo mod get -u
|
||||
```
|
||||
|
||||
要将 Hextra 更新到最新提交,请运行以下命令:
|
||||
如需把 Hextra 升级到[最新的发行版本](https://github.com/imfing/hextra/releases), 在终端中运行此命令:
|
||||
|
||||
```shell
|
||||
git submodule update --remote themes/hextra
|
||||
hugo mod get -u github.com/imfing/hextra
|
||||
```
|
||||
|
||||
有关更多详细信息,请参阅 [Git 子模块](https://git-scm.com/book/en/v2/Git-Tools-Submodules)。
|
||||
如果你需要获得更多信息,参见 [Hugo Modules](https://gohugo.io/hugo-modules/use-modules/#update-all-modules).
|
||||
|
||||
{{% /details %}}
|
||||
|
||||
## 下一步
|
||||
## 接下来
|
||||
|
||||
探索以下部分以开始添加更多内容:
|
||||
探索这些文档以便添加更多内容:
|
||||
|
||||
{{< cards >}}
|
||||
{{< card link="../guide/organize-files" title="组织文件" icon="document-duplicate" >}}
|
||||
{{< card link="../guide/configuration" title="配置" icon="adjustments" >}}
|
||||
{{< card link="../guide/organize-files" title="Organize Files" icon="document-duplicate" >}}
|
||||
{{< card link="../guide/configuration" title="Configuration" icon="adjustments" >}}
|
||||
{{< card link="../guide/markdown" title="Markdown" icon="markdown" >}}
|
||||
{{< /cards >}}
|
||||
@ -1,23 +0,0 @@
|
||||
---
|
||||
title: ガイド
|
||||
weight: 2
|
||||
prev: /docs/getting-started
|
||||
next: /docs/guide/organize-files
|
||||
sidebar:
|
||||
open: true
|
||||
---
|
||||
|
||||
Hextraの使い方を学ぶために、以下のセクションを探索してください:
|
||||
|
||||
<!--more-->
|
||||
|
||||
{{< cards >}}
|
||||
{{< card link="organize-files" title="ファイルの整理" icon="document-duplicate" >}}
|
||||
{{< card link="configuration" title="設定" icon="adjustments" >}}
|
||||
{{< card link="markdown" title="Markdown" icon="markdown" >}}
|
||||
{{< card link="syntax-highlighting" title="シンタックスハイライト" icon="sparkles" >}}
|
||||
{{< card link="latex" title="LaTeX" icon="variable" >}}
|
||||
{{< card link="diagrams" title="ダイアグラム" icon="chart-square-bar" >}}
|
||||
{{< card link="shortcodes" title="ショートコード" icon="template" >}}
|
||||
{{< card link="deploy-site" title="サイトのデプロイ" icon="server" >}}
|
||||
{{< /cards >}}
|
||||
@ -7,17 +7,16 @@ sidebar:
|
||||
open: true
|
||||
---
|
||||
|
||||
探索以下部分,了解如何使用 Hextra:
|
||||
探索以下各节以学习如何使用 Hextra 编写内容:
|
||||
|
||||
<!--more-->
|
||||
|
||||
{{< cards >}}
|
||||
{{< card link="organize-files" title="文件组织" icon="document-duplicate" >}}
|
||||
{{< card link="organize-files" title="目录结构" icon="document-duplicate" >}}
|
||||
{{< card link="configuration" title="配置" icon="adjustments" >}}
|
||||
{{< card link="markdown" title="Markdown" icon="markdown" >}}
|
||||
{{< card link="syntax-highlighting" title="语法高亮" icon="sparkles" >}}
|
||||
{{< card link="latex" title="LaTeX" icon="variable" >}}
|
||||
{{< card link="syntax-highlighting" title="代码高亮" icon="sparkles" >}}
|
||||
{{< card link="latex" title="LaTeX 公式" icon="variable" >}}
|
||||
{{< card link="diagrams" title="图表" icon="chart-square-bar" >}}
|
||||
{{< card link="shortcodes" title="短代码" icon="template" >}}
|
||||
{{< card link="deploy-site" title="部署站点" icon="server" >}}
|
||||
{{< /cards >}}
|
||||
@ -1,288 +0,0 @@
|
||||
---
|
||||
title: 設定
|
||||
weight: 2
|
||||
---
|
||||
|
||||
Hugoは、Hugoサイトのルートにある`hugo.yaml`から設定を読み取ります。
|
||||
この設定ファイルでは、サイトのすべての側面を設定できます。
|
||||
利用可能な設定とベストプラクティスの包括的な理解を得るために、GitHub上のこのサイトの設定ファイル[`exampleSite/hugo.yaml`](https://github.com/imfing/hextra/blob/main/exampleSite/hugo.yaml)をチェックしてください。
|
||||
|
||||
<!--more-->
|
||||
|
||||
## ナビゲーション
|
||||
|
||||
### メニュー
|
||||
|
||||
右上のメニューは、設定ファイルの`menu.main`セクションで定義されます:
|
||||
|
||||
```yaml {filename="hugo.yaml"}
|
||||
menu:
|
||||
main:
|
||||
- name: ドキュメント
|
||||
pageRef: /docs
|
||||
weight: 1
|
||||
- name: ブログ
|
||||
pageRef: /blog
|
||||
weight: 2
|
||||
- name: について
|
||||
pageRef: /about
|
||||
weight: 3
|
||||
- name: 検索
|
||||
weight: 4
|
||||
params:
|
||||
type: search
|
||||
- name: GitHub
|
||||
weight: 5
|
||||
url: "https://github.com/imfing/hextra"
|
||||
params:
|
||||
icon: github
|
||||
```
|
||||
|
||||
メニュー項目にはさまざまなタイプがあります:
|
||||
|
||||
1. `pageRef`を使用してサイト内のページにリンク
|
||||
```yaml
|
||||
- name: ドキュメント
|
||||
pageRef: /docs
|
||||
```
|
||||
2. `url`を使用して外部URLにリンク
|
||||
```yaml
|
||||
- name: GitHub
|
||||
url: "https://github.com"
|
||||
```
|
||||
3. `type: search`を使用して検索バーを表示
|
||||
```yaml
|
||||
- name: 検索
|
||||
params:
|
||||
type: search
|
||||
```
|
||||
4. アイコン
|
||||
```yaml
|
||||
- name: GitHub
|
||||
params:
|
||||
icon: github
|
||||
```
|
||||
|
||||
これらのメニュー項目は、`weight`パラメータを設定して並べ替えることができます。
|
||||
|
||||
### ロゴとタイトル
|
||||
|
||||
デフォルトのロゴを変更するには、`hugo.yaml`を編集し、`static`ディレクトリ下のロゴファイルへのパスを追加します。
|
||||
オプションで、ロゴをクリックしたときにユーザーがリダイレクトされるリンクや、ロゴの幅と高さをピクセル単位で設定できます。
|
||||
|
||||
```yaml {filename="hugo.yaml"}
|
||||
params:
|
||||
navbar:
|
||||
displayTitle: true
|
||||
displayLogo: true
|
||||
logo:
|
||||
path: images/logo.svg
|
||||
dark: images/logo-dark.svg
|
||||
link: /
|
||||
width: 40
|
||||
height: 20
|
||||
```
|
||||
|
||||
## サイドバー
|
||||
|
||||
### メインサイドバー
|
||||
|
||||
メインサイドバーは、コンテンツディレクトリの構造から自動的に生成されます。
|
||||
詳細については、[ファイルの整理](/docs/guide/organize-files)ページを参照してください。
|
||||
|
||||
左サイドバーから単一のページを除外するには、ページのフロントマターで`sidebar.exclude`パラメータを設定します:
|
||||
|
||||
```yaml {filename="content/docs/guide/configuration.md"}
|
||||
---
|
||||
title: 設定
|
||||
sidebar:
|
||||
exclude: true
|
||||
---
|
||||
```
|
||||
|
||||
### 追加リンク
|
||||
|
||||
サイドバーの追加リンクは、設定ファイルの`menu.sidebar`セクションで定義されます:
|
||||
|
||||
```yaml {filename="hugo.yaml"}
|
||||
menu:
|
||||
sidebar:
|
||||
- name: その他
|
||||
params:
|
||||
type: separator
|
||||
weight: 1
|
||||
- name: "について"
|
||||
pageRef: "/about"
|
||||
weight: 2
|
||||
- name: "Hugo Docs ↗"
|
||||
url: "https://gohugo.io/documentation/"
|
||||
weight: 3
|
||||
```
|
||||
|
||||
## 右サイドバー
|
||||
|
||||
### 目次
|
||||
|
||||
目次は、コンテンツファイルの見出しから自動的に生成されます。ページのフロントマターで`toc: false`を設定することで無効にできます。
|
||||
|
||||
```yaml {filename="content/docs/guide/configuration.md"}
|
||||
---
|
||||
title: 設定
|
||||
toc: false
|
||||
---
|
||||
```
|
||||
|
||||
### ページ編集リンク
|
||||
|
||||
ページ編集リンクを設定するには、設定ファイルで`params.editURL.base`パラメータを設定します:
|
||||
|
||||
```yaml {filename="hugo.yaml"}
|
||||
params:
|
||||
editURL:
|
||||
enable: true
|
||||
base: "https://github.com/your-username/your-repo/edit/main"
|
||||
```
|
||||
|
||||
提供されたURLをルートディレクトリとして、各ページの編集リンクが自動的に生成されます。
|
||||
特定のページの編集リンクを設定したい場合は、ページのフロントマターで`editURL`パラメータを設定します:
|
||||
|
||||
```yaml {filename="content/docs/guide/configuration.md"}
|
||||
---
|
||||
title: 設定
|
||||
editURL: "https://example.com/edit/this/page"
|
||||
---
|
||||
```
|
||||
|
||||
## フッター
|
||||
|
||||
### 著作権
|
||||
|
||||
ウェブサイトのフッターに表示される著作権テキストを変更するには、`i18n/en.yaml`という名前のファイルを作成します。
|
||||
このファイルに、以下のように新しい著作権テキストを指定します:
|
||||
|
||||
```yaml {filename="i18n/en.yaml"}
|
||||
copyright: "© 2024 YOUR TEXT HERE"
|
||||
```
|
||||
|
||||
参考として、GitHubリポジトリに[`i18n/en.yaml`](https://github.com/imfing/hextra/blob/main/i18n/en.yaml)ファイルの例があります。また、著作権テキストにMarkdown形式を使用することもできます。
|
||||
|
||||
## その他
|
||||
|
||||
### ファビコン
|
||||
|
||||
サイトの[ファビコン](https://ja.wikipedia.org/wiki/Favicon)をカスタマイズするには、`static`フォルダ下にアイコンファイルを配置して、[テーマのデフォルトのファビコン](https://github.com/imfing/hextra/tree/main/static)を上書きします:
|
||||
|
||||
{{< filetree/container >}}
|
||||
{{< filetree/folder name="static" >}}
|
||||
{{< filetree/file name="android-chrome-192x192.png" >}}
|
||||
{{< filetree/file name="android-chrome-512x512.png" >}}
|
||||
{{< filetree/file name="apple-touch-icon.png" >}}
|
||||
{{< filetree/file name="favicon-16x16.png" >}}
|
||||
{{< filetree/file name="favicon-32x32.png" >}}
|
||||
{{< filetree/file name="favicon-dark.svg" >}}
|
||||
{{< filetree/file name="favicon.ico" >}}
|
||||
{{< filetree/file name="favicon.svg" >}}
|
||||
{{< filetree/file name="site.webmanifest" >}}
|
||||
{{< /filetree/folder >}}
|
||||
{{< /filetree/container >}}
|
||||
|
||||
プロジェクトに`favicon.ico`、`favicon.svg`、`favicon-dark.svg`ファイルを含めて、サイトのファビコンが正しく表示されるようにします。
|
||||
|
||||
`favicon.ico`は一般的に古いブラウザ用ですが、`favicon.svg`と`favicon-dark.svg`は現代のブラウザでサポートされています。
|
||||
[favicon.io](https://favicon.io/)や[favycon](https://github.com/ruisaraiva19/favycon)などのツールを使用して、このようなアイコンを生成できます。
|
||||
|
||||
### テーマ設定
|
||||
|
||||
`theme`設定を使用して、デフォルトのテーマモードとトグルボタンを設定し、訪問者がライトモードとダークモードを切り替えられるようにします。
|
||||
|
||||
```yaml {filename="hugo.yaml"}
|
||||
params:
|
||||
theme:
|
||||
# light | dark | system
|
||||
default: system
|
||||
displayToggle: true
|
||||
```
|
||||
|
||||
`theme.default`のオプション:
|
||||
|
||||
- `light` - 常にライトモードを使用
|
||||
- `dark` - 常にダークモードを使用
|
||||
- `system` - オペレーティングシステムの設定と同期(デフォルト)
|
||||
|
||||
`theme.displayToggle`パラメータを使用して、テーマを変更するためのトグルボタンを表示できます。
|
||||
`true`に設定すると、訪問者はデフォルト設定を上書きしてライトモードとダークモードを切り替えることができます。
|
||||
|
||||
### ページ幅
|
||||
|
||||
ページの幅は、設定ファイルの`params.page.width`パラメータでカスタマイズできます:
|
||||
|
||||
```yaml {filename="hugo.yaml"}
|
||||
params:
|
||||
page:
|
||||
# full (100%), wide (90rem), normal (1280px)
|
||||
width: wide
|
||||
```
|
||||
|
||||
利用可能なオプションは`full`、`wide`、`normal`です。デフォルトでは、ページ幅は`normal`に設定されています。
|
||||
|
||||
同様に、ナビゲーションバーとフッターの幅は、`params.navbar.width`と`params.footer.width`パラメータでカスタマイズできます。
|
||||
|
||||
### 検索インデックス
|
||||
|
||||
[FlexSearch](https://github.com/nextapps-de/flexsearch)による全文検索はデフォルトで有効です。
|
||||
検索インデックスをカスタマイズするには、設定ファイルで`params.search.flexsearch.index`パラメータを設定します:
|
||||
|
||||
```yaml {filename="hugo.yaml"}
|
||||
params:
|
||||
# 検索
|
||||
search:
|
||||
enable: true
|
||||
type: flexsearch
|
||||
|
||||
flexsearch:
|
||||
# ページをインデックスする方法: content | summary | heading | title
|
||||
index: content
|
||||
```
|
||||
|
||||
`flexsearch.index`のオプション:
|
||||
|
||||
- `content` - ページの全内容(デフォルト)
|
||||
- `summary` - ページの要約、詳細は[Hugoコンテンツ要約](https://gohugo.io/content-management/summaries/)を参照
|
||||
- `heading` - レベル1とレベル2の見出し
|
||||
- `title` - ページタイトルのみを含める
|
||||
|
||||
検索トークン化をカスタマイズするには、設定ファイルで`params.search.flexsearch.tokenize`パラメータを設定します:
|
||||
|
||||
```yaml {filename="hugo.yaml"}
|
||||
params:
|
||||
# ...
|
||||
flexsearch:
|
||||
# full | forward | reverse | strict
|
||||
tokenize: forward
|
||||
```
|
||||
|
||||
[`flexsearch.tokenize`](https://github.com/nextapps-de/flexsearch/#tokenizer-prefix-search)のオプション:
|
||||
|
||||
- `strict` - 単語全体をインデックス
|
||||
- `forward` - 前方方向に単語を増分的にインデックス
|
||||
- `reverse` - 両方向に単語を増分的にインデックス
|
||||
- `full` - すべての可能な組み合わせをインデックス
|
||||
|
||||
検索インデックスからページを除外するには、ページのフロントマターで`excludeSearch: true`を設定します:
|
||||
|
||||
```yaml {filename="content/docs/guide/configuration.md"}
|
||||
---
|
||||
title: 設定
|
||||
excludeSearch: true
|
||||
---
|
||||
```
|
||||
|
||||
### Googleアナリティクス
|
||||
|
||||
[Googleアナリティクス](https://marketingplatform.google.com/about/analytics/)を有効にするには、`hugo.yaml`で`services.googleAnalytics.ID`フラグを設定します:
|
||||
|
||||
```yaml {filename="hugo.yaml"}
|
||||
services:
|
||||
googleAnalytics:
|
||||
ID: G-MEASUREMENT_ID
|
||||
```
|
||||
@ -1,33 +1,33 @@
|
||||
---
|
||||
title: 配置
|
||||
title: 配置文件
|
||||
weight: 2
|
||||
---
|
||||
|
||||
Hugo 从您 Hugo 站点根目录下的 `hugo.yaml` 文件中读取配置。
|
||||
配置文件是您可以配置站点所有方面的地方。
|
||||
查看此站点的配置文件 [`exampleSite/hugo.yaml`](https://github.com/imfing/hextra/blob/main/exampleSite/hugo.yaml) 在 GitHub 上,以全面了解可用的设置和最佳实践。
|
||||
Hugo 从 Hugo 网站根目录下的 `hugo.yaml` 读取配置。
|
||||
在配置文件中,您可以配置站点的所有选项。
|
||||
你可以在 `exampleSite/hugo.yaml` 中找到此站点的配置文件作为开始。
|
||||
|
||||
<!--more-->
|
||||
|
||||
## 导航
|
||||
## 导航栏
|
||||
|
||||
### 菜单
|
||||
|
||||
右上角的菜单在配置文件的 `menu.main` 部分中定义:
|
||||
右上角的菜单在配置文件的 `menu.main` 中配置:
|
||||
|
||||
```yaml {filename="hugo.yaml"}
|
||||
menu:
|
||||
main:
|
||||
- name: 文档
|
||||
- name: Documentation
|
||||
pageRef: /docs
|
||||
weight: 1
|
||||
- name: 博客
|
||||
- name: Blog
|
||||
pageRef: /blog
|
||||
weight: 2
|
||||
- name: 关于
|
||||
- name: About
|
||||
pageRef: /about
|
||||
weight: 3
|
||||
- name: 搜索
|
||||
- name: Search
|
||||
weight: 4
|
||||
params:
|
||||
type: search
|
||||
@ -38,83 +38,55 @@ menu:
|
||||
icon: github
|
||||
```
|
||||
|
||||
有不同类型的菜单项:
|
||||
有几种不同类型的菜单项:
|
||||
|
||||
1. 使用 `pageRef` 链接到站点内的页面
|
||||
1. Link to a page in the site with `pageRef`
|
||||
```yaml
|
||||
- name: 文档
|
||||
- name: Documentation
|
||||
pageRef: /docs
|
||||
```
|
||||
2. 使用 `url` 链接到外部 URL
|
||||
2. Link to an external URL with `url`
|
||||
```yaml
|
||||
- name: GitHub
|
||||
url: "https://github.com"
|
||||
```
|
||||
3. 使用 `type: search` 的搜索栏
|
||||
3. Search bar with `type: search`
|
||||
```yaml
|
||||
- name: 搜索
|
||||
- name: Search
|
||||
params:
|
||||
type: search
|
||||
```
|
||||
4. 图标
|
||||
4. Icon
|
||||
```yaml
|
||||
- name: GitHub
|
||||
params:
|
||||
icon: github
|
||||
```
|
||||
|
||||
这些菜单项可以通过设置 `weight` 参数进行排序。
|
||||
|
||||
### 徽标和标题
|
||||
|
||||
要修改默认徽标,编辑 `hugo.yaml` 并在 `static` 目录下添加徽标文件的路径。
|
||||
您还可以更改用户点击徽标时重定向的链接,以及设置徽标的宽度和高度(以像素为单位)。
|
||||
|
||||
```yaml {filename="hugo.yaml"}
|
||||
params:
|
||||
navbar:
|
||||
displayTitle: true
|
||||
displayLogo: true
|
||||
logo:
|
||||
path: images/logo.svg
|
||||
dark: images/logo-dark.svg
|
||||
link: /
|
||||
width: 40
|
||||
height: 20
|
||||
```
|
||||
这些菜单项可以通过设置 `weight` 进行排序。
|
||||
|
||||
## 侧边栏
|
||||
|
||||
### 主侧边栏
|
||||
|
||||
主侧边栏是根据内容目录的结构自动生成的。
|
||||
有关更多详细信息,请参阅 [组织文件](/docs/guide/organize-files) 页面。
|
||||
|
||||
要从左侧边栏中排除单个页面,请在页面的 front matter 中设置 `sidebar.exclude` 参数:
|
||||
|
||||
```yaml {filename="content/docs/guide/configuration.md"}
|
||||
---
|
||||
title: 配置
|
||||
sidebar:
|
||||
exclude: true
|
||||
---
|
||||
```
|
||||
主侧边栏是自动从 `content` 目录结构生成的。
|
||||
有关更多详细信息,转至 [目录结构](/docs/guide/organize-files)。
|
||||
|
||||
### 额外链接
|
||||
|
||||
侧边栏的额外链接在配置文件的 `menu.sidebar` 部分中定义:
|
||||
侧边栏的额外链接在配置文件的 `menu.sidebar` 部分中配置:
|
||||
|
||||
```yaml {filename="hugo.yaml"}
|
||||
menu:
|
||||
sidebar:
|
||||
- name: 更多
|
||||
- name: More
|
||||
params:
|
||||
type: separator
|
||||
weight: 1
|
||||
- name: "关于"
|
||||
- name: "About"
|
||||
pageRef: "/about"
|
||||
weight: 2
|
||||
- name: "Hugo 文档 ↗"
|
||||
- name: "Hugo Docs ↗"
|
||||
url: "https://gohugo.io/documentation/"
|
||||
weight: 3
|
||||
```
|
||||
@ -123,54 +95,50 @@ menu:
|
||||
|
||||
### 目录
|
||||
|
||||
目录是根据内容文件中的标题自动生成的。可以通过在页面的 front matter 中设置 `toc: false` 来禁用它。
|
||||
目录是根据内容文件中的标题自动生成的,可以在 `front matter` 设置 `toc:false` 来禁用它。
|
||||
|
||||
```yaml {filename="content/docs/guide/configuration.md"}
|
||||
---
|
||||
title: 配置
|
||||
title: Configuration
|
||||
toc: false
|
||||
---
|
||||
```
|
||||
|
||||
### 页面编辑链接
|
||||
|
||||
要配置页面编辑链接,我们可以在配置文件中设置 `params.editURL.base` 参数:
|
||||
### 编辑此页链接
|
||||
|
||||
要配置编辑此页链接,我们可以在配置文件中设置 `params.editURL.base`:
|
||||
```yaml {filename="hugo.yaml"}
|
||||
params:
|
||||
editURL:
|
||||
enable: true
|
||||
base: "https://github.com/your-username/your-repo/edit/main"
|
||||
```
|
||||
|
||||
编辑链接将根据提供的 URL 作为根目录自动为每个页面生成。
|
||||
如果要为特定页面设置编辑链接,可以在页面的 front matter 中设置 `editURL` 参数:
|
||||
将为每个页面自动生成编辑链接。
|
||||
如需为特定页面设置编辑链接,可以在页面的 `front matter` 中设置 `editURL`:
|
||||
|
||||
```yaml {filename="content/docs/guide/configuration.md"}
|
||||
---
|
||||
title: 配置
|
||||
title: Configuration
|
||||
editURL: "https://example.com/edit/this/page"
|
||||
---
|
||||
```
|
||||
## Footer
|
||||
|
||||
## 页脚
|
||||
### 版权声明
|
||||
|
||||
### 版权
|
||||
|
||||
要修改网站页脚中显示的版权文本,您需要创建一个名为 `i18n/en.yaml` 的文件。
|
||||
在此文件中,指定您的新版权文本,如下所示:
|
||||
如需修改网站页脚中显示的版权文本,您需要创建一个名为“i18n/en.yaml”的文件。
|
||||
在此文件中,填写新的版权文本,像这样:
|
||||
|
||||
```yaml {filename="i18n/en.yaml"}
|
||||
copyright: "© 2024 您的文本"
|
||||
copyright: "© 2024 YOUR TEXT HERE"
|
||||
```
|
||||
|
||||
作为参考,可以在 GitHub 仓库中找到示例 [`i18n/en.yaml`](https://github.com/imfing/hextra/blob/main/i18n/en.yaml) 文件。此外,您可以在版权文本中使用 Markdown 格式。
|
||||
你可以在 GitHub 存储库中找到示例 [`i18n/en.yaml`](https://github.com/imfing/hextra/blob/main/i18n/en.yaml) 文件。另外,你可以在版权文本中使用 Markdown 格式。
|
||||
|
||||
## 其他
|
||||
|
||||
### 网站图标
|
||||
### Favicon
|
||||
|
||||
要为您的站点自定义 [网站图标](https://en.wikipedia.org/wiki/Favicon),请将图标文件放在 `static` 文件夹下,以覆盖 [主题的默认网站图标](https://github.com/imfing/hextra/tree/main/static):
|
||||
如需自定义 [favicon](https://en.wikipedia.org/wiki/Favicon),请将图标文件放在 `static` 文件夹下以覆盖 [主题中的默认 favicon](https://github.com/imfing/hextra/tree/main/static):
|
||||
|
||||
{{< filetree/container >}}
|
||||
{{< filetree/folder name="static" >}}
|
||||
@ -186,14 +154,15 @@ copyright: "© 2024 您的文本"
|
||||
{{< /filetree/folder >}}
|
||||
{{< /filetree/container >}}
|
||||
|
||||
在您的项目中包含 `favicon.ico`、`favicon.svg` 和 `favicon-dark.svg` 文件,以确保您的站点图标正确显示。
|
||||
在您的项目中包含 `favicon.ico` 和 `favicon.svg` 文件,以确保网站的网站图标正确显示。
|
||||
|
||||
虽然 `favicon.ico` 通常用于旧版浏览器,但 `favicon.svg` 和 `favicon-dark.svg` 受现代浏览器支持。
|
||||
使用 [favicon.io](https://favicon.io/) 或 [favycon](https://github.com/ruisaraiva19/favycon) 等工具生成此类图标。
|
||||
虽然 `favicon.ico` 通常适用于较旧的浏览器,但 `favicon.svg` 受到现代浏览器的支持,所以更现代的做法是添加 `favicon-dark.svg` 以便在黑暗模式下提供较好的体验体验。
|
||||
|
||||
### 主题配置
|
||||
请随意使用 [favicon.io](https://favicon.io/) 或 [favycon](https://github.com/ruisaraiva19/favycon) 等工具来生成这些图标。
|
||||
|
||||
使用 `theme` 设置来配置默认主题模式和切换按钮,允许访问者在浅色或深色模式之间切换。
|
||||
### 颜色主题配置
|
||||
|
||||
使用`theme`设置来配置默认主题模式和切换按钮,允许访问者在浅色或深色模式之间切换。
|
||||
|
||||
```yaml {filename="hugo.yaml"}
|
||||
params:
|
||||
@ -203,18 +172,18 @@ params:
|
||||
displayToggle: true
|
||||
```
|
||||
|
||||
`theme.default` 的选项:
|
||||
`theme.default` 的可选项:
|
||||
|
||||
- `light` - 始终使用浅色模式
|
||||
- `dark` - 始终使用深色模式
|
||||
- `system` - 与操作系统设置同步(默认)
|
||||
- `light` - 仅使用浅色模式
|
||||
- `dark` - 仅使用神色模式
|
||||
- `system` - 跟随系统
|
||||
|
||||
`theme.displayToggle` 参数允许您显示一个切换按钮以更改主题。
|
||||
当设置为 `true` 时,访问者可以在浅色或深色模式之间切换,覆盖默认设置。
|
||||
`theme.displayToggle` 控制显示用于更改主题的切换按钮。
|
||||
当设置为“true”时,访问者可以在浅色或深色模式之间切换,覆盖默认设置。
|
||||
|
||||
### 页面宽度
|
||||
### 页宽
|
||||
|
||||
页面的宽度可以通过配置文件中的 `params.page.width` 参数进行自定义:
|
||||
页面的宽度可以通过配置文件中的`params.page.width`参数来调整:
|
||||
|
||||
```yaml {filename="hugo.yaml"}
|
||||
params:
|
||||
@ -223,37 +192,36 @@ params:
|
||||
width: wide
|
||||
```
|
||||
|
||||
有三个可用选项:`full`、`wide` 和 `normal`。默认情况下,页面宽度设置为 `normal`。
|
||||
有三个可选项:`full`, `wide`, and `normal`. 默认的页宽模式是 `normal`.
|
||||
|
||||
同样,导航栏和页脚的宽度可以通过 `params.navbar.width` 和 `params.footer.width` 参数进行自定义。
|
||||
同样的,导航栏和 `footer` 的宽度也可通过 `params.navbar.width` 和 `params.footer.width` 调整。
|
||||
|
||||
### 搜索索引
|
||||
### 搜索
|
||||
|
||||
默认启用由 [FlexSearch](https://github.com/nextapps-de/flexsearch) 提供的全文搜索。
|
||||
要自定义搜索索引,请在配置文件中设置 `params.search.flexsearch.index` 参数:
|
||||
默认情况下启用由 [FlexSearch](https://github.com/nextapps-de/flexsearch) 提供全文搜索。
|
||||
要自定义搜索索引,请在配置文件中设置 `params.search.flexsearch.index` :
|
||||
|
||||
```yaml {filename="hugo.yaml"}
|
||||
params:
|
||||
# 搜索
|
||||
# Search
|
||||
search:
|
||||
enable: true
|
||||
type: flexsearch
|
||||
|
||||
flexsearch:
|
||||
# 按以下内容索引页面:content | summary | heading | title
|
||||
# index page by: content | summary | heading | title
|
||||
index: content
|
||||
```
|
||||
`flexsearch.index` 的可选项:
|
||||
|
||||
`flexsearch.index` 的选项:
|
||||
|
||||
- `content` - 页面的完整内容(默认)
|
||||
- `summary` - 页面的摘要,请参阅 [Hugo 内容摘要](https://gohugo.io/content-management/summaries/) 了解更多详细信息
|
||||
- `content` - 全内容搜索
|
||||
- `summary` - 概述 [Hugo Content Summaries](https://gohugo.io/content-management/summaries/)
|
||||
- `heading` - 一级和二级标题
|
||||
- `title` - 仅包括页面标题
|
||||
- `title` - 仅搜索标题
|
||||
|
||||
要自定义搜索分词,请在配置文件中设置 `params.search.flexsearch.tokenize` 参数:
|
||||
要自定义检索分词,请在配置文件中设置`params.search.flexsearch.tokenize`:
|
||||
|
||||
```yaml {filename="hugo.yaml"}
|
||||
```hugo.yaml
|
||||
params:
|
||||
# ...
|
||||
flexsearch:
|
||||
@ -261,25 +229,27 @@ params:
|
||||
tokenize: forward
|
||||
```
|
||||
|
||||
[`flexsearch.tokenize`](https://github.com/nextapps-de/flexsearch/#tokenizer-prefix-search) 的选项:
|
||||
[`flexsearch.tokenize`](https://github.com/nextapps-de/flexsearch/#tokenizer-prefix-search)的可选项:
|
||||
|
||||
- `strict` - 索引整个单词
|
||||
- `forward` - 向前方向逐步索引单词
|
||||
- `reverse` - 双向逐步索引单词
|
||||
- `full` - 索引所有可能的组合
|
||||
- `strict` - 严格单词匹配
|
||||
- `forward` - 单词前缀匹配
|
||||
- `reverse` - 单词前后缀匹配
|
||||
- `full` - 单词子串匹配。
|
||||
|
||||
要从搜索索引中排除页面,请在页面的 front matter 中设置 `excludeSearch: true`:
|
||||
> 在默认的分词逻辑下,中文一句话就是一个“单词”
|
||||
|
||||
要从搜索索引中排除页面,更改 front matter 中的 `excludeSearch: true`:
|
||||
|
||||
```yaml {filename="content/docs/guide/configuration.md"}
|
||||
---
|
||||
title: 配置
|
||||
title: Configuration
|
||||
excludeSearch: true
|
||||
---
|
||||
```
|
||||
|
||||
### Google Analytics
|
||||
|
||||
要启用 [Google Analytics](https://marketingplatform.google.com/about/analytics/),请在 `hugo.yaml` 中设置 `services.googleAnalytics.ID` 标志:
|
||||
要启用 [Google Analytics](https://marketingplatform.google.com/about/analytics/),设置 `services.googleAnalytics.ID`:
|
||||
|
||||
```yaml {filename="hugo.yaml"}
|
||||
services:
|
||||
|
||||
@ -1,164 +0,0 @@
|
||||
---
|
||||
title: サイトのデプロイ
|
||||
prev: /docs/guide/shortcodes
|
||||
next: /docs/advanced
|
||||
---
|
||||
|
||||
Hugoは静的サイトを生成するため、柔軟なホスティングオプションが可能です。
|
||||
このページでは、Hextraサイトをさまざまなプラットフォームにデプロイするためのガイドを提供します。
|
||||
|
||||
<!--more-->
|
||||
|
||||
|
||||
## GitHub Pages
|
||||
|
||||
[GitHub Pages](https://docs.github.com/pages)は、無料でウェブサイトをデプロイおよびホストするための推奨方法です。
|
||||
|
||||
[hextra-starter-template](https://github.com/imfing/hextra-starter-template)を使用してサイトをブートストラップした場合、GitHub Pagesへの自動デプロイを支援するGitHub Actionsワークフローがすぐに利用可能です。
|
||||
|
||||
{{% details title="GitHub Actionsの設定" closed="true" %}}
|
||||
|
||||
以下は、[hextra-starter-template](https://github.com/imfing/hextra-starter-template)からの設定例です:
|
||||
|
||||
```yaml {filename=".github/workflows/pages.yaml"}
|
||||
# HugoサイトをGitHub Pagesにデプロイするためのサンプルワークフロー
|
||||
name: Deploy Hugo site to Pages
|
||||
|
||||
on:
|
||||
# デフォルトブランチへのプッシュ時に実行
|
||||
push:
|
||||
branches: ["main"]
|
||||
|
||||
# Actionsタブから手動でこのワークフローを実行可能
|
||||
workflow_dispatch:
|
||||
|
||||
# GITHUB_TOKENの権限を設定してGitHub Pagesへのデプロイを許可
|
||||
permissions:
|
||||
contents: read
|
||||
pages: write
|
||||
id-token: write
|
||||
|
||||
# 同時実行を1つに制限し、進行中の実行と最新のキューイングされた実行の間の実行をスキップ。
|
||||
# ただし、進行中の実行はキャンセルしないでください。これらの本番デプロイを完了させたいためです。
|
||||
concurrency:
|
||||
group: "pages"
|
||||
cancel-in-progress: false
|
||||
|
||||
# デフォルトはbash
|
||||
defaults:
|
||||
run:
|
||||
shell: bash
|
||||
|
||||
jobs:
|
||||
# ビルドジョブ
|
||||
build:
|
||||
runs-on: ubuntu-latest
|
||||
env:
|
||||
HUGO_VERSION: 0.138.0
|
||||
steps:
|
||||
- name: Checkout
|
||||
uses: actions/checkout@v4
|
||||
with:
|
||||
fetch-depth: 0 # .GitInfoと.Lastmodのためにすべての履歴を取得
|
||||
submodules: recursive
|
||||
- name: Setup Go
|
||||
uses: actions/setup-go@v5
|
||||
with:
|
||||
go-version: '1.22'
|
||||
- name: Setup Pages
|
||||
id: pages
|
||||
uses: actions/configure-pages@v4
|
||||
- name: Setup Hugo
|
||||
run: |
|
||||
wget -O ${{ runner.temp }}/hugo.deb https://github.com/gohugoio/hugo/releases/download/v${HUGO_VERSION}/hugo_extended_${HUGO_VERSION}_linux-amd64.deb \
|
||||
&& sudo dpkg -i ${{ runner.temp }}/hugo.deb
|
||||
- name: Build with Hugo
|
||||
env:
|
||||
# Hugoモジュールとの最大限の互換性のために
|
||||
HUGO_ENVIRONMENT: production
|
||||
HUGO_ENV: production
|
||||
run: |
|
||||
hugo \
|
||||
--gc --minify \
|
||||
--baseURL "${{ steps.pages.outputs.base_url }}/"
|
||||
- name: Upload artifact
|
||||
uses: actions/upload-pages-artifact@v3
|
||||
with:
|
||||
path: ./public
|
||||
|
||||
# デプロイジョブ
|
||||
deploy:
|
||||
environment:
|
||||
name: github-pages
|
||||
url: ${{ steps.deployment.outputs.page_url }}
|
||||
runs-on: ubuntu-latest
|
||||
needs: build
|
||||
steps:
|
||||
- name: Deploy to GitHub Pages
|
||||
id: deployment
|
||||
uses: actions/deploy-pages@v4
|
||||
```
|
||||
|
||||
{{% /details %}}
|
||||
|
||||
|
||||
{{< callout >}}
|
||||
リポジトリ設定で、**Pages** > **Build and deployment** > **Source** を **GitHub Actions** に設定します:
|
||||
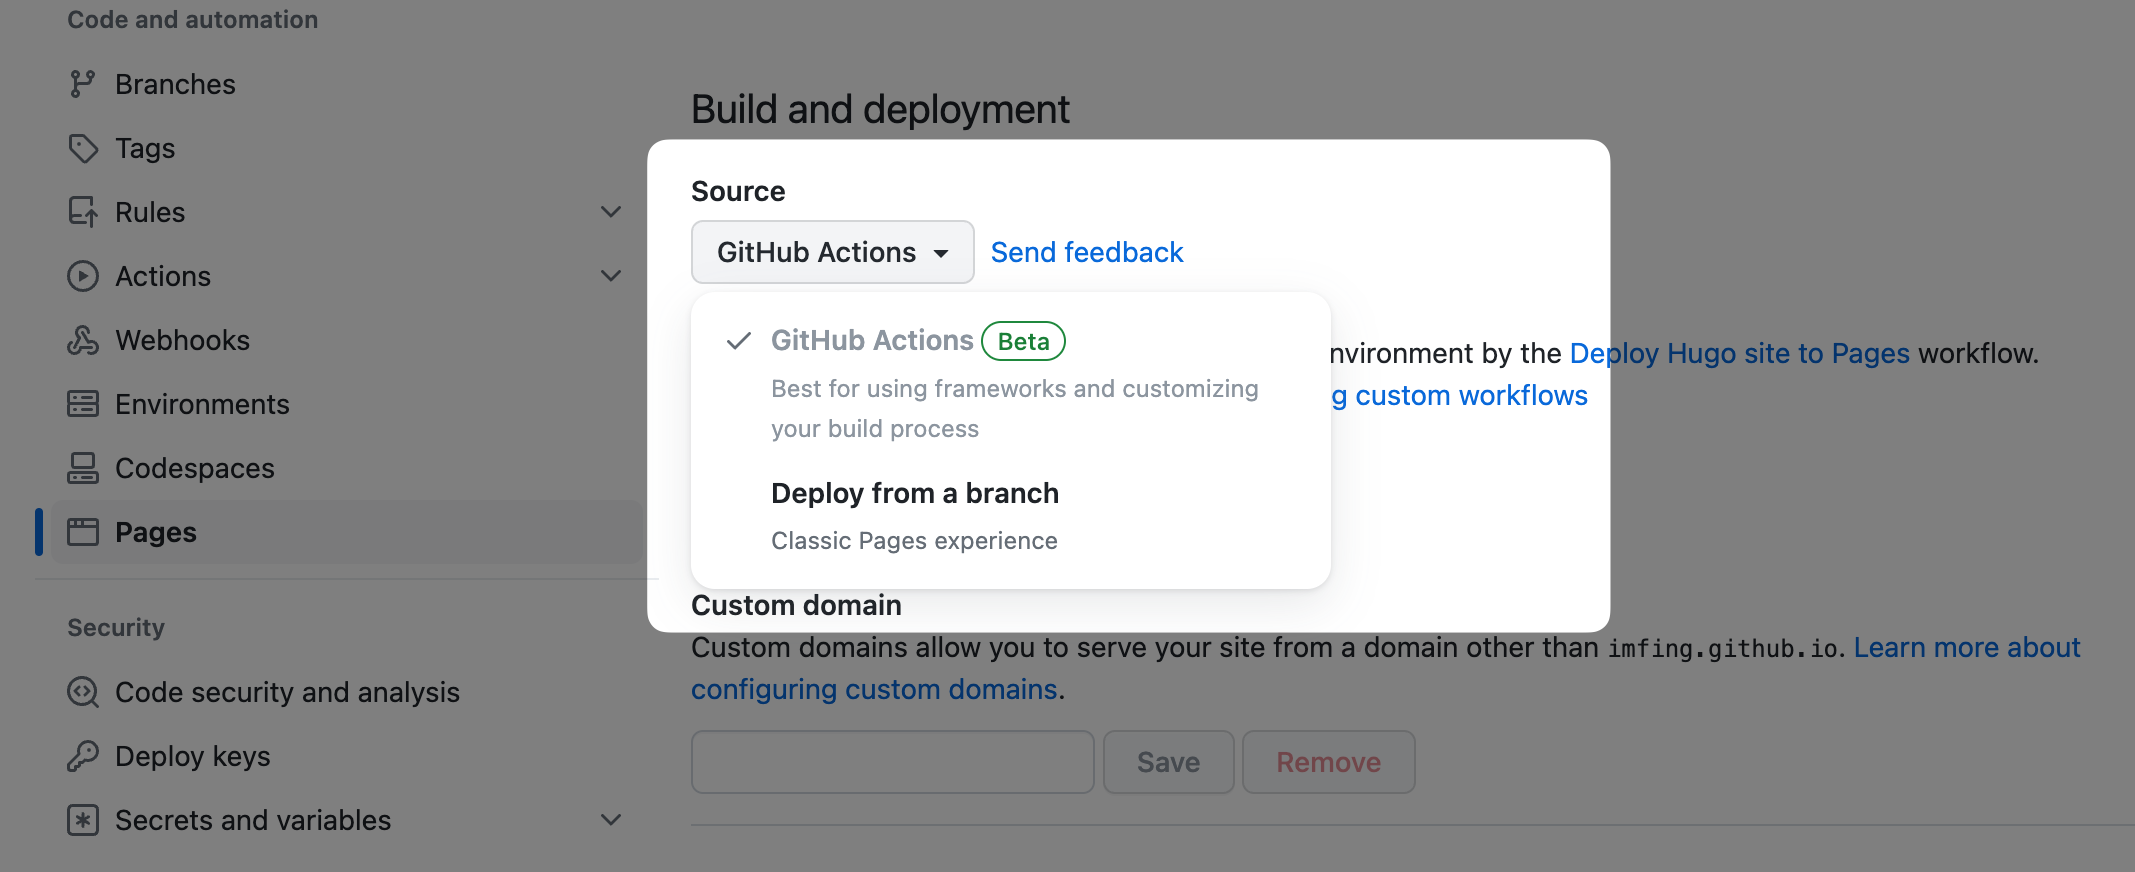
|
||||
{{< /callout >}}
|
||||
|
||||
デフォルトでは、上記のGitHub Actionsワークフロー `.github/workflows/pages.yaml` は、サイトが `https://<USERNAME>.github.io/<REPO>/` にデプロイされることを前提としています。
|
||||
|
||||
`https://<USERNAME>.github.io/` にデプロイする場合は、`--baseURL` を変更します:
|
||||
|
||||
```yaml {filename=".github/workflows/pages.yaml",linenos=table,linenostart=54,hl_lines=[4]}
|
||||
run: |
|
||||
hugo \
|
||||
--gc --minify \
|
||||
--baseURL "https://${{ github.repository_owner }}.github.io/"
|
||||
```
|
||||
|
||||
独自のドメインにデプロイする場合は、`--baseURL` の値を適宜変更してください。
|
||||
|
||||
|
||||
## Cloudflare Pages
|
||||
|
||||
1. サイトのソースコードをGitリポジトリ(例:GitHub)に配置します。
|
||||
2. [Cloudflareダッシュボード](https://dash.cloudflare.com/)にログインし、アカウントを選択します。
|
||||
3. アカウントホームで、**Workers & Pages** > **Create application** > **Pages** > **Connect to Git** を選択します。
|
||||
4. リポジトリを選択し、**Set up builds and deployments** セクションで以下の情報を提供します:
|
||||
|
||||
| 設定 | 値 |
|
||||
| ---------------- | ------------------- |
|
||||
| 本番ブランチ | `main` |
|
||||
| ビルドコマンド | `hugo --gc --minify` |
|
||||
| ビルドディレクトリ | `public` |
|
||||
|
||||
詳細については、以下を確認してください:
|
||||
- [Hugoサイトのデプロイ](https://developers.cloudflare.com/pages/framework-guides/deploy-a-hugo-site/#deploy-with-cloudflare-pages)。
|
||||
- [言語サポートとツール](https://developers.cloudflare.com/pages/platform/language-support-and-tools/)。
|
||||
|
||||
|
||||
## Netlify
|
||||
|
||||
1. コードをGitリポジトリ(GitHub、GitLabなど)にプッシュします。
|
||||
2. [プロジェクトをインポート](https://app.netlify.com/start)してNetlifyに追加します。
|
||||
3. [hextra-starter-template][hextra-starter-template]を使用していない場合、以下の設定を手動で行います:
|
||||
- ビルドコマンドを `hugo --gc --minify` に設定します。
|
||||
- 公開ディレクトリを `public` に指定します。
|
||||
- 環境変数 `HUGO_VERSION` を追加し、`0.138.0` に設定するか、`netlify.toml` ファイルに設定します。
|
||||
4. デプロイします!
|
||||
|
||||
詳細については、[NetlifyでのHugo](https://docs.netlify.com/integrations/frameworks/hugo/)を確認してください。
|
||||
|
||||
|
||||
## Vercel
|
||||
|
||||
1. コードをGitリポジトリ(GitHub、GitLabなど)にプッシュします。
|
||||
2. [Vercelダッシュボード](https://vercel.com/dashboard)に移動し、Hugoプロジェクトをインポートします。
|
||||
3. プロジェクトを設定し、フレームワークプリセットとしてHugoを選択します。
|
||||
4. ビルドコマンドとインストールコマンドを上書きします:
|
||||
1. ビルドコマンドを `hugo --gc --minify` に設定します。
|
||||
2. インストールコマンドを `yum install golang` に設定します。
|
||||
|
||||
|
||||
@ -4,32 +4,32 @@ prev: /docs/guide/shortcodes
|
||||
next: /docs/advanced
|
||||
---
|
||||
|
||||
Hugo 生成静态网站,允许灵活的托管选项。
|
||||
本页提供了在各种平台上部署 Hextra 站点的指南。
|
||||
Hugo 生成静态站点,允许多种托管方式,你可以自由选择
|
||||
本页将给出部署你的 Hextra 站点的方法
|
||||
|
||||
<!--more-->
|
||||
|
||||
|
||||
## GitHub Pages
|
||||
|
||||
[GitHub Pages](https://docs.github.com/pages) 是推荐的方式,可以免费部署和托管您的网站。
|
||||
[GitHub Pages](https://docs.github.com/pages) 是免费部署和托管网站的推荐方法
|
||||
|
||||
如果您使用 [hextra-starter-template](https://github.com/imfing/hextra-starter-template) 引导站点,它已经提供了开箱即用的 GitHub Actions 工作流,帮助自动部署到 GitHub Pages。
|
||||
如果您使用以下方式引导该网站 [hextra-starter-template](https://github.com/imfing/hextra-starter-template), 它提供了开箱即用的 GitHub Actions 工作流程,有助于自动部署到 GitHub Pages
|
||||
|
||||
{{% details title="GitHub Actions 配置" closed="true" %}}
|
||||
{{% details title="GitHub Actions Configuration" closed="true" %}}
|
||||
|
||||
以下是 [hextra-starter-template](https://github.com/imfing/hextra-starter-template) 的示例配置:
|
||||
以下是配置来自 [hextra-starter-template](https://github.com/imfing/hextra-starter-template) 的 Workflow 的示例:
|
||||
|
||||
```yaml {filename=".github/workflows/pages.yaml"}
|
||||
# 用于构建和部署 Hugo 站点到 GitHub Pages 的示例工作流
|
||||
name: 部署 Hugo 站点到 Pages
|
||||
# 用于构建 Hugo 站点并将其部署到 GitHub Pages 的示例工作流程
|
||||
name: Deploy Hugo site to Pages
|
||||
|
||||
on:
|
||||
# 在推送到默认分支时运行
|
||||
# 由默认分支触发
|
||||
push:
|
||||
branches: ["main"]
|
||||
|
||||
# 允许您从 Actions 选项卡手动运行此工作流
|
||||
# 允许手动运行
|
||||
workflow_dispatch:
|
||||
|
||||
# 设置 GITHUB_TOKEN 的权限以允许部署到 GitHub Pages
|
||||
@ -38,55 +38,55 @@ permissions:
|
||||
pages: write
|
||||
id-token: write
|
||||
|
||||
# 只允许一个并发部署,跳过在运行中和最新排队之间的运行。
|
||||
# 但是,不要取消正在运行的运行,因为我们希望这些生产部署能够完成。
|
||||
# 仅允许一项并发部署,跳过正在进行的运行和最新排队的运行之间排队的运行
|
||||
# 但是,不要取消正在进行的运行,因为我们希望完成这些生产部署
|
||||
concurrency:
|
||||
group: "pages"
|
||||
cancel-in-progress: false
|
||||
|
||||
# 默认使用 bash
|
||||
# 默认为 bash
|
||||
defaults:
|
||||
run:
|
||||
shell: bash
|
||||
|
||||
jobs:
|
||||
# 构建任务
|
||||
# 开始构建
|
||||
build:
|
||||
runs-on: ubuntu-latest
|
||||
env:
|
||||
HUGO_VERSION: 0.138.0
|
||||
HUGO_VERSION: 0.121.2
|
||||
steps:
|
||||
- name: 检出
|
||||
- name: Checkout
|
||||
uses: actions/checkout@v4
|
||||
with:
|
||||
fetch-depth: 0 # 获取所有历史记录以支持 .GitInfo 和 .Lastmod
|
||||
fetch-depth: 0 # 获取 .GitInfo 和 .Lastmod 的所有历史记录
|
||||
submodules: recursive
|
||||
- name: 设置 Go
|
||||
- name: Setup Go
|
||||
uses: actions/setup-go@v5
|
||||
with:
|
||||
go-version: '1.22'
|
||||
- name: 设置 Pages
|
||||
go-version: '1.21'
|
||||
- name: Setup Pages
|
||||
id: pages
|
||||
uses: actions/configure-pages@v4
|
||||
- name: 设置 Hugo
|
||||
- name: Setup Hugo
|
||||
run: |
|
||||
wget -O ${{ runner.temp }}/hugo.deb https://github.com/gohugoio/hugo/releases/download/v${HUGO_VERSION}/hugo_extended_${HUGO_VERSION}_linux-amd64.deb \
|
||||
&& sudo dpkg -i ${{ runner.temp }}/hugo.deb
|
||||
- name: 使用 Hugo 构建
|
||||
- name: Build with Hugo
|
||||
env:
|
||||
# 为了最大程度地兼容 Hugo 模块
|
||||
# 最大程度地向后兼容 Hugo 模块
|
||||
HUGO_ENVIRONMENT: production
|
||||
HUGO_ENV: production
|
||||
run: |
|
||||
hugo \
|
||||
--gc --minify \
|
||||
--baseURL "${{ steps.pages.outputs.base_url }}/"
|
||||
- name: 上传工件
|
||||
- name: Upload artifact
|
||||
uses: actions/upload-pages-artifact@v3
|
||||
with:
|
||||
path: ./public
|
||||
|
||||
# 部署任务
|
||||
# 开始部署
|
||||
deploy:
|
||||
environment:
|
||||
name: github-pages
|
||||
@ -94,7 +94,7 @@ jobs:
|
||||
runs-on: ubuntu-latest
|
||||
needs: build
|
||||
steps:
|
||||
- name: 部署到 GitHub Pages
|
||||
- name: Deploy to GitHub Pages
|
||||
id: deployment
|
||||
uses: actions/deploy-pages@v4
|
||||
```
|
||||
@ -103,13 +103,13 @@ jobs:
|
||||
|
||||
|
||||
{{< callout >}}
|
||||
在您的仓库设置中,将 **Pages** > **Build and deployment** > **Source** 设置为 **GitHub Actions**:
|
||||
在仓库设置中将 **Pages** > **Build and deployment** > **Source** 调整为 **GitHub Actions**:
|
||||

|
||||
{{< /callout >}}
|
||||
|
||||
默认情况下,上述 GitHub Actions 工作流 `.github/workflows/pages.yaml` 假设站点部署到 `https://<USERNAME>.github.io/<REPO>/`。
|
||||
默认情况下,上述 GitHub Actions 工作流程 `.github/workflows/pages.yaml` 假定站点部署到 `https://<USERNAME>.github.io/<REPO>/`
|
||||
|
||||
如果您部署到 `https://<USERNAME>.github.io/`,请修改 `--baseURL`:
|
||||
如需部署到 `https://<USERNAME>.github.io/` 修改参数 `--baseURL`:
|
||||
|
||||
```yaml {filename=".github/workflows/pages.yaml",linenos=table,linenostart=54,hl_lines=[4]}
|
||||
run: |
|
||||
@ -118,47 +118,47 @@ run: |
|
||||
--baseURL "https://${{ github.repository_owner }}.github.io/"
|
||||
```
|
||||
|
||||
如果您部署到自己的域名,请相应地更改 `--baseURL` 值。
|
||||
如需部署到自己的域,请对应修改 `--baseURL`
|
||||
|
||||
|
||||
## Cloudflare Pages
|
||||
|
||||
1. 将您的站点源代码放入 Git 仓库(例如 GitHub)
|
||||
2. 登录 [Cloudflare 仪表板](https://dash.cloudflare.com/) 并选择您的账户
|
||||
3. 在账户主页中,选择 **Workers & Pages** > **Create application** > **Pages** > **Connect to Git**
|
||||
4. 选择仓库,并在 **Set up builds and deployments** 部分提供以下信息:
|
||||
1. 将您的网站托管在 Git 存储库(例如 GitHub)
|
||||
2. 登录到 [Cloudflare dashboard](https://dash.cloudflare.com/) 并选择你的账户
|
||||
3. 转至在账户主页面中 **Workers & Pages** > **Create application** > **Pages** > **Connect to Git**
|
||||
4. 选择你的仓库 **Set up builds and deployments** 提供以下信息:
|
||||
|
||||
| 配置项 | 值 |
|
||||
| ------------------ | -------------------- |
|
||||
| 生产分支 | `main` |
|
||||
| 构建命令 | `hugo --gc --minify` |
|
||||
| 构建目录 | `public` |
|
||||
| Configuration | Value |
|
||||
| ----------------- | -------------------- |
|
||||
| Production branch | `main` |
|
||||
| Build command | `hugo --gc --minify` |
|
||||
| Build directory | `public` |
|
||||
|
||||
更多详情,请查看:
|
||||
- [部署 Hugo 站点](https://developers.cloudflare.com/pages/framework-guides/deploy-a-hugo-site/#deploy-with-cloudflare-pages)。
|
||||
- [语言支持和工具](https://developers.cloudflare.com/pages/platform/language-support-and-tools/)。
|
||||
如需了解更多内容,见:
|
||||
- [Deploy a Hugo site](https://developers.cloudflare.com/pages/framework-guides/deploy-a-hugo-site/#deploy-with-cloudflare-pages).
|
||||
- [Language support and tools](https://developers.cloudflare.com/pages/platform/language-support-and-tools/).
|
||||
|
||||
|
||||
## Netlify
|
||||
|
||||
1. 将代码推送到您的 Git 仓库(GitHub、GitLab 等)
|
||||
2. [导入项目](https://app.netlify.com/start) 到 Netlify
|
||||
3. 如果您没有使用 [hextra-starter-template][hextra-starter-template],请手动配置以下内容:
|
||||
- 将构建命令配置为 `hugo --gc --minify`
|
||||
1. 将代码推送到 Git 存储库 (如 GitHub, GitLab)
|
||||
2. [导入项目](https://app.netlify.com/start)
|
||||
3. 如果您不使用[hextra-starter-template][hextra-starter-template], 手动配置以下内容:
|
||||
- C 将构建命令配置为 `hugo --gc --minify`
|
||||
- 指定发布目录为 `public`
|
||||
- 添加环境变量 `HUGO_VERSION` 并设置为 `0.138.0`,或者将其设置在 `netlify.toml` 文件中
|
||||
4. 部署!
|
||||
- 添加环境变量 `HUGO_VERSION` 并设定为 `0.119.0`
|
||||
4. 部署
|
||||
|
||||
查看 [Netlify 上的 Hugo](https://docs.netlify.com/integrations/frameworks/hugo/) 了解更多详情。
|
||||
转至 [Hugo on Netlify](https://docs.netlify.com/integrations/frameworks/hugo/) 获得更多信息
|
||||
|
||||
|
||||
## Vercel
|
||||
|
||||
1. 将代码推送到您的 Git 仓库(GitHub、GitLab 等)
|
||||
2. 前往 [Vercel 仪表板](https://vercel.com/dashboard) 并导入您的 Hugo 项目
|
||||
3. 配置项目,选择 Hugo 作为框架预设
|
||||
1. 将代码推送到 Git 存储库(GitHub、GitLab 等)
|
||||
2. 转至 [Vercel Dashboard](https://vercel.com/dashboard) 并导入你的 Hugo 项目
|
||||
3. 配置项目,选择 Hugo 作为 Framework Preset
|
||||
4. 覆盖构建命令和安装命令:
|
||||
1. 将构建命令设置为 `hugo --gc --minify`
|
||||
1. 设置构建命令为 `hugo --gc --minify`
|
||||
2. 将安装命令设置为 `yum install golang`
|
||||
|
||||

|
||||

|
||||
|
||||
@ -1,53 +0,0 @@
|
||||
---
|
||||
title: ダイアグラム
|
||||
weight: 6
|
||||
next: /docs/guide/shortcodes
|
||||
---
|
||||
|
||||
現在、Hextraはダイアグラムのために[Mermaid](#mermaid)をサポートしています。
|
||||
|
||||
<!--more-->
|
||||
|
||||
## Mermaid
|
||||
|
||||
[Mermaid](https://github.com/mermaid-js/mermaid#readme)は、JavaScriptベースのダイアグラムおよびチャート作成ツールで、Markdownにインスパイアされたテキスト定義を取り込み、ブラウザ内でダイナミックにダイアグラムを作成します。例えば、Mermaidはフローチャート、シーケンス図、円グラフなどをレンダリングできます。
|
||||
|
||||
HextraでMermaidを使用するのは、言語を`mermaid`に設定したコードブロックを書くのと同じくらい簡単です:
|
||||
|
||||
````markdown
|
||||
```mermaid
|
||||
graph TD;
|
||||
A-->B;
|
||||
A-->C;
|
||||
B-->D;
|
||||
C-->D;
|
||||
```
|
||||
````
|
||||
|
||||
これは次のようにレンダリングされます:
|
||||
|
||||
```mermaid
|
||||
graph TD;
|
||||
A-->B;
|
||||
A-->C;
|
||||
B-->D;
|
||||
C-->D;
|
||||
```
|
||||
|
||||
シーケンス図:
|
||||
|
||||
```mermaid
|
||||
sequenceDiagram
|
||||
participant Alice
|
||||
participant Bob
|
||||
Alice->>John: こんにちはJohn、元気ですか?
|
||||
loop 健康チェック
|
||||
John->>John: 心気症と戦う
|
||||
end
|
||||
Note right of John: 理性的な思考 <br/>が勝つ!
|
||||
John-->>Alice: 元気です!
|
||||
John->>Bob: あなたはどうですか?
|
||||
Bob-->>John: とても元気です!
|
||||
```
|
||||
|
||||
詳細については、[Mermaidドキュメント](https://mermaid-js.github.io/mermaid/#/)を参照してください。
|
||||
@ -4,15 +4,15 @@ weight: 6
|
||||
next: /docs/guide/shortcodes
|
||||
---
|
||||
|
||||
目前,Hextra 支持使用 [Mermaid](#mermaid) 来绘制图表。
|
||||
目前,Hextra 支持 [Mermaid](#mermaid) 的图表。
|
||||
|
||||
<!--more-->
|
||||
|
||||
## Mermaid
|
||||
|
||||
[Mermaid](https://github.com/mermaid-js/mermaid#readme) 是一个基于 JavaScript 的图表工具,它通过类似 Markdown 的文本定义,在浏览器中动态生成图表。例如,Mermaid 可以渲染流程图、序列图、饼图等。
|
||||
[Mermaid](https://github.com/mermaid-js/mermaid#readme) 是一个基于 JavaScript 的图表绘制工具,它的文本定义和 Markdown 类似,可在浏览器中动态创建图表。例如:流程图、序列图、饼图等。
|
||||
|
||||
在 Hextra 中使用 Mermaid 非常简单,只需编写一个语言设置为 `mermaid` 的代码块:
|
||||
在 Hextra 中使用 Mermaid 就像使用代码块一样简单:
|
||||
|
||||
````markdown
|
||||
```mermaid
|
||||
@ -24,7 +24,7 @@ graph TD;
|
||||
```
|
||||
````
|
||||
|
||||
将会渲染为:
|
||||
将呈现为:
|
||||
|
||||
```mermaid
|
||||
graph TD;
|
||||
@ -34,20 +34,20 @@ graph TD;
|
||||
C-->D;
|
||||
```
|
||||
|
||||
序列图示例:
|
||||
Sequence diagram:
|
||||
|
||||
```mermaid
|
||||
sequenceDiagram
|
||||
participant Alice
|
||||
participant Bob
|
||||
Alice->>John: 你好 John,最近怎么样?
|
||||
loop 健康检查
|
||||
John->>John: 与疑病症作斗争
|
||||
Alice->>John: Hello John, how are you?
|
||||
loop Healthcheck
|
||||
John->>John: Fight against hypochondria
|
||||
end
|
||||
Note right of John: 理性思考 <br/>占据上风!
|
||||
John-->>Alice: 很好!
|
||||
John->>Bob: 你怎么样?
|
||||
Bob-->>John: 非常好!
|
||||
Note right of John: Rational thoughts <br/>prevail!
|
||||
John-->>Alice: Great!
|
||||
John->>Bob: How about you?
|
||||
Bob-->>John: Jolly good!
|
||||
```
|
||||
|
||||
更多信息,请参考 [Mermaid 文档](https://mermaid-js.github.io/mermaid/#/)。
|
||||
如需获取更多信息,转至 [Mermaid Documentation](https://mermaid-js.github.io/mermaid/#/)。
|
||||
|
||||
@ -1,97 +0,0 @@
|
||||
---
|
||||
title: "LaTeX"
|
||||
weight: 4
|
||||
math: true
|
||||
---
|
||||
|
||||
$\KaTeX$ は LaTeX の数式をレンダリングするために使用されます。ページのフロントマターで `math` を `true` に設定することで、ページごとに有効にすることができます。
|
||||
|
||||
<!--more-->
|
||||
|
||||
```yaml {filename="page.md"}
|
||||
---
|
||||
title: "LaTeX を使用した私のページ"
|
||||
math: true
|
||||
---
|
||||
|
||||
```
|
||||
|
||||
有効にすると、KaTeX のスクリプト、スタイルシート、フォントが自動的にサイトに含まれます。Markdown コンテンツ内で LaTeX 数式を使用できます。
|
||||
|
||||
## 例
|
||||
|
||||
Markdown コンテンツ内で、インラインおよび別段落の LaTeX 数式がサポートされています。
|
||||
|
||||
### インライン
|
||||
|
||||
```markdown {filename="page.md"}
|
||||
これは $\sigma(z) = \frac{1}{1 + e^{-z}}$ インラインです。
|
||||
```
|
||||
|
||||
これは $\sigma(z) = \frac{1}{1 + e^{-z}}$ インラインです。
|
||||
|
||||
### 別段落
|
||||
|
||||
```markdown {filename="page.md"}
|
||||
$$F(\omega) = \int_{-\infty}^{\infty} f(t) e^{-j\omega t} \, dt$$
|
||||
```
|
||||
|
||||
次のようにレンダリングされます:
|
||||
|
||||
$$F(\omega) = \int_{-\infty}^{\infty} f(t) e^{-j\omega t} \, dt$$
|
||||
|
||||
> [!IMPORTANT]
|
||||
> Hugo 設定ファイルで [パススルー拡張機能](https://gohugo.io/content-management/mathematics/) を有効にして設定してください。これにより、複雑な式のレンダリング問題を回避するために、デリミタ内の生のコンテンツが保持されます。
|
||||
|
||||
```yaml {filename="hugo.yaml"}
|
||||
markup:
|
||||
goldmark:
|
||||
extensions:
|
||||
passthrough:
|
||||
delimiters:
|
||||
block: [['\[', '\]'], ['$$', '$$']]
|
||||
inline: [['\(', '\)']]
|
||||
enable: true
|
||||
```
|
||||
|
||||
例えば、aligned 環境を使用する場合:
|
||||
|
||||
```latex {filename="page.md"}
|
||||
$$
|
||||
\begin{aligned}
|
||||
\nabla \cdot \mathbf{E} &= \frac{\rho}{\varepsilon_0} \\
|
||||
\nabla \cdot \mathbf{B} &= 0 \\
|
||||
\nabla \times \mathbf{E} &= -\frac{\partial \mathbf{B}}{\partial t} \\
|
||||
\nabla \times \mathbf{B} &= \mu_0 \left( \mathbf{J} + \varepsilon_0 \frac{\partial \mathbf{E}}{\partial t} \right)
|
||||
\end{aligned}
|
||||
$$
|
||||
```
|
||||
|
||||
次のようにレンダリングされます:
|
||||
|
||||
$$
|
||||
\begin{aligned}
|
||||
\nabla \cdot \mathbf{E} &= \frac{\rho}{\varepsilon_0} \\
|
||||
\nabla \cdot \mathbf{B} &= 0 \\
|
||||
\nabla \times \mathbf{E} &= -\frac{\partial \mathbf{B}}{\partial t} \\
|
||||
\nabla \times \mathbf{B} &= \mu_0 \left( \mathbf{J} + \varepsilon_0 \frac{\partial \mathbf{E}}{\partial t} \right)
|
||||
\end{aligned}
|
||||
$$
|
||||
|
||||
## サポートされている関数
|
||||
|
||||
サポートされている関数の一覧については、[KaTeX サポートされている関数](https://katex.org/docs/supported.html) を参照してください。
|
||||
|
||||
## 化学
|
||||
|
||||
化学式は [mhchem](https://mhchem.github.io/MathJax-mhchem/) 拡張機能を介してサポートされています。
|
||||
|
||||
インライン: $\ce{H2O}$ は水です。
|
||||
|
||||
別段落:
|
||||
|
||||
```markdown {filename="page.md"}
|
||||
$$\ce{Hg^2+ ->[I-] HgI2 ->[I-] [Hg^{II}I4]^2-}$$
|
||||
```
|
||||
|
||||
$$\ce{Hg^2+ ->[I-] HgI2 ->[I-] [Hg^{II}I4]^2-}$$
|
||||
@ -8,7 +8,7 @@ $\KaTeX$ is used for rendering LaTeX math expressions. It can be enabled per pag
|
||||
|
||||
<!--more-->
|
||||
|
||||
```yaml {filename="page.md"}
|
||||
```yaml {filename="Markdown"}
|
||||
---
|
||||
title: "My Page with LaTeX"
|
||||
math: true
|
||||
@ -40,43 +40,6 @@ will be rendered as:
|
||||
|
||||
$$F(\omega) = \int_{-\infty}^{\infty} f(t) e^{-j\omega t} \, dt$$
|
||||
|
||||
> [!IMPORTANT]
|
||||
> Please enable and configure the [passthrough extension](https://gohugo.io/content-management/mathematics/) in the Hugo configuration file. It preserves raw content within the delimiters to avoid rendering issues for complex expressions.
|
||||
|
||||
```yaml {filename="hugo.yaml"}
|
||||
markup:
|
||||
goldmark:
|
||||
extensions:
|
||||
passthrough:
|
||||
delimiters:
|
||||
block: [['\[', '\]'], ['$$', '$$']]
|
||||
inline: [['\(', '\)']]
|
||||
enable: true
|
||||
```
|
||||
|
||||
For example, using the aligned environment:
|
||||
|
||||
```latex {filename="page.md"}
|
||||
$$
|
||||
\begin{aligned}
|
||||
\nabla \cdot \mathbf{E} &= \frac{\rho}{\varepsilon_0} \\
|
||||
\nabla \cdot \mathbf{B} &= 0 \\
|
||||
\nabla \times \mathbf{E} &= -\frac{\partial \mathbf{B}}{\partial t} \\
|
||||
\nabla \times \mathbf{B} &= \mu_0 \left( \mathbf{J} + \varepsilon_0 \frac{\partial \mathbf{E}}{\partial t} \right)
|
||||
\end{aligned}
|
||||
$$
|
||||
```
|
||||
|
||||
will be rendered as:
|
||||
|
||||
$$
|
||||
\begin{aligned}
|
||||
\nabla \cdot \mathbf{E} &= \frac{\rho}{\varepsilon_0} \\
|
||||
\nabla \cdot \mathbf{B} &= 0 \\
|
||||
\nabla \times \mathbf{E} &= -\frac{\partial \mathbf{B}}{\partial t} \\
|
||||
\nabla \times \mathbf{B} &= \mu_0 \left( \mathbf{J} + \varepsilon_0 \frac{\partial \mathbf{E}}{\partial t} \right)
|
||||
\end{aligned}
|
||||
$$
|
||||
|
||||
## Supported Functions
|
||||
|
||||
|
||||
@ -1,34 +1,33 @@
|
||||
---
|
||||
title: "数学公式"
|
||||
title: "LaTeX 公式"
|
||||
weight: 4
|
||||
math: true
|
||||
---
|
||||
|
||||
$\KaTeX$ 用于渲染 LaTeX 数学表达式。可以通过在页面前置设置中将 `math` 设置为 `true` 来启用它。
|
||||
$\KaTeX$ 用于呈现 LaTeX 数学表达式。可在 `frontmatter` 将 `math` 设置为 `true` 来启用。
|
||||
|
||||
<!--more-->
|
||||
|
||||
```yaml {filename="page.md"}
|
||||
```yaml {filename="Markdown"}
|
||||
---
|
||||
title: "我的页面包含 LaTeX"
|
||||
title: "My Page with LaTeX"
|
||||
math: true
|
||||
---
|
||||
|
||||
```
|
||||
|
||||
启用后,KaTeX 的脚本、样式表和字体将自动包含在您的站点中。您可以在 Markdown 内容中开始使用 LaTeX 数学表达式。
|
||||
启用后,KaTeX 中的脚本,样式表和字体将自动包含在你的网站中。这样就可以在 Markdown 内容中使用 LaTeX 数学表达式。
|
||||
|
||||
## 示例
|
||||
|
||||
Markdown 内容中支持内联和独立段落的 LaTeX 数学表达式。
|
||||
Markdown 内容支持行内和独立段落的 LaTeX 数学表达式。
|
||||
|
||||
### 内联
|
||||
### 行内
|
||||
|
||||
```markdown {filename="page.md"}
|
||||
这个 $\sigma(z) = \frac{1}{1 + e^{-z}}$ 是内联的。
|
||||
This $\sigma(z) = \frac{1}{1 + e^{-z}}$ is inline.
|
||||
```
|
||||
|
||||
这个 $\sigma(z) = \frac{1}{1 + e^{-z}}$ 是内联的。
|
||||
This $\sigma(z) = \frac{1}{1 + e^{-z}}$ is inline.
|
||||
|
||||
### 独立段落
|
||||
|
||||
@ -36,57 +35,20 @@ Markdown 内容中支持内联和独立段落的 LaTeX 数学表达式。
|
||||
$$F(\omega) = \int_{-\infty}^{\infty} f(t) e^{-j\omega t} \, dt$$
|
||||
```
|
||||
|
||||
将渲染为:
|
||||
将被渲染为:
|
||||
|
||||
$$F(\omega) = \int_{-\infty}^{\infty} f(t) e^{-j\omega t} \, dt$$
|
||||
|
||||
> [!IMPORTANT]
|
||||
> 请在 Hugo 配置文件中启用并配置 [passthrough 扩展](https://gohugo.io/content-management/mathematics/)。它保留分隔符内的原始内容,以避免复杂表达式的渲染问题。
|
||||
|
||||
```yaml {filename="hugo.yaml"}
|
||||
markup:
|
||||
goldmark:
|
||||
extensions:
|
||||
passthrough:
|
||||
delimiters:
|
||||
block: [['\[', '\]'], ['$$', '$$']]
|
||||
inline: [['\(', '\)']]
|
||||
enable: true
|
||||
```
|
||||
## 支持的功能
|
||||
|
||||
例如,使用对齐环境:
|
||||
有关支持的符号列表,转至 [KaTeX 支持的公式](https://katex.org/docs/supported.html)。
|
||||
|
||||
```latex {filename="page.md"}
|
||||
$$
|
||||
\begin{aligned}
|
||||
\nabla \cdot \mathbf{E} &= \frac{\rho}{\varepsilon_0} \\
|
||||
\nabla \cdot \mathbf{B} &= 0 \\
|
||||
\nabla \times \mathbf{E} &= -\frac{\partial \mathbf{B}}{\partial t} \\
|
||||
\nabla \times \mathbf{B} &= \mu_0 \left( \mathbf{J} + \varepsilon_0 \frac{\partial \mathbf{E}}{\partial t} \right)
|
||||
\end{aligned}
|
||||
$$
|
||||
```
|
||||
## 化学表达式
|
||||
|
||||
将渲染为:
|
||||
通过 [mhchem](https://mhchem.github.io/MathJax-mhchem/) 支持化学表达式。
|
||||
|
||||
$$
|
||||
\begin{aligned}
|
||||
\nabla \cdot \mathbf{E} &= \frac{\rho}{\varepsilon_0} \\
|
||||
\nabla \cdot \mathbf{B} &= 0 \\
|
||||
\nabla \times \mathbf{E} &= -\frac{\partial \mathbf{B}}{\partial t} \\
|
||||
\nabla \times \mathbf{B} &= \mu_0 \left( \mathbf{J} + \varepsilon_0 \frac{\partial \mathbf{E}}{\partial t} \right)
|
||||
\end{aligned}
|
||||
$$
|
||||
|
||||
## 支持的函数
|
||||
|
||||
有关支持的函数列表,请参阅 [KaTeX 支持的函数](https://katex.org/docs/supported.html)。
|
||||
|
||||
## 化学
|
||||
|
||||
通过 [mhchem](https://mhchem.github.io/MathJax-mhchem/) 扩展支持化学表达式。
|
||||
|
||||
内联:$\ce{H2O}$ 是水。
|
||||
行内:$\ce{H2O}$ 是水。
|
||||
|
||||
独立段落:
|
||||
|
||||
|
||||
@ -1,196 +0,0 @@
|
||||
---
|
||||
title: Markdown
|
||||
weight: 2
|
||||
---
|
||||
|
||||
Hugoは、テキストのフォーマットやリストの作成などに[Markdown](https://ja.wikipedia.org/wiki/Markdown)構文をサポートしています。このページでは、最も一般的なMarkdown構文の例をいくつか紹介します。
|
||||
|
||||
<!--more-->
|
||||
|
||||
## Markdownの例
|
||||
|
||||
### テキストのスタイル
|
||||
|
||||
| スタイル | 構文 | 例 | 出力 |
|
||||
| -------- | -------- | ------ | ------ |
|
||||
| 太字 | `**太字テキスト**` | `**太字テキスト**` | **太字テキスト** |
|
||||
| 斜体 | `*斜体テキスト*` | `*斜体テキスト*` | *斜体テキスト* |
|
||||
| 取り消し線 | `~~取り消し線テキスト~~` | `~~取り消し線テキスト~~` | ~~取り消し線テキスト~~ |
|
||||
| 下付き文字 | `<sub></sub>` | `これは<sub>下付き文字</sub>です` | これは<sub>下付き文字</sub>です |
|
||||
| 上付き文字 | `<sup></sup>` | `これは<sup>上付き文字</sup>です` | これは<sup>上付き文字</sup>です |
|
||||
|
||||
### ブロッククォート
|
||||
|
||||
引用元付きのブロッククォート
|
||||
|
||||
> メモリを共有してコミュニケーションするのではなく、コミュニケーションしてメモリを共有せよ。<br>
|
||||
> — <cite>ロブ・パイク[^1]</cite>
|
||||
|
||||
[^1]: 上記の引用は、2015年11月18日のGopherfestでのロブ・パイクの[講演](https://www.youtube.com/watch?v=PAAkCSZUG1c)から抜粋したものです。
|
||||
|
||||
```markdown {filename=Markdown}
|
||||
> メモリを共有してコミュニケーションするのではなく、コミュニケーションしてメモリを共有せよ。<br>
|
||||
> — <cite>ロブ・パイク[^1]</cite>
|
||||
|
||||
[^1]: 上記の引用は、2015年11月18日のGopherfestでのロブ・パイクの[講演](https://www.youtube.com/watch?v=PAAkCSZUG1c)から抜粋したものです。
|
||||
```
|
||||
|
||||
### アラート
|
||||
|
||||
{{< new-feature version="v0.9.0" >}}
|
||||
|
||||
アラートは、ブロッククォート構文に基づくMarkdown拡張で、重要な情報を強調するために使用できます。
|
||||
[GitHubスタイルのアラート](https://docs.github.com/ja/get-started/writing-on-github/getting-started-with-writing-and-formatting-on-github/basic-writing-and-formatting-syntax#alerts)がサポートされています。
|
||||
Hextraの最新バージョンと[Hugo v0.134.0](https://github.com/gohugoio/hugo/releases/tag/v0.134.0)以降を使用していることを確認してください。
|
||||
|
||||
> [!NOTE]
|
||||
> ユーザーが知っておくべき有用な情報で、内容をざっと見る際にも役立ちます。
|
||||
|
||||
> [!TIP]
|
||||
> 物事をより良く、または簡単に行うための役立つアドバイス。
|
||||
|
||||
> [!IMPORTANT]
|
||||
> ユーザーが目標を達成するために知っておくべき重要な情報。
|
||||
|
||||
> [!WARNING]
|
||||
> 問題を避けるために即座にユーザーの注意を引く必要がある緊急の情報。
|
||||
|
||||
> [!CAUTION]
|
||||
> 特定のアクションのリスクやネガティブな結果についてのアドバイス。
|
||||
|
||||
```markdown {filename=Markdown}
|
||||
> [!NOTE]
|
||||
> ユーザーが知っておくべき有用な情報で、内容をざっと見る際にも役立ちます。
|
||||
|
||||
> [!TIP]
|
||||
> 物事をより良く、または簡単に行うための役立つアドバイス。
|
||||
|
||||
> [!IMPORTANT]
|
||||
> ユーザーが目標を達成するために知っておくべき重要な情報。
|
||||
|
||||
> [!WARNING]
|
||||
> 問題を避けるために即座にユーザーの注意を引く必要がある緊急の情報。
|
||||
|
||||
> [!CAUTION]
|
||||
> 特定のアクションのリスクやネガティブな結果についてのアドバイス。
|
||||
```
|
||||
|
||||
### テーブル
|
||||
|
||||
テーブルはMarkdownのコア仕様には含まれていませんが、Hugoはデフォルトでサポートしています。
|
||||
|
||||
| 名前 | 年齢 |
|
||||
|--------|------|
|
||||
| ボブ | 27 |
|
||||
| アリス | 23 |
|
||||
|
||||
```markdown {filename=Markdown}
|
||||
| 名前 | 年齢 |
|
||||
|--------|------|
|
||||
| ボブ | 27 |
|
||||
| アリス | 23 |
|
||||
```
|
||||
|
||||
#### テーブル内のインラインMarkdown
|
||||
|
||||
| 斜体 | 太字 | コード |
|
||||
| -------- | -------- | ------ |
|
||||
| *斜体* | **太字** | `コード` |
|
||||
|
||||
```markdown {filename=Markdown}
|
||||
| 斜体 | 太字 | コード |
|
||||
| -------- | -------- | ------ |
|
||||
| *斜体* | **太字** | `コード` |
|
||||
```
|
||||
|
||||
### コードブロック
|
||||
|
||||
{{< cards >}}
|
||||
{{< card link="../../guide/syntax-highlighting" title="シンタックスハイライト" icon="sparkles" >}}
|
||||
{{< /cards >}}
|
||||
|
||||
### リスト
|
||||
|
||||
#### 順序付きリスト
|
||||
|
||||
1. 最初の項目
|
||||
2. 2番目の項目
|
||||
3. 3番目の項目
|
||||
|
||||
```markdown {filename=Markdown}
|
||||
1. 最初の項目
|
||||
2. 2番目の項目
|
||||
3. 3番目の項目
|
||||
```
|
||||
|
||||
#### 順序なしリスト
|
||||
|
||||
* リスト項目
|
||||
* 別の項目
|
||||
* さらに別の項目
|
||||
|
||||
```markdown {filename=Markdown}
|
||||
* リスト項目
|
||||
* 別の項目
|
||||
* さらに別の項目
|
||||
```
|
||||
|
||||
#### ネストされたリスト
|
||||
|
||||
* 果物
|
||||
* りんご
|
||||
* オレンジ
|
||||
* バナナ
|
||||
* 乳製品
|
||||
* 牛乳
|
||||
* チーズ
|
||||
|
||||
```markdown {filename=Markdown}
|
||||
* 果物
|
||||
* りんご
|
||||
* オレンジ
|
||||
* バナナ
|
||||
* 乳製品
|
||||
* 牛乳
|
||||
* チーズ
|
||||
```
|
||||
|
||||
### 画像
|
||||
|
||||

|
||||
|
||||
```markdown {filename=Markdown}
|
||||

|
||||
```
|
||||
|
||||
キャプション付き:
|
||||
|
||||

|
||||
|
||||
```markdown {filename=Markdown}
|
||||

|
||||
```
|
||||
|
||||
## 設定
|
||||
|
||||
HugoはMarkdownの解析に[Goldmark](https://github.com/yuin/goldmark)を使用しています。
|
||||
Markdownのレンダリングは、`hugo.yaml`の`markup.goldmark`で設定できます。
|
||||
以下はHextraのデフォルト設定です:
|
||||
|
||||
```yaml {filename="hugo.yaml"}
|
||||
markup:
|
||||
goldmark:
|
||||
renderer:
|
||||
unsafe: true
|
||||
highlight:
|
||||
noClasses: false
|
||||
```
|
||||
|
||||
その他の設定オプションについては、Hugoのドキュメント[Configure Markup](https://gohugo.io/getting-started/configuration-markup/)を参照してください。
|
||||
|
||||
## 学習リソース
|
||||
|
||||
* [Markdownガイド](https://www.markdownguide.org/)
|
||||
* [Markdownチートシート](https://github.com/adam-p/markdown-here/wiki/Markdown-Cheatsheet)
|
||||
* [Markdownチュートリアル](https://www.markdowntutorial.com/)
|
||||
* [Markdownリファレンス](https://commonmark.org/help/)
|
||||
@ -37,8 +37,6 @@ Blockquote with attribution
|
||||
|
||||
### Alerts
|
||||
|
||||
{{< new-feature version="v0.9.0" >}}
|
||||
|
||||
Alerts are a Markdown extension based on the blockquote syntax that you can use to emphasize critical information.
|
||||
[GitHub-style alerts](https://docs.github.com/en/get-started/writing-on-github/getting-started-with-writing-and-formatting-on-github/basic-writing-and-formatting-syntax#alerts) are supported.
|
||||
Please make sure you are using the latest version of Hextra and [Hugo v0.134.0](https://github.com/gohugoio/hugo/releases/tag/v0.134.0) or later.
|
||||
|
||||
@ -3,7 +3,7 @@ title: Markdown
|
||||
weight: 2
|
||||
---
|
||||
|
||||
Hugo 支持使用 [Markdown](https://en.wikipedia.org/wiki/Markdown) 语法来格式化文本、创建列表等。本页将展示一些最常见的 Markdown 语法示例。
|
||||
Hugo 支持 [Markdown](https://en.wikipedia.org/wiki/Markdown) 来书写内容,创建列表等。本页将向你展示一些最常见的 Markdown 语法示例。
|
||||
|
||||
<!--more-->
|
||||
|
||||
@ -11,171 +11,130 @@ Hugo 支持使用 [Markdown](https://en.wikipedia.org/wiki/Markdown) 语法来
|
||||
|
||||
### 文本样式
|
||||
|
||||
| 样式 | 语法 | 示例 | 输出 |
|
||||
| Style | Syntax | Example | Output |
|
||||
| -------- | -------- | ------ | ------ |
|
||||
| 粗体 | `**粗体文本**` | `**粗体文本**` | **粗体文本** |
|
||||
| 斜体 | `*斜体文本*` | `*斜体文本*` | *斜体文本* |
|
||||
| 删除线 | `~~删除线文本~~` | `~~删除线文本~~` | ~~删除线文本~~ |
|
||||
| 下标 | `<sub></sub>` | `这是一个<sub>下标</sub>文本` | 这是一个<sub>下标</sub>文本 |
|
||||
| 上标 | `<sup></sup>` | `这是一个<sup>上标</sup>文本` | 这是一个<sup>上标</sup>文本 |
|
||||
| Bold | `**bold text**` | `**bold text**` | **bold text** |
|
||||
| Italic | `*italicized text*` | `*italicized text* | *italicized text* |
|
||||
| Strikethrough | `~~strikethrough text~~` | `~~strikethrough text~~` | ~~strikethrough text~~ |
|
||||
| Subscript | `<sub></sub>` | `This is a <sub>subscript</sub> text` | This is a <sub>subscript</sub> text |
|
||||
| Superscript | `<sup></sup>` | `This is a <sup>superscript</sup> text` | This is a <sup>superscript</sup> text |
|
||||
|
||||
### 引用块
|
||||
### 引用
|
||||
|
||||
带出处的引用块
|
||||
带角标的块引用:
|
||||
|
||||
> 不要通过共享内存来通信,而要通过通信来共享内存。<br>
|
||||
> Don't communicate by sharing memory, share memory by communicating.<br>
|
||||
> — <cite>Rob Pike[^1]</cite>
|
||||
|
||||
[^1]: 以上引用摘自 Rob Pike 在 2015 年 11 月 18 日 Gopherfest 上的[演讲](https://www.youtube.com/watch?v=PAAkCSZUG1c)。
|
||||
[^1]: The above quote is excerpted from Rob Pike's [talk](https://www.youtube.com/watch?v=PAAkCSZUG1c) during Gopherfest, November 18, 2015.
|
||||
|
||||
```markdown {filename=Markdown}
|
||||
> 不要通过共享内存来通信,而要通过通信来共享内存。<br>
|
||||
> Don't communicate by sharing memory, share memory by communicating.<br>
|
||||
> — <cite>Rob Pike[^1]</cite>
|
||||
|
||||
[^1]: 以上引用摘自 Rob Pike 在 2015 年 11 月 18 日 Gopherfest 上的[演讲](https://www.youtube.com/watch?v=PAAkCSZUG1c)。
|
||||
```
|
||||
|
||||
### 提示框
|
||||
|
||||
{{< new-feature version="v0.9.0" >}}
|
||||
|
||||
提示框是基于引用块语法的 Markdown 扩展,可用于强调关键信息。
|
||||
支持 [GitHub 风格的提示框](https://docs.github.com/en/get-started/writing-on-github/getting-started-with-writing-and-formatting-on-github/basic-writing-and-formatting-syntax#alerts)。
|
||||
请确保您使用的是最新版本的 Hextra 和 [Hugo v0.134.0](https://github.com/gohugoio/hugo/releases/tag/v0.134.0) 或更高版本。
|
||||
|
||||
> [!NOTE]
|
||||
> 用户应该知道的有用信息,即使是在浏览内容时。
|
||||
|
||||
> [!TIP]
|
||||
> 帮助用户更好地或更轻松地完成任务的建议。
|
||||
|
||||
> [!IMPORTANT]
|
||||
> 用户需要了解的关键信息,以实现他们的目标。
|
||||
|
||||
> [!WARNING]
|
||||
> 需要用户立即注意的紧急信息,以避免问题。
|
||||
|
||||
> [!CAUTION]
|
||||
> 关于某些操作的风险或负面结果的建议。
|
||||
|
||||
```markdown {filename=Markdown}
|
||||
> [!NOTE]
|
||||
> 用户应该知道的有用信息,即使是在浏览内容时。
|
||||
|
||||
> [!TIP]
|
||||
> 帮助用户更好地或更轻松地完成任务的建议。
|
||||
|
||||
> [!IMPORTANT]
|
||||
> 用户需要了解的关键信息,以实现他们的目标。
|
||||
|
||||
> [!WARNING]
|
||||
> 需要用户立即注意的紧急信息,以避免问题。
|
||||
|
||||
> [!CAUTION]
|
||||
> 关于某些操作的风险或负面结果的建议。
|
||||
[^1]: The above quote is excerpted from Rob Pike's [talk](https://www.youtube.com/watch?v=PAAkCSZUG1c) during Gopherfest, November 18, 2015.
|
||||
```
|
||||
|
||||
### 表格
|
||||
|
||||
表格不是 Markdown 核心规范的一部分,但 Hugo 默认支持它们。
|
||||
表格并非核心 Markdown 规范,但 Hugo 支持开箱即用的表格:
|
||||
|
||||
| 姓名 | 年龄 |
|
||||
| Name | Age |
|
||||
|--------|------|
|
||||
| Bob | 27 |
|
||||
| Alice | 23 |
|
||||
|
||||
```markdown {filename=Markdown}
|
||||
| 姓名 | 年龄 |
|
||||
| Name | Age |
|
||||
|--------|------|
|
||||
| Bob | 27 |
|
||||
| Alice | 23 |
|
||||
```
|
||||
|
||||
#### 表格中的内联 Markdown
|
||||
#### Markdown 表格中的内联
|
||||
|
||||
| 斜体 | 粗体 | 代码 |
|
||||
| Italics | Bold | Code |
|
||||
| -------- | -------- | ------ |
|
||||
| *斜体* | **粗体** | `代码` |
|
||||
| *italics* | **bold** | `code` |
|
||||
|
||||
```markdown {filename=Markdown}
|
||||
| 斜体 | 粗体 | 代码 |
|
||||
| Italics | Bold | Code |
|
||||
| -------- | -------- | ------ |
|
||||
| *斜体* | **粗体** | `代码` |
|
||||
| *italics* | **bold** | `code` |
|
||||
```
|
||||
|
||||
### 代码块
|
||||
|
||||
{{< cards >}}
|
||||
{{< card link="../../guide/syntax-highlighting" title="语法高亮" icon="sparkles" >}}
|
||||
{{< card link="../../guide/syntax-highlighting" title="Syntax Highlighting" icon="sparkles" >}}
|
||||
{{< /cards >}}
|
||||
|
||||
### 列表
|
||||
|
||||
#### 有序列表
|
||||
|
||||
1. 第一项
|
||||
2. 第二项
|
||||
3. 第三项
|
||||
1. First item
|
||||
2. Second item
|
||||
3. Third item
|
||||
|
||||
```markdown {filename=Markdown}
|
||||
1. 第一项
|
||||
2. 第二项
|
||||
3. 第三项
|
||||
1. First item
|
||||
2. Second item
|
||||
3. Third item
|
||||
```
|
||||
|
||||
#### 无序列表
|
||||
|
||||
* 列表项
|
||||
* 另一个项
|
||||
* 再一个项
|
||||
* List item
|
||||
* Another item
|
||||
* And another item
|
||||
|
||||
```markdown {filename=Markdown}
|
||||
* 列表项
|
||||
* 另一个项
|
||||
* 再一个项
|
||||
* List item
|
||||
* Another item
|
||||
* And another item
|
||||
```
|
||||
|
||||
#### 嵌套列表
|
||||
|
||||
* 水果
|
||||
* 苹果
|
||||
* 橙子
|
||||
* 香蕉
|
||||
* 乳制品
|
||||
* 牛奶
|
||||
* 奶酪
|
||||
* Fruit
|
||||
* Apple
|
||||
* Orange
|
||||
* Banana
|
||||
* Dairy
|
||||
* Milk
|
||||
* Cheese
|
||||
|
||||
```markdown {filename=Markdown}
|
||||
* 水果
|
||||
* 苹果
|
||||
* 橙子
|
||||
* 香蕉
|
||||
* 乳制品
|
||||
* 牛奶
|
||||
* 奶酪
|
||||
* Fruit
|
||||
* Apple
|
||||
* Orange
|
||||
* Banana
|
||||
* Dairy
|
||||
* Milk
|
||||
* Cheese
|
||||
```
|
||||
|
||||
### 图片
|
||||
|
||||

|
||||

|
||||
|
||||
```markdown {filename=Markdown}
|
||||

|
||||

|
||||
```
|
||||
|
||||
带标题:
|
||||
带有标题:
|
||||
|
||||

|
||||

|
||||
|
||||
```markdown {filename=Markdown}
|
||||

|
||||

|
||||
```
|
||||
|
||||
## 配置
|
||||
|
||||
Hugo 使用 [Goldmark](https://github.com/yuin/goldmark) 进行 Markdown 解析。
|
||||
Markdown 渲染可以在 `hugo.yaml` 中的 `markup.goldmark` 下进行配置。
|
||||
以下是 Hextra 的默认配置:
|
||||
Hugo 使用 [Goldmark](https://github.com/yuin/goldmark) 解析 Markdown。
|
||||
Markdown 渲染可以在 `hugo.yaml` 中的 `markup.goldmark` 中配置。以下是Hextra的默认配置:
|
||||
|
||||
```yaml {filename="hugo.yaml"}
|
||||
markup:
|
||||
@ -186,11 +145,11 @@ markup:
|
||||
noClasses: false
|
||||
```
|
||||
|
||||
更多配置选项,请参阅 Hugo 文档中的 [配置 Markup](https://gohugo.io/getting-started/configuration-markup/)。
|
||||
如需了解更多选项,转至 [Configure Markup](https://gohugo.io/getting-started/configuration-markup/)。
|
||||
|
||||
## 学习资源
|
||||
## 参考资料
|
||||
|
||||
* [Markdown 指南](https://www.markdownguide.org/)
|
||||
* [Markdown 速查表](https://github.com/adam-p/markdown-here/wiki/Markdown-Cheatsheet)
|
||||
* [Markdown 教程](https://www.markdowntutorial.com/)
|
||||
* [Markdown 参考](https://commonmark.org/help/)
|
||||
* [Markdown Guide](https://www.markdownguide.org/)
|
||||
* [Markdown Cheatsheet](https://github.com/adam-p/markdown-here/wiki/Markdown-Cheatsheet)
|
||||
* [Markdown Tutorial](https://www.markdowntutorial.com/)
|
||||
* [Markdown Reference](https://commonmark.org/help/)
|
||||
|
||||
@ -1,187 +0,0 @@
|
||||
---
|
||||
title: ファイルの整理
|
||||
weight: 1
|
||||
prev: /docs/guide
|
||||
---
|
||||
|
||||
## ディレクトリ構造
|
||||
|
||||
デフォルトでは、Hugoは`content`ディレクトリ内のMarkdownファイルを検索し、ディレクトリの構造がウェブサイトの最終的な出力構造を決定します。
|
||||
このサイトを例に取ります:
|
||||
|
||||
<!--more-->
|
||||
|
||||
{{< filetree/container >}}
|
||||
{{< filetree/folder name="content" >}}
|
||||
{{< filetree/file name="_index.md" >}}
|
||||
{{< filetree/folder name="docs" state="open" >}}
|
||||
{{< filetree/file name="_index.md" >}}
|
||||
{{< filetree/file name="getting-started.md" >}}
|
||||
{{< filetree/folder name="guide" state="open" >}}
|
||||
{{< filetree/file name="_index.md" >}}
|
||||
{{< filetree/file name="organize-files.md" >}}
|
||||
{{< /filetree/folder >}}
|
||||
{{< /filetree/folder >}}
|
||||
{{< filetree/folder name="blog" state="open" >}}
|
||||
{{< filetree/file name="_index.md" >}}
|
||||
{{< filetree/file name="post-1.md" >}}
|
||||
{{< /filetree/folder >}}
|
||||
{{< /filetree/folder >}}
|
||||
{{< /filetree/container >}}
|
||||
|
||||
各`_index.md`ファイルは、対応するセクションのインデックスページです。他のMarkdownファイルは通常のページです。
|
||||
|
||||
```
|
||||
content
|
||||
├── _index.md // <- /
|
||||
├── docs
|
||||
│ ├── _index.md // <- /docs/
|
||||
│ ├── getting-started.md // <- /docs/getting-started/
|
||||
│ └── guide
|
||||
│ ├── _index.md // <- /docs/guide/
|
||||
│ └── organize-files.md // <- /docs/guide/organize-files/
|
||||
└── blog
|
||||
├── _index.md // <- /blog/
|
||||
└── post-1.md // <- /blog/post-1/
|
||||
```
|
||||
|
||||
## レイアウト
|
||||
|
||||
Hextraは、異なるコンテンツタイプに対して3つのレイアウトを提供します:
|
||||
|
||||
| レイアウト | ディレクトリ | 特徴 |
|
||||
| :-------- | :-------------------- | :--------------------------------------------------------------- |
|
||||
| `docs` | `content/docs/` | 構造化されたドキュメントに最適で、このセクションと同じです。 |
|
||||
| `blog` | `content/blog/` | ブログ投稿用で、リスト表示と詳細記事表示の両方があります。 |
|
||||
| `default` | その他のディレクトリ | サイドバーなしの単一ページ記事表示です。 |
|
||||
|
||||
セクションの動作をビルトインレイアウトと同じにするには、セクションの`_index.md`のフロントマターで希望するタイプを指定します。
|
||||
|
||||
```yaml {filename="content/my-docs/_index.md"}
|
||||
---
|
||||
title: My Docs
|
||||
cascade:
|
||||
type: docs
|
||||
---
|
||||
```
|
||||
|
||||
上記の設定例により、`content/my-docs/`内のコンテンツファイルはデフォルトでドキュメント(`docs`タイプ)として扱われます。
|
||||
|
||||
## サイドバーナビゲーション
|
||||
|
||||
サイドバーナビゲーションは、コンテンツの整理に基づいて自動的に生成されます。サイドバーの順序を手動で設定するには、Markdownファイルのフロントマターで`weight`パラメータを使用します。
|
||||
|
||||
```yaml {filename="content/docs/guide/_index.md"}
|
||||
---
|
||||
title: Guide
|
||||
weight: 2
|
||||
---
|
||||
```
|
||||
|
||||
{{< callout emoji="ℹ️">}}
|
||||
サイドバーがあまり深くならないようにすることをお勧めします。多くのコンテンツがある場合は、**複数のセクションに分割する**ことを検討してください。
|
||||
{{< /callout >}}
|
||||
|
||||
## パンくずナビゲーション
|
||||
|
||||
パンくずは、`/content`のディレクトリ構造に基づいて自動生成されます。
|
||||
|
||||
例えば、[上記のファイル構造](#directory-structure)を考えます。その構造に基づいて、`/docs/guide/organize-files/`ページの上部にパンくずが自動的に表示されます:
|
||||
|
||||
```
|
||||
Documentation > Guide > Organize Files
|
||||
```
|
||||
|
||||
### パンくずリンクのタイトルをカスタマイズ
|
||||
|
||||
デフォルトでは、各パンくずリンクはそのページの`title`パラメータに基づいて生成されます。これをカスタマイズするには、`linkTitle`を指定します。
|
||||
|
||||
例えば、`Organize Files`の代わりに`Foo Bar`と表示したい場合:
|
||||
|
||||
```yaml {filename="content/docs/guide/organize-files.md"}
|
||||
---
|
||||
linkTitle: Foo Bar
|
||||
title: Organize Files
|
||||
---
|
||||
```
|
||||
|
||||
これにより、以下のパンくずが生成されます:
|
||||
```
|
||||
Documentation > Guide > Foo Bar
|
||||
```
|
||||
|
||||
### パンくずを非表示にする
|
||||
|
||||
ページのフロントマターで`breadcrumbs: false`を指定することで、パンくずを完全に非表示にできます:
|
||||
|
||||
```yaml {filename="content/docs/guide/organize-files.md"}
|
||||
---
|
||||
breadcrumbs: false
|
||||
title: Organize Files
|
||||
---
|
||||
```
|
||||
|
||||
## コンテンツディレクトリの設定
|
||||
|
||||
デフォルトでは、Hugoはサイトを構築するためにルートの`content/`ディレクトリを使用します。
|
||||
例えば`docs/`など、異なるディレクトリをコンテンツに使用する必要がある場合は、サイト設定`hugo.yaml`で[`contentDir`](https://gohugo.io/getting-started/configuration/#contentdir)パラメータを設定することで行えます。
|
||||
|
||||
## 画像の追加
|
||||
|
||||
画像を追加する最も簡単な方法は、画像ファイルをMarkdownファイルと同じディレクトリに置くことです。
|
||||
例えば、`my-page.md`ファイルと同じディレクトリに`image.png`ファイルを追加します:
|
||||
|
||||
{{< filetree/container >}}
|
||||
{{< filetree/folder name="content" >}}
|
||||
{{< filetree/folder name="docs" >}}
|
||||
{{< filetree/file name="my-page.md" >}}
|
||||
{{< filetree/file name="image.png" >}}
|
||||
{{< /filetree/folder >}}
|
||||
{{< /filetree/folder >}}
|
||||
{{< /filetree/container >}}
|
||||
|
||||
その後、以下のMarkdown構文を使用してコンテンツに画像を追加できます:
|
||||
|
||||
```markdown {filename="content/docs/my-page.md"}
|
||||

|
||||
```
|
||||
|
||||
また、Hugoの[ページバンドル][page-bundles]機能を利用して、画像ファイルをMarkdownファイルと一緒に整理することもできます。そのためには、`my-page.md`ファイルを`my-page`ディレクトリに変換し、コンテンツを`index.md`というファイルに置き、画像ファイルを`my-page`ディレクトリ内に置きます:
|
||||
|
||||
{{< filetree/container >}}
|
||||
{{< filetree/folder name="content" >}}
|
||||
{{< filetree/folder name="docs" >}}
|
||||
{{< filetree/folder name="my-page" >}}
|
||||
{{< filetree/file name="index.md" >}}
|
||||
{{< filetree/file name="image.png" >}}
|
||||
{{< /filetree/folder >}}
|
||||
{{< /filetree/folder >}}
|
||||
{{< /filetree/folder >}}
|
||||
{{< /filetree/container >}}
|
||||
|
||||
```markdown {filename="content/docs/my-page/index.md"}
|
||||

|
||||
```
|
||||
|
||||
または、画像ファイルを`static`ディレクトリに置くこともできます。これにより、すべてのページで画像が利用可能になります:
|
||||
|
||||
{{< filetree/container >}}
|
||||
{{< filetree/folder name="static" >}}
|
||||
{{< filetree/folder name="images" >}}
|
||||
{{< filetree/file name="image.png" >}}
|
||||
{{< /filetree/folder >}}
|
||||
{{< /filetree/folder >}}
|
||||
{{< filetree/folder name="content" >}}
|
||||
{{< filetree/folder name="docs" >}}
|
||||
{{< filetree/file name="my-page.md" >}}
|
||||
{{< /filetree/folder >}}
|
||||
{{< /filetree/folder >}}
|
||||
{{< /filetree/container >}}
|
||||
|
||||
画像パスはスラッシュ`/`で始まり、`static`ディレクトリからの相対パスであることに注意してください:
|
||||
|
||||
```markdown {filename="content/docs/my-page.md"}
|
||||

|
||||
```
|
||||
|
||||
[page-bundles]: https://gohugo.io/content-management/page-bundles/#leaf-bundles
|
||||
@ -1,13 +1,13 @@
|
||||
---
|
||||
title: 组织文件
|
||||
title: 目录结构
|
||||
weight: 1
|
||||
prev: /docs/guide
|
||||
---
|
||||
|
||||
## 目录结构
|
||||
|
||||
默认情况下,Hugo 会在 `content` 目录中查找 Markdown 文件,目录的结构决定了网站最终的输出结构。
|
||||
以本网站为例:
|
||||
默认情况下,Hugo 在 `content` 目录中搜索 Markdown 文件,目录的结构决定了网站的最终输出结构。
|
||||
以示例网站为例:
|
||||
|
||||
<!--more-->
|
||||
|
||||
@ -29,7 +29,7 @@ prev: /docs/guide
|
||||
{{< /filetree/folder >}}
|
||||
{{< /filetree/container >}}
|
||||
|
||||
每个 `_index.md` 文件都是对应部分的索引页面。其他 Markdown 文件则是常规页面。
|
||||
每个 `_index.md` 文件都是相应部分的索引页,其他 Markdown 文件则是常规页面。
|
||||
|
||||
```
|
||||
content
|
||||
@ -45,143 +45,21 @@ content
|
||||
└── post-1.md // <- /blog/post-1/
|
||||
```
|
||||
|
||||
## 布局
|
||||
|
||||
Hextra 为不同类型的内容提供了三种布局:
|
||||
|
||||
| 布局 | 目录 | 特性 |
|
||||
| :-------- | :------------------ | :----------------------------------------------------------- |
|
||||
| `docs` | `content/docs/` | 适合结构化文档,与本部分相同。 |
|
||||
| `blog` | `content/blog/` | 用于博客文章,包含列表和详细文章视图。 |
|
||||
| `default` | 其他所有目录 | 单页文章视图,无侧边栏。 |
|
||||
|
||||
要将某个部分自定义为与内置布局相同的行为,可以在该部分的 `_index.md` 的前言中指定所需的类型。
|
||||
|
||||
```yaml {filename="content/my-docs/_index.md"}
|
||||
---
|
||||
title: 我的文档
|
||||
cascade:
|
||||
type: docs
|
||||
---
|
||||
```
|
||||
|
||||
上述示例配置确保 `content/my-docs/` 中的内容文件默认会被视为文档(`docs` 类型)。
|
||||
|
||||
## 侧边栏导航
|
||||
|
||||
侧边栏导航会根据内容组织按字母顺序自动生成。要手动配置侧边栏顺序,可以在 Markdown 文件的前言中使用 `weight` 参数。
|
||||
侧边栏导航是根据内容组织的字母顺序自动生成的。要手动配置侧边栏顺序,可以在 Markdown 文件的 `frontmatter ` 中使用 `weight` 配置。
|
||||
|
||||
```yaml {filename="content/docs/guide/_index.md"}
|
||||
---
|
||||
title: 指南
|
||||
title: Guide
|
||||
weight: 2
|
||||
---
|
||||
```
|
||||
|
||||
{{< callout emoji="ℹ️">}}
|
||||
建议不要让侧边栏过深。如果你有很多内容,考虑**将它们分成多个部分**。
|
||||
建议侧边栏不要太深。如果内容太多,请考虑 **将它们分成多个部分**。
|
||||
{{< /callout >}}
|
||||
|
||||
## 面包屑导航
|
||||
|
||||
面包屑导航会根据 `/content` 的目录结构自动生成。
|
||||
|
||||
例如,考虑上面[展示的目录结构](#directory-structure)。根据该结构,页面 `/docs/guide/organize-files/` 顶部的面包屑导航会自动显示如下:
|
||||
|
||||
```
|
||||
文档 > 指南 > 组织文件
|
||||
```
|
||||
|
||||
### 自定义面包屑链接标题
|
||||
|
||||
默认情况下,每个面包屑链接是根据页面的 `title` 参数生成的。你可以通过指定 `linkTitle` 来自定义。
|
||||
|
||||
例如,如果我们希望面包屑显示为 `Foo Bar` 而不是 `Organize Files`:
|
||||
|
||||
```yaml {filename="content/docs/guide/organize-files.md"}
|
||||
---
|
||||
linkTitle: Foo Bar
|
||||
title: 组织文件
|
||||
---
|
||||
```
|
||||
|
||||
现在会生成以下面包屑:
|
||||
```
|
||||
文档 > 指南 > Foo Bar
|
||||
```
|
||||
|
||||
### 隐藏面包屑
|
||||
|
||||
你可以通过在页面的前言中指定 `breadcrumbs: false` 来完全隐藏面包屑:
|
||||
|
||||
```yaml {filename="content/docs/guide/organize-files.md"}
|
||||
---
|
||||
breadcrumbs: false
|
||||
title: 组织文件
|
||||
---
|
||||
```
|
||||
|
||||
## 配置内容目录
|
||||
|
||||
默认情况下,Hugo 使用根目录 `content/` 来构建网站。
|
||||
如果你需要使用不同的目录来存放内容,例如 `docs/`,可以通过在站点配置文件 `hugo.yaml` 中设置 [`contentDir`](https://gohugo.io/getting-started/configuration/#contentdir) 参数来实现。
|
||||
|
||||
## 添加图片
|
||||
|
||||
添加图片的最简单方法是将图片文件放在与 Markdown 文件相同的目录中。
|
||||
例如,将图片文件 `image.png` 与 `my-page.md` 文件放在一起:
|
||||
|
||||
{{< filetree/container >}}
|
||||
{{< filetree/folder name="content" >}}
|
||||
{{< filetree/folder name="docs" >}}
|
||||
{{< filetree/file name="my-page.md" >}}
|
||||
{{< filetree/file name="image.png" >}}
|
||||
{{< /filetree/folder >}}
|
||||
{{< /filetree/folder >}}
|
||||
{{< /filetree/container >}}
|
||||
|
||||
然后,我们可以使用以下 Markdown 语法将图片添加到内容中:
|
||||
|
||||
```markdown {filename="content/docs/my-page.md"}
|
||||

|
||||
```
|
||||
|
||||
我们还可以利用 Hugo 的 [页面包][page-bundles] 功能将图片文件与 Markdown 文件一起组织。为此,将 `my-page.md` 文件转换为目录 `my-page`,并将内容放入名为 `index.md` 的文件中,然后将图片文件放入 `my-page` 目录中:
|
||||
|
||||
{{< filetree/container >}}
|
||||
{{< filetree/folder name="content" >}}
|
||||
{{< filetree/folder name="docs" >}}
|
||||
{{< filetree/folder name="my-page" >}}
|
||||
{{< filetree/file name="index.md" >}}
|
||||
{{< filetree/file name="image.png" >}}
|
||||
{{< /filetree/folder >}}
|
||||
{{< /filetree/folder >}}
|
||||
{{< /filetree/folder >}}
|
||||
{{< /filetree/container >}}
|
||||
|
||||
```markdown {filename="content/docs/my-page/index.md"}
|
||||

|
||||
```
|
||||
|
||||
或者,我们也可以将图片文件放在 `static` 目录中,这样所有页面都可以访问这些图片:
|
||||
|
||||
{{< filetree/container >}}
|
||||
{{< filetree/folder name="static" >}}
|
||||
{{< filetree/folder name="images" >}}
|
||||
{{< filetree/file name="image.png" >}}
|
||||
{{< /filetree/folder >}}
|
||||
{{< /filetree/folder >}}
|
||||
{{< filetree/folder name="content" >}}
|
||||
{{< filetree/folder name="docs" >}}
|
||||
{{< filetree/file name="my-page.md" >}}
|
||||
{{< /filetree/folder >}}
|
||||
{{< /filetree/folder >}}
|
||||
{{< /filetree/container >}}
|
||||
|
||||
注意,图片路径以斜杠 `/` 开头,并且相对于静态目录:
|
||||
|
||||
```markdown {filename="content/docs/my-page.md"}
|
||||

|
||||
```
|
||||
|
||||
[page-bundles]: https://gohugo.io/content-management/page-bundles/#leaf-bundles
|
||||
如果需要为的内容使用不同的目录,可以在站点配置文件中设置 [`contentDir`](https://gohugo.io/getting-started/configuration/#contentdir) 来实现。
|
||||
|
||||
@ -1,29 +0,0 @@
|
||||
---
|
||||
title: ショートコード
|
||||
weight: 9
|
||||
prev: /docs/guide/diagrams
|
||||
next: /docs/guide/shortcodes/callout
|
||||
---
|
||||
|
||||
[Hugo ショートコード](https://gohugo.io/content-management/shortcodes/)は、コンテンツファイル内に埋め込まれるシンプルなスニペットで、組み込みまたはカスタムテンプレートを呼び出します。
|
||||
|
||||
Hextra は、コンテンツを強化するための美しいショートコードのコレクションを提供します。
|
||||
|
||||
{{< cards >}}
|
||||
{{< card link="callout" title="コールアウト" icon="warning" >}}
|
||||
{{< card link="cards" title="カード" icon="card" >}}
|
||||
{{< card link="details" title="詳細" icon="chevron-right" >}}
|
||||
{{< card link="filetree" title="FileTree" icon="folder-tree" >}}
|
||||
{{< card link="icon" title="アイコン" icon="badge-check" >}}
|
||||
{{< card link="steps" title="ステップ" icon="one" >}}
|
||||
{{< card link="tabs" title="タブ" icon="collection" >}}
|
||||
{{< /cards >}}
|
||||
|
||||
<div style="padding-top:4rem"></div>
|
||||
|
||||
Hugo と Hextra が提供する追加のショートコード:
|
||||
|
||||
{{< cards >}}
|
||||
{{< card link="jupyter" title="Jupyter Notebook" icon="jupyter" tag="alpha" >}}
|
||||
{{< card link="others" title="その他" icon="view-grid" >}}
|
||||
{{< /cards >}}
|
||||
@ -5,25 +5,15 @@ prev: /docs/guide/diagrams
|
||||
next: /docs/guide/shortcodes/callout
|
||||
---
|
||||
|
||||
[Hugo 短代码](https://gohugo.io/content-management/shortcodes/)是内容文件中的简单片段,用于调用内置或自定义模板。
|
||||
[Hugo 短代码](https://gohugo.io/content-management/shortcodes/) 是你的内容文件中调用内置或自定义模板的简单片段。
|
||||
|
||||
Hextra 提供了一系列精美的短代码,以增强您的内容。
|
||||
Hextra 提供了一系列美观的短代码以增强你的内容。
|
||||
|
||||
{{< cards >}}
|
||||
{{< card link="callout" title="标注" icon="warning" >}}
|
||||
{{< card link="callout" title="注意事项" icon="warning" >}}
|
||||
{{< card link="cards" title="卡片" icon="card" >}}
|
||||
{{< card link="details" title="详情" icon="chevron-right" >}}
|
||||
{{< card link="filetree" title="文件树" icon="folder-tree" >}}
|
||||
{{< card link="icon" title="图标" icon="badge-check" >}}
|
||||
{{< card link="steps" title="步骤" icon="one" >}}
|
||||
{{< card link="tabs" title="标签页" icon="collection" >}}
|
||||
{{< /cards >}}
|
||||
|
||||
<div style="padding-top:4rem"></div>
|
||||
|
||||
Hugo 和 Hextra 提供的其他短代码:
|
||||
|
||||
{{< cards >}}
|
||||
{{< card link="jupyter" title="Jupyter 笔记本" icon="jupyter" tag="alpha" >}}
|
||||
{{< card link="others" title="其他" icon="view-grid" >}}
|
||||
{{< card link="tabs" title="标签" icon="collection" >}}
|
||||
{{< /cards >}}
|
||||
@ -1,83 +0,0 @@
|
||||
---
|
||||
title: コールアウトコンポーネント
|
||||
linkTitle: コールアウト
|
||||
aliases:
|
||||
- callouts
|
||||
prev: /docs/guide/shortcodes
|
||||
---
|
||||
|
||||
読者に重要な情報を示すための組み込みコンポーネントです。
|
||||
|
||||
<!--more-->
|
||||
|
||||
> [!NOTE]
|
||||
> [GitHubスタイルのアラート](../../markdown#alerts)は[v0.9.0](https://github.com/imfing/hextra/releases/tag/v0.9.0)以降でサポートされています。
|
||||
> これはMarkdown構文を活用してコールアウトをレンダリングし、コンテンツの移植性と可読性を向上させます。
|
||||
|
||||
## 例
|
||||
|
||||
{{< callout emoji="👾">}}
|
||||
**コールアウト**は、注意を引くための短いテキストです。
|
||||
{{< /callout >}}
|
||||
|
||||
{{< callout type="info" >}}
|
||||
**コールアウト**は、注意を引くための短いテキストです。
|
||||
{{< /callout >}}
|
||||
|
||||
{{< callout type="warning" >}}
|
||||
**コールアウト**は、注意を引くための短いテキストです。
|
||||
{{< /callout >}}
|
||||
|
||||
{{< callout type="error" >}}
|
||||
**コールアウト**は、注意を引くための短いテキストです。
|
||||
{{< /callout >}}
|
||||
|
||||
## 使用方法
|
||||
|
||||
### デフォルト
|
||||
|
||||
{{< callout emoji="🌐">}}
|
||||
Hugoは、ブログ、ポートフォリオ、ドキュメントサイトなど、さまざまなウェブサイトを作成するために使用できます。
|
||||
{{< /callout >}}
|
||||
|
||||
```markdown
|
||||
{{</* callout emoji="🌐" */>}}
|
||||
Hugoは、ブログ、ポートフォリオ、ドキュメントサイトなど、さまざまなウェブサイトを作成するために使用できます。
|
||||
{{</* /callout */>}}
|
||||
```
|
||||
|
||||
### 情報
|
||||
|
||||
{{< callout type="info" >}}
|
||||
最新のリリースを確認するには、GitHubをご覧ください。
|
||||
{{< /callout >}}
|
||||
|
||||
```markdown
|
||||
{{</* callout type="info" */>}}
|
||||
最新のリリースを確認するには、GitHubをご覧ください。
|
||||
{{</* /callout */>}}
|
||||
```
|
||||
|
||||
### 警告
|
||||
|
||||
{{< callout type="warning" >}}
|
||||
このAPIは次のバージョンで非推奨になります。
|
||||
{{< /callout >}}
|
||||
|
||||
```markdown
|
||||
{{</* callout type="warning" */>}}
|
||||
**コールアウト**は、注意を引くための短いテキストです。
|
||||
{{</* /callout */>}}
|
||||
```
|
||||
|
||||
### エラー
|
||||
|
||||
{{< callout type="error" >}}
|
||||
何か問題が発生し、爆発しそうです。
|
||||
{{< /callout >}}
|
||||
|
||||
```markdown
|
||||
{{</* callout type="error" */>}}
|
||||
何か問題が発生し、爆発しそうです。
|
||||
{{</* /callout */>}}
|
||||
```
|
||||
@ -10,10 +10,6 @@ A built-in component to show important information to the reader.
|
||||
|
||||
<!--more-->
|
||||
|
||||
> [!NOTE]
|
||||
> [GitHub-style alerts](../../markdown#alerts) are supported since [v0.9.0](https://github.com/imfing/hextra/releases/tag/v0.9.0).
|
||||
> It leverages Markdown syntax to render the callout which ensures better portability and readability of the content.
|
||||
|
||||
## Example
|
||||
|
||||
{{< callout emoji="👾">}}
|
||||
|
||||
@ -1,83 +1,78 @@
|
||||
---
|
||||
title: 提示框组件
|
||||
linkTitle: 提示框
|
||||
title: 标注
|
||||
aliases:
|
||||
- 提示框
|
||||
- callouts
|
||||
prev: /docs/guide/shortcodes
|
||||
---
|
||||
|
||||
一个内置组件,用于向读者展示重要信息。
|
||||
向读者显示重要信息的内置组件。
|
||||
|
||||
<!--more-->
|
||||
|
||||
> [!NOTE]
|
||||
> 自 [v0.9.0](https://github.com/imfing/hextra/releases/tag/v0.9.0) 起支持 [GitHub 风格的提醒](../../markdown#alerts)。
|
||||
> 它利用 Markdown 语法来渲染提示框,确保内容具有更好的可移植性和可读性。
|
||||
|
||||
## 示例
|
||||
## Example
|
||||
|
||||
{{< callout emoji="👾">}}
|
||||
**提示框** 是一段简短的文本,旨在吸引注意力。
|
||||
**标注**是一段旨在吸引注意力的短文本
|
||||
{{< /callout >}}
|
||||
|
||||
{{< callout type="info" >}}
|
||||
**提示框** 是一段简短的文本,旨在吸引注意力。
|
||||
**标注**是一段旨在吸引注意力的短文本。
|
||||
{{< /callout >}}
|
||||
|
||||
{{< callout type="warning" >}}
|
||||
**提示框** 是一段简短的文本,旨在吸引注意力。
|
||||
**标注**是一段旨在吸引注意力的短文本。
|
||||
{{< /callout >}}
|
||||
|
||||
{{< callout type="error" >}}
|
||||
**提示框** 是一段简短的文本,旨在吸引注意力。
|
||||
**标注**是一段旨在吸引注意力的短文本。
|
||||
{{< /callout >}}
|
||||
|
||||
## 用法
|
||||
## Usage
|
||||
|
||||
### 默认
|
||||
### Default
|
||||
|
||||
{{< callout emoji="🌐">}}
|
||||
Hugo 可用于创建各种类型的网站,包括博客、作品集、文档站点等。
|
||||
Hugo 可用于创建各种网站,包括博客、作品集、文档网站等
|
||||
{{< /callout >}}
|
||||
|
||||
```markdown
|
||||
{{</* callout emoji="🌐" */>}}
|
||||
Hugo 可用于创建各种类型的网站,包括博客、作品集、文档站点等。
|
||||
Hugo 可用于创建各种网站,包括博客、作品集、文档网站等
|
||||
{{</* /callout */>}}
|
||||
```
|
||||
|
||||
### 信息
|
||||
### Info
|
||||
|
||||
{{< callout type="info" >}}
|
||||
请访问 GitHub 查看最新版本。
|
||||
请访问 GitHub 查看最新版本
|
||||
{{< /callout >}}
|
||||
|
||||
```markdown
|
||||
{{</* callout type="info" */>}}
|
||||
请访问 GitHub 查看最新版本。
|
||||
请访问 GitHub 查看最新版本
|
||||
{{</* /callout */>}}
|
||||
```
|
||||
|
||||
### 警告
|
||||
### Warning
|
||||
|
||||
{{< callout type="warning" >}}
|
||||
此 API 将在下一个版本中弃用。
|
||||
该 API 将在下一版本中弃用
|
||||
{{< /callout >}}
|
||||
|
||||
```markdown
|
||||
{{</* callout type="warning" */>}}
|
||||
**提示框** 是一段简短的文本,旨在吸引注意力。
|
||||
**标注**是一段旨在吸引注意力的简短文字
|
||||
{{</* /callout */>}}
|
||||
```
|
||||
|
||||
### 错误
|
||||
### Error
|
||||
|
||||
{{< callout type="error" >}}
|
||||
出错了,系统即将崩溃。
|
||||
出问题了,要爆炸了
|
||||
{{< /callout >}}
|
||||
|
||||
```markdown
|
||||
{{</* callout type="error" */>}}
|
||||
出错了,系统即将崩溃。
|
||||
出问题了,要爆炸了
|
||||
{{</* /callout */>}}
|
||||
```
|
||||
@ -1,115 +0,0 @@
|
||||
---
|
||||
title: カードコンポーネント
|
||||
linkTitle: カード
|
||||
---
|
||||
|
||||
## 例
|
||||
|
||||
{{< cards >}}
|
||||
{{< card link="../callout" title="コールアウト" icon="warning" >}}
|
||||
{{< card link="../callout" title="タグ付きカード" icon="tag" tag="カスタムタグ">}}
|
||||
{{< card link="/" title="アイコンなし" >}}
|
||||
{{< /cards >}}
|
||||
|
||||
{{< cards >}}
|
||||
{{< card link="/" title="画像カード" image="https://github.com/user-attachments/assets/71b7e3ec-1a8d-4582-b600-5425c6cc0407" subtitle="インターネット画像" >}}
|
||||
{{< card link="/" title="ローカル画像" image="/images/card-image-unprocessed.jpg" subtitle="staticディレクトリ下の未加工画像。" >}}
|
||||
{{< card link="/" title="ローカル画像" image="images/space.jpg" subtitle="assetsディレクトリ下の画像、Hugoで処理済み。" method="Resize" options="600x q80 webp" >}}
|
||||
{{< /cards >}}
|
||||
|
||||
## 使用方法
|
||||
|
||||
```
|
||||
{{</* cards */>}}
|
||||
{{</* card link="../callout" title="コールアウト" icon="warning" */>}}
|
||||
{{</* card link="../callout" title="タグ付きカード" icon="tag" tag= "カスタムタグ" */>}}
|
||||
{{</* card link="/" title="アイコンなし" */>}}
|
||||
{{</* /cards */>}}
|
||||
```
|
||||
|
||||
```
|
||||
{{</* cards */>}}
|
||||
{{</* card link="/" title="画像カード" image="https://source.unsplash.com/featured/800x600?landscape" subtitle="Unsplashの風景画像" */>}}
|
||||
{{</* card link="/" title="ローカル画像" image="/images/card-image-unprocessed.jpg" subtitle="staticディレクトリ下の未加工画像。" */>}}
|
||||
{{</* card link="/" title="ローカル画像" image="images/space.jpg" subtitle="assetsディレクトリ下の画像、Hugoで処理済み。" method="Resize" options="600x q80 webp" */>}}
|
||||
{{</* /cards */>}}
|
||||
```
|
||||
|
||||
## カードパラメータ
|
||||
|
||||
| パラメータ | 説明 |
|
||||
|----------- |-----------------------------------------------------------------|
|
||||
| `link` | URL(内部または外部)。 |
|
||||
| `title` | カードのタイトル見出し。 |
|
||||
| `subtitle` | サブタイトル見出し(Markdown対応)。 |
|
||||
| `icon` | アイコンの名前。 |
|
||||
| `tag` | タグ内のテキスト。 |
|
||||
| `tagColor` | タグの色: `gray`(デフォルト)、`yellow`、`red`、`blue`。 |
|
||||
|
||||
## 画像カード
|
||||
|
||||
さらに、カードは画像の追加と以下のパラメータを通じた処理をサポートします:
|
||||
|
||||
| パラメータ | 説明 |
|
||||
|----------- |---------------------------------------------|
|
||||
| `image` | カードの画像URLを指定します。 |
|
||||
| `method` | Hugoの画像処理メソッドを設定します。 |
|
||||
| `options` | Hugoの画像処理オプションを設定します。 |
|
||||
|
||||
カードは3種類の画像をサポートします:
|
||||
|
||||
1. リモート画像: `image`パラメータに完全なURLを指定。
|
||||
2. 静的画像: Hugoの`static/`ディレクトリ内の相対パスを使用。
|
||||
3. 処理済み画像: Hugoの`assets/`ディレクトリ内の相対パスを使用。
|
||||
|
||||
Hextraはビルド時に画像処理が必要かどうかを自動検出し、`options`パラメータまたはデフォルト設定(Resize、800x、品質80、WebPフォーマット)を適用します。
|
||||
現在サポートされている`method`は`Resize`、`Fit`、`Fill`、`Crop`です。
|
||||
|
||||
Hugoの組み込み画像処理コマンド、メソッド、オプションの詳細については、[画像処理ドキュメント](https://gohugo.io/content-management/image-processing/)を参照してください。
|
||||
|
||||
## タグ
|
||||
|
||||
カードはタグの追加をサポートしており、追加のステータス情報を表示するのに役立ちます。
|
||||
|
||||
{{< cards >}}
|
||||
{{< card link="../callout" title="デフォルトタグ付きカード" tag="タグテキスト" >}}
|
||||
{{< card link="../callout" title="エラータグ付きカード" tag="タグテキスト" tagType="error" >}}
|
||||
{{< card link="../callout" title="情報タグ付きカード" tag="タグテキスト" tagType="info" >}}
|
||||
{{< card link="../callout" title="警告タグ付きカード" tag="タグテキスト" tagType="warning" >}}
|
||||
{{< card link="/" title="画像カード" image="https://github.com/user-attachments/assets/71b7e3ec-1a8d-4582-b600-5425c6cc0407" subtitle="インターネット画像" tag="タグテキスト" tagType="error" >}}
|
||||
{{< /cards >}}
|
||||
|
||||
```
|
||||
{{</* cards */>}}
|
||||
{{</* card link="../callout" title="デフォルトタグ色付きカード" tag="タグテキスト" */>}}
|
||||
{{</* card link="../callout" title="デフォルト赤タグ付きカード" tag="タグテキスト" tagType="error" */>}}
|
||||
{{</* card link="../callout" title="青タグ付きカード" tag="タグテキスト" tagType="info" */>}}
|
||||
{{</* card link="../callout" title="黄色タグ付きカード" tag="タグテキスト" tagType="warning" */>}}
|
||||
{{</* /cards */>}}
|
||||
```
|
||||
|
||||
## 列
|
||||
|
||||
`cards`ショートコードに`cols`パラメータを渡すことで、カードが広がる最大列数を指定できます。ただし、小さい画面では列は折りたたまれます。
|
||||
|
||||
{{< cards cols="1" >}}
|
||||
{{< card link="/" title="上部カード" >}}
|
||||
{{< card link="/" title="下部カード" >}}
|
||||
{{< /cards >}}
|
||||
|
||||
{{< cards cols="2" >}}
|
||||
{{< card link="/" title="左カード" >}}
|
||||
{{< card link="/" title="右カード" >}}
|
||||
{{< /cards >}}
|
||||
|
||||
```
|
||||
{{</* cards cols="1" */>}}
|
||||
{{</* card link="/" title="上部カード" */>}}
|
||||
{{</* card link="/" title="下部カード" */>}}
|
||||
{{</* /cards */>}}
|
||||
|
||||
{{</* cards cols="2" */>}}
|
||||
{{</* card link="/" title="左カード" */>}}
|
||||
{{</* card link="/" title="右カード" */>}}
|
||||
{{</* /cards */>}}
|
||||
```
|
||||
@ -1,115 +1,65 @@
|
||||
---
|
||||
title: 卡片组件
|
||||
linkTitle: 卡片
|
||||
title: 卡片
|
||||
linkTitle: Cards
|
||||
---
|
||||
|
||||
## 示例
|
||||
|
||||
{{< cards >}}
|
||||
{{< card link="../callout" title="提示框" icon="warning" >}}
|
||||
{{< card link="../callout" title="带标签的卡片" icon="tag" tag="自定义标签">}}
|
||||
{{< card link="/" title="无图标" >}}
|
||||
{{< card link="../callout" title="Callout" icon="warning" >}}
|
||||
{{< card link="/" title="No Icon" >}}
|
||||
{{< /cards >}}
|
||||
|
||||
{{< cards >}}
|
||||
{{< card link="/" title="图片卡片" image="https://github.com/user-attachments/assets/71b7e3ec-1a8d-4582-b600-5425c6cc0407" subtitle="网络图片" >}}
|
||||
{{< card link="/" title="本地图片" image="/images/card-image-unprocessed.jpg" subtitle="静态目录下的原始图片。" >}}
|
||||
{{< card link="/" title="本地图片" image="images/space.jpg" subtitle="资源目录下的图片,由 Hugo 处理。" method="Resize" options="600x q80 webp" >}}
|
||||
{{< card link="/" title="Image Card" image="https://source.unsplash.com/featured/800x600?landscape" subtitle="Unsplash Landscape" >}}
|
||||
{{< card link="/" title="Local Image" image="/images/card-image-unprocessed.jpg" subtitle="Raw image under static directory." >}}
|
||||
{{< card link="/" title="Local Image" image="images/space.jpg" subtitle="Image under assets directory, processed by Hugo." method="Resize" options="600x q80 webp" >}}
|
||||
{{< /cards >}}
|
||||
|
||||
## 用法
|
||||
## 使用
|
||||
|
||||
```
|
||||
{{</* cards */>}}
|
||||
{{</* card link="../callout" title="提示框" icon="warning" */>}}
|
||||
{{</* card link="../callout" title="带标签的卡片" icon="tag" tag= "自定义标签" */>}}
|
||||
{{</* card link="/" title="无图标" */>}}
|
||||
{{</* card link="../callout" title="Callout" icon="warning" */>}}
|
||||
{{</* card link="/" title="No Icon" */>}}
|
||||
{{</* /cards */>}}
|
||||
```
|
||||
|
||||
```
|
||||
{{</* cards */>}}
|
||||
{{</* card link="/" title="图片卡片" image="https://source.unsplash.com/featured/800x600?landscape" subtitle="Unsplash 风景" */>}}
|
||||
{{</* card link="/" title="本地图片" image="/images/card-image-unprocessed.jpg" subtitle="静态目录下的原始图片。" */>}}
|
||||
{{</* card link="/" title="本地图片" image="images/space.jpg" subtitle="资源目录下的图片,由 Hugo 处理。" method="Resize" options="600x q80 webp" */>}}
|
||||
{{</* card link="/" title="Image Card" image="https://source.unsplash.com/featured/800x600?landscape" subtitle="Unsplash Landscape" */>}}
|
||||
{{</* card link="/" title="Local Image" image="/images/card-image-unprocessed.jpg" subtitle="Raw image under static directory." */>}}
|
||||
{{</* card link="/" title="Local Image" image="images/space.jpg" subtitle="Image under assets directory, processed by Hugo." method="Resize" options="600x q80 webp" */>}}
|
||||
{{</* /cards */>}}
|
||||
```
|
||||
|
||||
## 卡片参数
|
||||
|
||||
| 参数 | 描述 |
|
||||
|----------- |-----------------------------------------------------------------|
|
||||
| `link` | URL(内部或外部)。 |
|
||||
| `title` | 卡片的标题。 |
|
||||
| `subtitle` | 卡片的副标题(支持 Markdown)。 |
|
||||
| `icon` | 图标的名称。 |
|
||||
| `tag` | 标签中的文本。 |
|
||||
| `tagColor` | 标签的颜色:`gray`(默认)、`yellow`、`red` 和 `blue`。 |
|
||||
| Parameter | Description |
|
||||
|----------- |---------------------------------------|
|
||||
| `link` | URL(内部或外部) |
|
||||
| `title` | 卡片的标题 |
|
||||
| `subtitle` | 字幕标题(支持 Markdown) |
|
||||
| `icon` | 图标的名称 |
|
||||
|
||||
## 图片卡片
|
||||
## Image Card
|
||||
|
||||
此外,卡片支持通过以下参数添加图片并进行处理:
|
||||
此外,该卡还支持通过以下参数添加图像和处理:
|
||||
|
||||
| 参数 | 描述 |
|
||||
|-----------|--------------------------------------|
|
||||
| `image` | 指定卡片的图片 URL。 |
|
||||
| `method` | 设置 Hugo 的图片处理方法。 |
|
||||
| `options` | 配置 Hugo 的图片处理选项。 |
|
||||
| Parameter | Description |
|
||||
|----------- |---------------------------------------------|
|
||||
| `image` | 指定卡片的图像 URL. |
|
||||
| `method` | 设置 Hugo 的图像处理方法。 |
|
||||
| `options` | 配置 Hugo 的图像处理选项。|
|
||||
|
||||
卡片支持三种类型的图片:
|
||||
卡片支持三种图像:
|
||||
|
||||
1. 远程图片:`image` 参数中的完整 URL。
|
||||
2. 静态图片:使用 Hugo `static/` 目录中的相对路径。
|
||||
3. 处理后的图片:使用 Hugo `assets/` 目录中的相对路径。
|
||||
1. 远程图片:完整网址应放置在 image 参数中
|
||||
2. 静态图片:使用 Hugo 的 static/ 目录中的相对路径
|
||||
3. 处理过的图片:使用 Hugo 的 assets/ 目录中的相对路径
|
||||
|
||||
Hextra 在构建时自动检测是否需要图片处理,并应用 `options` 参数或默认设置(Resize,800x,质量 80,WebP 格式)。
|
||||
目前支持以下 `method`:`Resize`、`Fit`、`Fill` 和 `Crop`。
|
||||
Hextra 在构建过程中会自动检测图片是否需要处理,并根据需要应用 options 参数或默认设置(缩放,800x,质量 80,WebP 格式)。
|
||||
|
||||
有关 Hugo 内置图片处理命令、方法和选项的更多信息,请参阅其[图片处理文档](https://gohugo.io/content-management/image-processing/)。
|
||||
它目前支持以下处理方法:Resize(缩放)、Fit(适应)、Fill(填充)和 Crop(裁剪)。
|
||||
|
||||
## 标签
|
||||
|
||||
卡片支持添加标签,这对于显示额外的状态信息非常有用。
|
||||
|
||||
{{< cards >}}
|
||||
{{< card link="../callout" title="带默认标签的卡片" tag="标签文本" >}}
|
||||
{{< card link="../callout" title="带错误标签的卡片" tag="标签文本" tagType="error" >}}
|
||||
{{< card link="../callout" title="带信息标签的卡片" tag="标签文本" tagType="info" >}}
|
||||
{{< card link="../callout" title="带警告标签的卡片" tag="标签文本" tagType="warning" >}}
|
||||
{{< card link="/" title="图片卡片" image="https://github.com/user-attachments/assets/71b7e3ec-1a8d-4582-b600-5425c6cc0407" subtitle="网络图片" tag="标签文本" tagType="error" >}}
|
||||
{{< /cards >}}
|
||||
|
||||
```
|
||||
{{</* cards */>}}
|
||||
{{</* card link="../callout" title="带默认标签颜色的卡片" tag="标签文本" */>}}
|
||||
{{</* card link="../callout" title="带红色标签的卡片" tag="标签文本" tagType="error" */>}}
|
||||
{{</* card link="../callout" title="带蓝色标签的卡片" tag="标签文本" tagType="info" */>}}
|
||||
{{</* card link="../callout" title="带黄色标签的卡片" tag="标签文本" tagType="warning" */>}}
|
||||
{{</* /cards */>}}
|
||||
```
|
||||
|
||||
## 列数
|
||||
|
||||
您可以通过将 `cols` 参数传递给 `cards` 短代码来指定卡片的最大列数。请注意,在较小的屏幕上,列仍会折叠。
|
||||
|
||||
{{< cards cols="1" >}}
|
||||
{{< card link="/" title="顶部卡片" >}}
|
||||
{{< card link="/" title="底部卡片" >}}
|
||||
{{< /cards >}}
|
||||
|
||||
{{< cards cols="2" >}}
|
||||
{{< card link="/" title="左侧卡片" >}}
|
||||
{{< card link="/" title="右侧卡片" >}}
|
||||
{{< /cards >}}
|
||||
|
||||
```
|
||||
{{</* cards cols="1" */>}}
|
||||
{{</* card link="/" title="顶部卡片" */>}}
|
||||
{{</* card link="/" title="底部卡片" */>}}
|
||||
{{</* /cards */>}}
|
||||
|
||||
{{</* cards cols="2" */>}}
|
||||
{{</* card link="/" title="左侧卡片" */>}}
|
||||
{{</* card link="/" title="右侧卡片" */>}}
|
||||
{{</* /cards */>}}
|
||||
```
|
||||
有关 Hugo 内置图像处理命令、方法和选项的更多信息,请参阅他们的 [Image Processing Documentation](https://gohugo.io/content-management/image-processing/).
|
||||
|
||||
@ -1,43 +0,0 @@
|
||||
---
|
||||
title: 詳細
|
||||
---
|
||||
|
||||
折りたたみ可能なコンテンツを表示するための組み込みコンポーネント。
|
||||
|
||||
<!--more-->
|
||||
|
||||
## 例
|
||||
|
||||
{{% details title="詳細" %}}
|
||||
|
||||
これは詳細のコンテンツです。
|
||||
|
||||
Markdownは**サポートされています**。
|
||||
|
||||
{{% /details %}}
|
||||
|
||||
{{% details title="クリックして表示" closed="true" %}}
|
||||
|
||||
これはデフォルトで非表示になります。
|
||||
|
||||
{{% /details %}}
|
||||
|
||||
## 使い方
|
||||
|
||||
````markdown
|
||||
{{%/* details title="詳細" */%}}
|
||||
|
||||
これは詳細のコンテンツです。
|
||||
|
||||
Markdownは**サポートされています**。
|
||||
|
||||
{{%/* /details */%}}
|
||||
````
|
||||
|
||||
````markdown
|
||||
{{%/* details title="クリックして表示" closed="true" */%}}
|
||||
|
||||
これはデフォルトで非表示になります。
|
||||
|
||||
{{%/* /details */%}}
|
||||
````
|
||||
@ -2,42 +2,42 @@
|
||||
title: 详情
|
||||
---
|
||||
|
||||
一个内置组件,用于显示可折叠的内容。
|
||||
用于显示可折叠内容的内置组件。
|
||||
|
||||
<!--more-->
|
||||
|
||||
## 示例
|
||||
|
||||
{{% details title="详情" %}}
|
||||
{{% details title="Details" %}}
|
||||
|
||||
这是详情的内容。
|
||||
这是细节的内容
|
||||
|
||||
支持 **Markdown**。
|
||||
Markdown is **supported**.
|
||||
|
||||
{{% /details %}}
|
||||
|
||||
{{% details title="点击我展开" closed="true" %}}
|
||||
{{% details title="Click me to reveal" closed="true" %}}
|
||||
|
||||
默认情况下,这部分内容会被隐藏。
|
||||
默认情况下这将被隐藏
|
||||
|
||||
{{% /details %}}
|
||||
|
||||
## 用法
|
||||
## Usage
|
||||
|
||||
````markdown
|
||||
{{%/* details title="详情" */%}}
|
||||
{{%/* details title="Details" */%}}
|
||||
|
||||
这是详情的内容。
|
||||
这是细节的内容
|
||||
|
||||
支持 **Markdown**。
|
||||
**支持** Markdown
|
||||
|
||||
{{%/* /details */%}}
|
||||
````
|
||||
|
||||
````markdown
|
||||
{{%/* details title="点击我展开" closed="true" */%}}
|
||||
{{%/* details title="Click me to reveal" closed="true" */%}}
|
||||
|
||||
默认情况下,这部分内容会被隐藏。
|
||||
默认情况下这将被隐藏
|
||||
|
||||
{{%/* /details */%}}
|
||||
````
|
||||
@ -1,34 +0,0 @@
|
||||
---
|
||||
title: FileTree コンポーネント
|
||||
linkTitle: FileTree
|
||||
---
|
||||
|
||||
## 例
|
||||
|
||||
{{< filetree/container >}}
|
||||
{{< filetree/folder name="content" >}}
|
||||
{{< filetree/file name="_index.md" >}}
|
||||
{{< filetree/folder name="docs" state="closed" >}}
|
||||
{{< filetree/file name="_index.md" >}}
|
||||
{{< filetree/file name="introduction.md" >}}
|
||||
{{< filetree/file name="introduction.fr.md" >}}
|
||||
{{< /filetree/folder >}}
|
||||
{{< /filetree/folder >}}
|
||||
{{< filetree/file name="hugo.toml" >}}
|
||||
{{< /filetree/container >}}
|
||||
|
||||
## 使用方法
|
||||
|
||||
```text {filename="Markdown"}
|
||||
{{</* filetree/container */>}}
|
||||
{{</* filetree/folder name="content" */>}}
|
||||
{{</* filetree/file name="_index.md" */>}}
|
||||
{{</* filetree/folder name="docs" state="closed" */>}}
|
||||
{{</* filetree/file name="_index.md" */>}}
|
||||
{{</* filetree/file name="introduction.md" */>}}
|
||||
{{</* filetree/file name="introduction.fr.md" */>}}
|
||||
{{</* /filetree/folder */>}}
|
||||
{{</* /filetree/folder */>}}
|
||||
{{</* filetree/file name="hugo.toml" */>}}
|
||||
{{</* /filetree/container */>}}
|
||||
```
|
||||
@ -1,6 +1,5 @@
|
||||
---
|
||||
title: 文件树组件
|
||||
linkTitle: 文件树
|
||||
title: 文件树
|
||||
---
|
||||
|
||||
## 示例
|
||||
|
||||
@ -1,46 +0,0 @@
|
||||
---
|
||||
title: アイコン
|
||||
---
|
||||
|
||||
このショートコードをインラインで使用するには、設定でインラインショートコードを有効にする必要があります:
|
||||
|
||||
```yaml {filename="hugo.yaml"}
|
||||
enableInlineShortcodes: true
|
||||
```
|
||||
|
||||
利用可能なアイコンのリストは、[`data/icons.yaml`](https://github.com/imfing/hextra/blob/main/data/icons.yaml) で確認できます。
|
||||
|
||||
<!--more-->
|
||||
|
||||
## 例
|
||||
|
||||
{{< icon "academic-cap" >}}
|
||||
{{< icon "cake" >}}
|
||||
{{< icon "gift" >}}
|
||||
{{< icon "sparkles" >}}
|
||||
|
||||
## 使用方法
|
||||
|
||||
```
|
||||
{{</* icon "github" */>}}
|
||||
```
|
||||
|
||||
[Heroicons](https://v1.heroicons.com/) v1 のアウトラインアイコンがデフォルトで利用可能です。
|
||||
|
||||
### 独自のアイコンを追加する方法
|
||||
|
||||
`data/icons.yaml` ファイルを作成し、以下の形式で独自のSVGアイコンを追加します:
|
||||
|
||||
```yaml {filename="data/icons.yaml"}
|
||||
your-icon: <svg>your icon svg content</svg>
|
||||
```
|
||||
|
||||
その後、ショートコードで以下のように使用できます:
|
||||
|
||||
```
|
||||
{{</* icon "your-icon" */>}}
|
||||
|
||||
{{</* card icon="your-icon" */>}}
|
||||
```
|
||||
|
||||
ヒント: [Iconify Design](https://iconify.design/) は、サイト用のSVGアイコンを見つけるのに最適な場所です。
|
||||
@ -2,13 +2,13 @@
|
||||
title: 图标
|
||||
---
|
||||
|
||||
要在行内使用此短代码,需要在配置中启用行内短代码:
|
||||
要内联使用此短代码,需要在配置中启用内联短代码:
|
||||
|
||||
```yaml {filename="hugo.yaml"}
|
||||
enableInlineShortcodes: true
|
||||
```
|
||||
|
||||
可用图标的列表可以在 [`data/icons.yaml`](https://github.com/imfing/hextra/blob/main/data/icons.yaml) 中找到。
|
||||
可用图标列表可以在以下位置找到 [`data/icons.yaml`](https://github.com/imfing/hextra/blob/main/data/icons.yaml).
|
||||
|
||||
<!--more-->
|
||||
|
||||
@ -25,17 +25,17 @@ enableInlineShortcodes: true
|
||||
{{</* icon "github" */>}}
|
||||
```
|
||||
|
||||
[Heroicons](https://v1.heroicons.com/) v1 的轮廓图标默认可用。
|
||||
[Heroicons](https://v1.heroicons.com/) v1 轮廓图标开箱即用
|
||||
|
||||
### 如何添加自定义图标
|
||||
### 如何添加自己的图标
|
||||
|
||||
创建 `data/icons.yaml` 文件,然后按照以下格式添加自定义的 SVG 图标:
|
||||
创建 `data/icons.yaml` 文件,然后按以下格式添加您自己的 SVG 图标:
|
||||
|
||||
```yaml {filename="data/icons.yaml"}
|
||||
your-icon: <svg>your icon svg content</svg>
|
||||
```
|
||||
|
||||
然后可以在短代码中这样使用:
|
||||
然后可以在短代码中使用它,如下所示:
|
||||
|
||||
```
|
||||
{{</* icon "your-icon" */>}}
|
||||
@ -43,4 +43,4 @@ your-icon: <svg>your icon svg content</svg>
|
||||
{{</* card icon="your-icon" */>}}
|
||||
```
|
||||
|
||||
提示:[Iconify Design](https://iconify.design/) 是寻找网站 SVG 图标的好地方。
|
||||
提示:[Iconify Design](https://iconify.design/) 是为您的网站查找 SVG 图标的好地方
|
||||
|
||||
@ -1,79 +0,0 @@
|
||||
---
|
||||
title: "Jupyter Notebook コンポーネント"
|
||||
linktitle: "Jupyter Notebook"
|
||||
math: true
|
||||
sidebar:
|
||||
exclude: true
|
||||
---
|
||||
|
||||
{{< callout >}}Jupyter Notebook をショートコード経由で含める実験的な機能です。すべてのセルタイプがサポートされているわけではありません。{{< /callout >}}
|
||||
|
||||
[Jupyter Notebook](https://jupyter.org/) は、[Project Jupyter](https://jupyter.org/) の言語に依存しない HTML ノートブックアプリケーションです。これを使用すると、ライブコード、数式、視覚化、および説明文を含むドキュメントを作成して共有できます。
|
||||
|
||||
<!--more-->
|
||||
|
||||
## 使用方法
|
||||
|
||||
### ローカルノートブックを使用する
|
||||
|
||||
Jupyter Notebook ショートコードを使用するには、プロジェクト内に Jupyter Notebook ファイルが必要です。[画像を追加する](../../organize-files#add-images)方法と同様に、Jupyter Notebook を `assets` フォルダに追加できます。
|
||||
|
||||
{{< filetree/container >}}
|
||||
{{< filetree/folder name="assets" >}}
|
||||
{{< filetree/file name="notebook.ipynb" >}}
|
||||
{{< /filetree/folder >}}
|
||||
{{< filetree/folder name="content" >}}
|
||||
{{< filetree/folder name="docs" >}}
|
||||
{{< filetree/file name="my-page.md" >}}
|
||||
{{< /filetree/folder >}}
|
||||
{{< /filetree/folder >}}
|
||||
{{< /filetree/container >}}
|
||||
|
||||
`jupyter` ショートコードを使用してページに Jupyter Notebook を含めます:
|
||||
|
||||
```markdown {filename="content/docs/my-page.md"}
|
||||
---
|
||||
title: My Page
|
||||
math: true
|
||||
---
|
||||
|
||||
{{%/* jupyter "notebook.ipynb" */%}}
|
||||
```
|
||||
|
||||
あるいは、Hugo の [ページバンドル][page-bundles] 機能を利用して、Jupyter Notebook を Markdown ファイルと一緒に整理することもできます。
|
||||
|
||||
{{< filetree/container >}}
|
||||
{{< filetree/folder name="content" >}}
|
||||
{{< filetree/folder name="docs" >}}
|
||||
{{< filetree/folder name="my-page" >}}
|
||||
{{< filetree/file name="index.md" >}}
|
||||
{{< filetree/file name="notebook.ipynb" >}}
|
||||
{{< /filetree/folder >}}
|
||||
{{< /filetree/folder >}}
|
||||
{{< /filetree/folder >}}
|
||||
{{< /filetree/container >}}
|
||||
|
||||
```markdown {filename="content/docs/my-page/index.md"}
|
||||
---
|
||||
title: My Page
|
||||
math: true
|
||||
---
|
||||
|
||||
{{%/* jupyter "notebook.ipynb" */%}}
|
||||
```
|
||||
|
||||
### リモートノートブックを使用する
|
||||
|
||||
ノートブックファイルの URL を指定して、リモートノートブックを使用することもできます。たとえば、[What is the Jupyter Notebook](https://github.com/jupyter/notebook/blob/main/docs/source/examples/Notebook/What%20is%20the%20Jupyter%20Notebook.ipynb) ノートブックをページに含めるには、次のショートコードを使用します:
|
||||
|
||||
```
|
||||
{{%/* jupyter "https://raw.githubusercontent.com/jupyter/notebook/main/docs/source/examples/Notebook/What%20is%20the%20Jupyter%20Notebook.ipynb" */%}}
|
||||
```
|
||||
|
||||
## ノートブックの例
|
||||
|
||||
{{< callout type="info" >}}以下は、プロジェクトの assets フォルダに含まれているノートブックファイルの例です。{{< /callout >}}
|
||||
|
||||
{{% jupyter "example.ipynb" %}}
|
||||
|
||||
[page-bundles]: https://gohugo.io/content-management/page-bundles/#leaf-bundles
|
||||
@ -1,79 +0,0 @@
|
||||
---
|
||||
title: "Jupyter Notebook 组件"
|
||||
linktitle: "Jupyter Notebook"
|
||||
math: true
|
||||
sidebar:
|
||||
exclude: true
|
||||
---
|
||||
|
||||
{{< callout >}}实验性功能:通过短代码嵌入 Jupyter Notebook。请注意,并非所有单元格类型都受支持。{{< /callout >}}
|
||||
|
||||
[Jupyter Notebook](https://jupyter.org/) 是 [Project Jupyter](https://jupyter.org/) 的一个语言无关的 HTML 笔记本应用程序。它允许你创建和共享包含实时代码、方程、可视化和叙述性文本的文档。
|
||||
|
||||
<!--more-->
|
||||
|
||||
## 使用方法
|
||||
|
||||
### 使用本地笔记本
|
||||
|
||||
要使用 Jupyter Notebook 短代码,你需要在项目中有一个 Jupyter Notebook 文件。类似于如何[添加图片](../../organize-files#add-images)到项目中,你可以将 Jupyter Notebooks 添加到 `assets` 文件夹。
|
||||
|
||||
{{< filetree/container >}}
|
||||
{{< filetree/folder name="assets" >}}
|
||||
{{< filetree/file name="notebook.ipynb" >}}
|
||||
{{< /filetree/folder >}}
|
||||
{{< filetree/folder name="content" >}}
|
||||
{{< filetree/folder name="docs" >}}
|
||||
{{< filetree/file name="my-page.md" >}}
|
||||
{{< /filetree/folder >}}
|
||||
{{< /filetree/folder >}}
|
||||
{{< /filetree/container >}}
|
||||
|
||||
使用 `jupyter` 短代码将 Jupyter Notebook 包含在页面中:
|
||||
|
||||
```markdown {filename="content/docs/my-page.md"}
|
||||
---
|
||||
title: 我的页面
|
||||
math: true
|
||||
---
|
||||
|
||||
{{%/* jupyter "notebook.ipynb" */%}}
|
||||
```
|
||||
|
||||
或者,你可以利用 Hugo 的[页面包][page-bundles]功能将 Jupyter Notebooks 与 Markdown 文件一起组织。
|
||||
|
||||
{{< filetree/container >}}
|
||||
{{< filetree/folder name="content" >}}
|
||||
{{< filetree/folder name="docs" >}}
|
||||
{{< filetree/folder name="my-page" >}}
|
||||
{{< filetree/file name="index.md" >}}
|
||||
{{< filetree/file name="notebook.ipynb" >}}
|
||||
{{< /filetree/folder >}}
|
||||
{{< /filetree/folder >}}
|
||||
{{< /filetree/folder >}}
|
||||
{{< /filetree/container >}}
|
||||
|
||||
```markdown {filename="content/docs/my-page/index.md"}
|
||||
---
|
||||
title: 我的页面
|
||||
math: true
|
||||
---
|
||||
|
||||
{{%/* jupyter "notebook.ipynb" */%}}
|
||||
```
|
||||
|
||||
### 使用远程笔记本
|
||||
|
||||
你也可以通过提供笔记本文件的 URL 来使用远程笔记本。例如,要在页面中包含 [What is the Jupyter Notebook](https://github.com/jupyter/notebook/blob/main/docs/source/examples/Notebook/What%20is%20the%20Jupyter%20Notebook.ipynb) 笔记本,你可以使用以下短代码:
|
||||
|
||||
```
|
||||
{{%/* jupyter "https://raw.githubusercontent.com/jupyter/notebook/main/docs/source/examples/Notebook/What%20is%20the%20Jupyter%20Notebook.ipynb" */%}}
|
||||
```
|
||||
|
||||
## 示例笔记本
|
||||
|
||||
{{< callout type="info" >}}以下是包含在项目 assets 文件夹中的笔记本文件示例。{{< /callout >}}
|
||||
|
||||
{{% jupyter "example.ipynb" %}}
|
||||
|
||||
[page-bundles]: https://gohugo.io/content-management/page-bundles/#leaf-bundles
|
||||
@ -1,77 +0,0 @@
|
||||
---
|
||||
title: その他のショートコード
|
||||
linkTitle: その他
|
||||
sidebar:
|
||||
exclude: true
|
||||
---
|
||||
|
||||
{{< callout emoji="ℹ️" >}}
|
||||
これらの一部はHugoの組み込みショートコードです。
|
||||
これらのショートコードは安定性が低く、いつでも変更される可能性があります。
|
||||
{{< /callout >}}
|
||||
|
||||
## バッジ
|
||||
|
||||
```
|
||||
{{</* badge "バッジ" */>}}
|
||||
```
|
||||
|
||||
結果:
|
||||
|
||||
{{< badge "バッジ" >}}
|
||||
|
||||
バリエーション:
|
||||
|
||||
```
|
||||
{{</* badge content="info" type="info" */>}}
|
||||
{{</* badge content="warning" type="warning" */>}}
|
||||
{{</* badge content="error" type="error" */>}}
|
||||
```
|
||||
|
||||
結果:
|
||||
|
||||
{{< badge content="info" type="info" >}}
|
||||
{{< badge content="warning" type="warning" >}}
|
||||
{{< badge content="error" type="error" >}}
|
||||
|
||||
リンクとアイコン付き:
|
||||
|
||||
```
|
||||
{{</* badge content="リリース" link="https://github.com/imfing/hextra/releases" icon="github" */>}}
|
||||
```
|
||||
|
||||
結果:
|
||||
|
||||
{{< badge content="リリース" link="https://github.com/imfing/hextra/releases" icon="github" >}}
|
||||
|
||||
## YouTube
|
||||
|
||||
YouTube動画を埋め込みます。
|
||||
|
||||
```
|
||||
{{</* youtube VIDEO_ID */>}}
|
||||
```
|
||||
|
||||
結果:
|
||||
|
||||
{{< youtube id=dQw4w9WgXcQ loading=lazy >}}
|
||||
|
||||
詳細については、[HugoのYouTubeショートコード](https://gohugo.io/content-management/shortcodes/#youtube)を参照してください。
|
||||
|
||||
## PDF
|
||||
|
||||
PDFショートコードを使用すると、コンテンツ内にPDFファイルを埋め込むことができます。
|
||||
|
||||
```
|
||||
{{</* pdf "https://example.com/sample.pdf" */>}}
|
||||
```
|
||||
|
||||
また、プロジェクトディレクトリ内にPDFファイルを配置し、相対パスを使用することもできます。
|
||||
|
||||
```
|
||||
{{</* pdf "path/to/file.pdf" */>}}
|
||||
```
|
||||
|
||||
例:
|
||||
|
||||
{{< pdf "https://upload.wikimedia.org/wikipedia/commons/1/13/Example.pdf" >}}
|
||||
@ -34,15 +34,16 @@ Result:
|
||||
{{< badge content="warning" type="warning" >}}
|
||||
{{< badge content="error" type="error" >}}
|
||||
|
||||
With link and icon:
|
||||
With link:
|
||||
|
||||
```
|
||||
{{</* badge content="Releases" link="https://github.com/imfing/hextra/releases" icon="github" */>}}
|
||||
{{</* badge content="Releases" link="https://github.com/imfing/hextra/releases" */>}}
|
||||
```
|
||||
|
||||
Result:
|
||||
|
||||
{{< badge content="Releases" link="https://github.com/imfing/hextra/releases" icon="github" >}}
|
||||
{{< badge content="Releases" link="https://github.com/imfing/hextra/releases" >}}
|
||||
|
||||
|
||||
## YouTube
|
||||
|
||||
|
||||
@ -1,77 +0,0 @@
|
||||
---
|
||||
title: 其他短代码
|
||||
linkTitle: 其他
|
||||
sidebar:
|
||||
exclude: true
|
||||
---
|
||||
|
||||
{{< callout emoji="ℹ️" >}}
|
||||
其中一些是 Hugo 内置的短代码。
|
||||
这些短代码被认为不太稳定,可能会随时更改。
|
||||
{{< /callout >}}
|
||||
|
||||
## 徽章
|
||||
|
||||
```
|
||||
{{</* badge "徽章" */>}}
|
||||
```
|
||||
|
||||
结果:
|
||||
|
||||
{{< badge "徽章" >}}
|
||||
|
||||
变体:
|
||||
|
||||
```
|
||||
{{</* badge content="信息" type="info" */>}}
|
||||
{{</* badge content="警告" type="warning" */>}}
|
||||
{{</* badge content="错误" type="error" */>}}
|
||||
```
|
||||
|
||||
结果:
|
||||
|
||||
{{< badge content="信息" type="info" >}}
|
||||
{{< badge content="警告" type="warning" >}}
|
||||
{{< badge content="错误" type="error" >}}
|
||||
|
||||
带链接和图标:
|
||||
|
||||
```
|
||||
{{</* badge content="发布" link="https://github.com/imfing/hextra/releases" icon="github" */>}}
|
||||
```
|
||||
|
||||
结果:
|
||||
|
||||
{{< badge content="发布" link="https://github.com/imfing/hextra/releases" icon="github" >}}
|
||||
|
||||
## YouTube
|
||||
|
||||
嵌入 YouTube 视频。
|
||||
|
||||
```
|
||||
{{</* youtube 视频ID */>}}
|
||||
```
|
||||
|
||||
结果:
|
||||
|
||||
{{< youtube id=dQw4w9WgXcQ loading=lazy >}}
|
||||
|
||||
更多信息,请参阅 [Hugo 的 YouTube 短代码](https://gohugo.io/content-management/shortcodes/#youtube)。
|
||||
|
||||
## PDF
|
||||
|
||||
使用 PDF 短代码,您可以在内容中嵌入 PDF 文件。
|
||||
|
||||
```
|
||||
{{</* pdf "https://example.com/sample.pdf" */>}}
|
||||
```
|
||||
|
||||
您也可以将 PDF 文件放在项目目录中并使用相对路径。
|
||||
|
||||
```
|
||||
{{</* pdf "path/to/file.pdf" */>}}
|
||||
```
|
||||
|
||||
示例:
|
||||
|
||||
{{< pdf "https://upload.wikimedia.org/wikipedia/commons/1/13/Example.pdf" >}}
|
||||
@ -1,46 +0,0 @@
|
||||
---
|
||||
title: ステップ
|
||||
---
|
||||
|
||||
ステップのシリーズを表示するための組み込みコンポーネント。
|
||||
|
||||
## 例
|
||||
|
||||
{{% steps %}}
|
||||
|
||||
### ステップ 1
|
||||
|
||||
これは最初のステップです。
|
||||
|
||||
### ステップ 2
|
||||
|
||||
これは2番目のステップです。
|
||||
|
||||
### ステップ 3
|
||||
|
||||
これは3番目のステップです。
|
||||
|
||||
{{% /steps %}}
|
||||
|
||||
## 使い方
|
||||
|
||||
{{< callout emoji="ℹ️" >}}
|
||||
このショートコードは**Markdownコンテンツ専用**であることに注意してください。
|
||||
HTMLコンテンツや他のショートコードをステップの内容として使用すると、期待通りにレンダリングされない場合があります。
|
||||
{{< /callout >}}
|
||||
|
||||
`steps` ショートコード内にMarkdownのh3ヘッダーを配置します。
|
||||
|
||||
```
|
||||
{{%/* steps */%}}
|
||||
|
||||
### ステップ 1
|
||||
|
||||
これは最初のステップです。
|
||||
|
||||
### ステップ 2
|
||||
|
||||
これは2番目のステップです。
|
||||
|
||||
{{%/* /steps */%}}
|
||||
```
|
||||
@ -2,7 +2,7 @@
|
||||
title: 步骤
|
||||
---
|
||||
|
||||
一个内置组件,用于显示一系列步骤。
|
||||
A built-in component to display a series of steps.
|
||||
|
||||
## 示例
|
||||
|
||||
@ -23,25 +23,20 @@ title: 步骤
|
||||
{{% /steps %}}
|
||||
|
||||
|
||||
## 用法
|
||||
## 使用
|
||||
|
||||
{{< callout emoji="ℹ️" >}}
|
||||
请注意,此短代码**仅适用于 Markdown 内容**。
|
||||
如果将 HTML 内容或其他短代码作为步骤内容,可能无法按预期渲染。
|
||||
{{< /callout >}}
|
||||
|
||||
在 `steps` 短代码中放置 Markdown 的 h3 标题。
|
||||
将 Markdown h3 标题放入 `steps` 短代码中。
|
||||
|
||||
```
|
||||
{{%/* steps */%}}
|
||||
|
||||
### 第一步
|
||||
### Step 1
|
||||
|
||||
这是第一步。
|
||||
This is the first step.
|
||||
|
||||
### 第二步
|
||||
### Step 2
|
||||
|
||||
这是第二步。
|
||||
This is the second step.
|
||||
|
||||
{{%/* /steps */%}}
|
||||
```
|
||||
@ -1,93 +0,0 @@
|
||||
---
|
||||
title: タブ
|
||||
next: /docs/guide/deploy-site
|
||||
---
|
||||
|
||||
## 例
|
||||
|
||||
{{< tabs items="JSON,YAML,TOML" >}}
|
||||
|
||||
{{< tab >}}**JSON**: JavaScript Object Notation (JSON) は、JavaScript オブジェクト構文に基づいた構造化データを表現するための標準的なテキストベースのフォーマットです。{{< /tab >}}
|
||||
{{< tab >}}**YAML**: YAML は人間が読みやすいデータシリアライゼーション言語です。{{< /tab >}}
|
||||
{{< tab >}}**TOML**: TOML は、明らかなセマンティクスにより読みやすい最小限の設定ファイルフォーマットを目指しています。{{< /tab >}}
|
||||
|
||||
{{< /tabs >}}
|
||||
|
||||
## 使用方法
|
||||
|
||||
### デフォルト
|
||||
|
||||
```
|
||||
{{</* tabs items="JSON,YAML,TOML" */>}}
|
||||
|
||||
{{</* tab */>}}**JSON**: JavaScript Object Notation (JSON) は、JavaScript オブジェクト構文に基づいた構造化データを表現するための標準的なテキストベースのフォーマットです。{{</* /tab */>}}
|
||||
{{</* tab */>}}**YAML**: YAML は人間が読みやすいデータシリアライゼーション言語です。{{</* /tab */>}}
|
||||
{{</* tab */>}}**TOML**: TOML は、明らかなセマンティクスにより読みやすい最小限の設定ファイルフォーマットを目指しています。{{</* /tab */>}}
|
||||
|
||||
{{</* /tabs */>}}
|
||||
```
|
||||
|
||||
### 選択されたインデックスを指定
|
||||
|
||||
`defaultIndex` プロパティを使用して、選択されるタブを指定します。インデックスは 0 から始まります。
|
||||
|
||||
```
|
||||
{{</* tabs items="JSON,YAML,TOML" defaultIndex="1" */>}}
|
||||
|
||||
{{</* tab */>}}**JSON**: JavaScript Object Notation (JSON) は、JavaScript オブジェクト構文に基づいた構造化データを表現するための標準的なテキストベースのフォーマットです。{{</* /tab */>}}
|
||||
{{</* tab */>}}**YAML**: YAML は人間が読みやすいデータシリアライゼーション言語です。{{</* /tab */>}}
|
||||
{{</* tab */>}}**TOML**: TOML は、明らかなセマンティクスにより読みやすい最小限の設定ファイルフォーマットを目指しています。{{</* /tab */>}}
|
||||
|
||||
{{</* /tabs */>}}
|
||||
```
|
||||
|
||||
`YAML` タブがデフォルトで選択されます。
|
||||
|
||||
{{< tabs items="JSON,YAML,TOML" defaultIndex="1" >}}
|
||||
|
||||
{{< tab >}}**JSON**: JavaScript Object Notation (JSON) は、JavaScript オブジェクト構文に基づいた構造化データを表現するための標準的なテキストベースのフォーマットです。{{< /tab >}}
|
||||
{{< tab >}}**YAML**: YAML は人間が読みやすいデータシリアライゼーション言語です。{{< /tab >}}
|
||||
{{< tab >}}**TOML**: TOML は、明らかなセマンティクスにより読みやすい最小限の設定ファイルフォーマットを目指しています。{{< /tab >}}
|
||||
|
||||
{{< /tabs >}}
|
||||
|
||||
|
||||
### Markdown を使用
|
||||
|
||||
コードブロックを含む Markdown 構文もサポートされています:
|
||||
|
||||
````
|
||||
{{</* tabs items="JSON,YAML,TOML" */>}}
|
||||
|
||||
{{</* tab */>}}
|
||||
```json
|
||||
{ "hello": "world" }
|
||||
```
|
||||
{{</* /tab */>}}
|
||||
|
||||
... 他のタブも同様に追加
|
||||
|
||||
{{</* /tabs */>}}
|
||||
````
|
||||
|
||||
{{< tabs items="JSON,YAML,TOML" >}}
|
||||
|
||||
{{< tab >}}
|
||||
```json
|
||||
{ "hello": "world" }
|
||||
```
|
||||
{{< /tab >}}
|
||||
|
||||
{{< tab >}}
|
||||
```yaml
|
||||
hello: world
|
||||
```
|
||||
{{< /tab >}}
|
||||
|
||||
{{< tab >}}
|
||||
```toml
|
||||
hello = "world"
|
||||
```
|
||||
{{< /tab >}}
|
||||
|
||||
{{< /tabs >}}
|
||||
@ -7,54 +7,54 @@ next: /docs/guide/deploy-site
|
||||
|
||||
{{< tabs items="JSON,YAML,TOML" >}}
|
||||
|
||||
{{< tab >}}**JSON**: JavaScript 对象表示法(JSON)是一种基于 JavaScript 对象语法的标准文本格式,用于表示结构化数据。{{< /tab >}}
|
||||
{{< tab >}}**YAML**: YAML 是一种人类可读的数据序列化语言。{{< /tab >}}
|
||||
{{< tab >}}**TOML**: TOML 旨在成为一种最小化的配置文件格式,由于其明显的语义,易于阅读。{{< /tab >}}
|
||||
{{< tab >}}**JSON**: JavaScript Object Notation (JSON) is a standard text-based format for representing structured data based on JavaScript object syntax.{{< /tab >}}
|
||||
{{< tab >}}**YAML**: YAML is a human-readable data serialization language.{{< /tab >}}
|
||||
{{< tab >}}**TOML**: TOML aims to be a minimal configuration file format that's easy to read due to obvious semantics.{{< /tab >}}
|
||||
|
||||
{{< /tabs >}}
|
||||
|
||||
## 用法
|
||||
## 使用
|
||||
|
||||
### 默认
|
||||
### 默认情况下
|
||||
|
||||
```
|
||||
{{</* tabs items="JSON,YAML,TOML" */>}}
|
||||
|
||||
{{</* tab */>}}**JSON**: JavaScript 对象表示法(JSON)是一种基于 JavaScript 对象语法的标准文本格式,用于表示结构化数据。{{</* /tab */>}}
|
||||
{{</* tab */>}}**YAML**: YAML 是一种人类可读的数据序列化语言。{{</* /tab */>}}
|
||||
{{</* tab */>}}**TOML**: TOML 旨在成为一种最小化的配置文件格式,由于其明显的语义,易于阅读。{{</* /tab */>}}
|
||||
{{</* tab */>}}**JSON**: JavaScript Object Notation (JSON) is a standard text-based format for representing structured data based on JavaScript object syntax.{{</* /tab */>}}
|
||||
{{</* tab */>}}**YAML**: YAML is a human-readable data serialization language.{{</* /tab */>}}
|
||||
{{</* tab */>}}**TOML**: TOML aims to be a minimal configuration file format that's easy to read due to obvious semantics.{{</* /tab */>}}
|
||||
|
||||
{{</* /tabs */>}}
|
||||
```
|
||||
|
||||
### 指定选中索引
|
||||
### 指定索引
|
||||
|
||||
使用 `defaultIndex` 属性来指定选中的标签页。索引从 0 开始。
|
||||
使用 `defaultIndex` 属性指定选定的选项卡。索引从 0 开始。
|
||||
|
||||
```
|
||||
{{</* tabs items="JSON,YAML,TOML" defaultIndex="1" */>}}
|
||||
|
||||
{{</* tab */>}}**JSON**: JavaScript 对象表示法(JSON)是一种基于 JavaScript 对象语法的标准文本格式,用于表示结构化数据。{{</* /tab */>}}
|
||||
{{</* tab */>}}**YAML**: YAML 是一种人类可读的数据序列化语言。{{</* /tab */>}}
|
||||
{{</* tab */>}}**TOML**: TOML 旨在成为一种最小化的配置文件格式,由于其明显的语义,易于阅读。{{</* /tab */>}}
|
||||
{{</* tab */>}}**JSON**: JavaScript Object Notation (JSON) is a standard text-based format for representing structured data based on JavaScript object syntax.{{</* /tab */>}}
|
||||
{{</* tab */>}}**YAML**: YAML is a human-readable data serialization language.{{</* /tab */>}}
|
||||
{{</* tab */>}}**TOML**: TOML aims to be a minimal configuration file format that's easy to read due to obvious semantics.{{</* /tab */>}}
|
||||
|
||||
{{</* /tabs */>}}
|
||||
```
|
||||
|
||||
默认情况下,`YAML` 标签页将被选中。
|
||||
默认为 `YAML`
|
||||
|
||||
{{< tabs items="JSON,YAML,TOML" defaultIndex="1" >}}
|
||||
|
||||
{{< tab >}}**JSON**: JavaScript 对象表示法(JSON)是一种基于 JavaScript 对象语法的标准文本格式,用于表示结构化数据。{{< /tab >}}
|
||||
{{< tab >}}**YAML**: YAML 是一种人类可读的数据序列化语言。{{< /tab >}}
|
||||
{{< tab >}}**TOML**: TOML 旨在成为一种最小化的配置文件格式,由于其明显的语义,易于阅读。{{< /tab >}}
|
||||
{{< tab >}}**JSON**: JavaScript Object Notation (JSON) is a standard text-based format for representing structured data based on JavaScript object syntax.{{< /tab >}}
|
||||
{{< tab >}}**YAML**: YAML is a human-readable data serialization language.{{< /tab >}}
|
||||
{{< tab >}}**TOML**: TOML aims to be a minimal configuration file format that's easy to read due to obvious semantics.{{< /tab >}}
|
||||
|
||||
{{< /tabs >}}
|
||||
|
||||
|
||||
### 使用 Markdown
|
||||
|
||||
Markdown 语法,包括代码块,也受支持:
|
||||
还支持包括代码块的 Markdown 语法:
|
||||
|
||||
````
|
||||
{{</* tabs items="JSON,YAML,TOML" */>}}
|
||||
@ -65,7 +65,7 @@ Markdown 语法,包括代码块,也受支持:
|
||||
```
|
||||
{{</* /tab */>}}
|
||||
|
||||
... 类似地添加其他标签页
|
||||
... add other tabs similarly
|
||||
|
||||
{{</* /tabs */>}}
|
||||
````
|
||||
|
||||
@ -1,114 +0,0 @@
|
||||
---
|
||||
title: "シンタックスハイライト"
|
||||
weight: 3
|
||||
---
|
||||
|
||||
Hugoは、純粋なGoで書かれた汎用シンタックスハイライターである[Chroma](https://github.com/alecthomas/chroma)を使用してシンタックスハイライトを行います。
|
||||
Markdownコンテンツ内のコードブロックにはバッククォートを使用することを推奨します。例えば:
|
||||
|
||||
<!--more-->
|
||||
|
||||
````markdown {filename="Markdown"}
|
||||
```python
|
||||
def say_hello():
|
||||
print("Hello!")
|
||||
```
|
||||
````
|
||||
|
||||
は次のようにレンダリングされます:
|
||||
|
||||
```python
|
||||
def say_hello():
|
||||
print("Hello!")
|
||||
```
|
||||
|
||||
## 機能
|
||||
|
||||
### ファイル名
|
||||
|
||||
コードブロックにファイル名やタイトルを追加するには、`filename`属性を設定します:
|
||||
|
||||
````markdown {filename="Markdown"}
|
||||
```python {filename="hello.py"}
|
||||
def say_hello():
|
||||
print("Hello!")
|
||||
```
|
||||
````
|
||||
|
||||
```python {filename="hello.py"}
|
||||
def say_hello():
|
||||
print("Hello!")
|
||||
```
|
||||
|
||||
### ファイルへのリンク
|
||||
|
||||
{{< new-feature version="v0.9.2" >}}
|
||||
|
||||
`base_url`属性を使用して、ファイル名と組み合わせてリンクを生成するベースURLを提供できます。
|
||||
|
||||
ファイル名には、ベースパス内のファイルの場所を指定する相対パスを含めることができます。
|
||||
|
||||
````markdown {filename="Markdown"}
|
||||
```go {base_url="https://github.com/imfing/hextra/blob/main/",filename="exampleSite/hugo.work"}
|
||||
go 1.20
|
||||
```
|
||||
````
|
||||
|
||||
```go {base_url="https://github.com/imfing/hextra/blob/main/",filename="exampleSite/hugo.work"}
|
||||
go 1.20
|
||||
```
|
||||
|
||||
### 行番号
|
||||
|
||||
行番号を設定するには、`linenos`属性を`table`に設定し、オプションで`linenostart`を開始行番号に設定します:
|
||||
|
||||
````markdown {filename="Markdown"}
|
||||
```python {linenos=table,linenostart=42}
|
||||
def say_hello():
|
||||
print("Hello!")
|
||||
```
|
||||
````
|
||||
|
||||
```python {linenos=table,linenostart=42}
|
||||
def say_hello():
|
||||
print("Hello!")
|
||||
```
|
||||
|
||||
### 行のハイライト
|
||||
|
||||
行をハイライトするには、`hl_lines`属性に行番号のリストを設定します:
|
||||
|
||||
````markdown {filename="Markdown"}
|
||||
```python {linenos=table,hl_lines=[2,4],linenostart=1,filename="hello.py"}
|
||||
def say_hello():
|
||||
print("Hello!")
|
||||
|
||||
def main():
|
||||
say_hello()
|
||||
```
|
||||
````
|
||||
|
||||
```python {linenos=table,hl_lines=[2,4],linenostart=1,filename="hello.py"}
|
||||
def say_hello():
|
||||
print("Hello!")
|
||||
|
||||
def main():
|
||||
say_hello()
|
||||
```
|
||||
|
||||
### コピーボタン
|
||||
|
||||
デフォルトでは、コードブロックにコピーボタンが有効になっています。その動作はサイト設定ファイルを変更することで変更できます:
|
||||
|
||||
```yaml {linenos=table,linenostart=42,filename="hugo.yaml"}
|
||||
params:
|
||||
highlight:
|
||||
copy:
|
||||
enable: true
|
||||
# hover | always
|
||||
display: hover
|
||||
```
|
||||
|
||||
## サポートされている言語
|
||||
|
||||
サポートされている言語のリストについては、[Chromaのドキュメント](https://github.com/alecthomas/chroma#supported-languages)を参照してください。
|
||||
@ -40,24 +40,6 @@ def say_hello():
|
||||
print("Hello!")
|
||||
```
|
||||
|
||||
### Link to File
|
||||
|
||||
{{< new-feature version="v0.9.2" >}}
|
||||
|
||||
You can use the `base_url` attribute to provide a base URL that will be combined with the file name to generate a link.
|
||||
|
||||
The file name can include a relative path if it specifies the file's location within the base path.
|
||||
|
||||
````markdown {filename="Markdown"}
|
||||
```go {base_url="https://github.com/imfing/hextra/blob/main/",filename="exampleSite/hugo.work"}
|
||||
go 1.20
|
||||
```
|
||||
````
|
||||
|
||||
```go {base_url="https://github.com/imfing/hextra/blob/main/",filename="exampleSite/hugo.work"}
|
||||
go 1.20
|
||||
```
|
||||
|
||||
### Line Numbers
|
||||
|
||||
To set line numbers, set attribute `linenos` to `table` and optionally set `linenostart` to the starting line number:
|
||||
|
||||
@ -1,10 +1,10 @@
|
||||
---
|
||||
title: "语法高亮"
|
||||
title: "代码高亮"
|
||||
weight: 3
|
||||
---
|
||||
|
||||
Hugo 使用 [Chroma](https://github.com/alecthomas/chroma),这是一个用纯 Go 编写的通用语法高亮器,用于语法高亮。
|
||||
建议在 Markdown 内容中使用反引号来标记代码块。例如:
|
||||
Hugo 使用 [Chroma](https://github.com/alecthomas/chroma),一种纯 Golang 实现的代码高亮渲染器。
|
||||
建议对 Markdown 内容中的代码块使用反引号,例如:
|
||||
|
||||
<!--more-->
|
||||
|
||||
@ -15,18 +15,18 @@ def say_hello():
|
||||
```
|
||||
````
|
||||
|
||||
将会渲染为:
|
||||
将呈现为:
|
||||
|
||||
```python
|
||||
def say_hello():
|
||||
print("Hello!")
|
||||
```
|
||||
|
||||
## 功能
|
||||
## 特性
|
||||
|
||||
### 文件名
|
||||
|
||||
要为代码块添加文件名或标题,请设置 `filename` 属性:
|
||||
要向代码块添加文件名或标题,请设置 `filename`:
|
||||
|
||||
````markdown {filename="Markdown"}
|
||||
```python {filename="hello.py"}
|
||||
@ -40,27 +40,9 @@ def say_hello():
|
||||
print("Hello!")
|
||||
```
|
||||
|
||||
### 文件链接
|
||||
|
||||
{{< new-feature version="v0.9.2" >}}
|
||||
|
||||
你可以使用 `base_url` 属性提供一个基础 URL,它将与文件名结合生成一个链接。
|
||||
|
||||
如果文件名指定了文件在基础路径中的位置,则可以包含相对路径。
|
||||
|
||||
````markdown {filename="Markdown"}
|
||||
```go {base_url="https://github.com/imfing/hextra/blob/main/",filename="exampleSite/hugo.work"}
|
||||
go 1.20
|
||||
```
|
||||
````
|
||||
|
||||
```go {base_url="https://github.com/imfing/hextra/blob/main/",filename="exampleSite/hugo.work"}
|
||||
go 1.20
|
||||
```
|
||||
|
||||
### 行号
|
||||
|
||||
要设置行号,请将 `linenos` 属性设置为 `table`,并可选地设置 `linenostart` 为起始行号:
|
||||
如需设置行号,将 `linenos` 设置为 `table`,并将 `linenostart` 设置为起始行号:
|
||||
|
||||
````markdown {filename="Markdown"}
|
||||
```python {linenos=table,linenostart=42}
|
||||
@ -76,7 +58,7 @@ def say_hello():
|
||||
|
||||
### 高亮行
|
||||
|
||||
要高亮特定行,请将 `hl_lines` 属性设置为行号列表:
|
||||
显示高亮行,设置 `hl_lines` 为行号:
|
||||
|
||||
````markdown {filename="Markdown"}
|
||||
```python {linenos=table,hl_lines=[2,4],linenostart=1,filename="hello.py"}
|
||||
@ -96,19 +78,12 @@ def main():
|
||||
say_hello()
|
||||
```
|
||||
|
||||
|
||||
### 复制按钮
|
||||
|
||||
默认情况下,代码块启用了复制按钮。可以通过修改站点配置文件来更改其行为:
|
||||
默认情况下,代码块复制按钮已自动启用。
|
||||
|
||||
```yaml {linenos=table,linenostart=42,filename="hugo.yaml"}
|
||||
params:
|
||||
highlight:
|
||||
copy:
|
||||
enable: true
|
||||
# hover | always
|
||||
display: hover
|
||||
```
|
||||
|
||||
## 支持的语言
|
||||
## 支持的编程语言
|
||||
|
||||
有关支持的语言列表,请参阅 [Chroma 文档](https://github.com/alecthomas/chroma#supported-languages)。
|
||||
如需了解支持的编程语言,转至 [Chroma's documentation](https://github.com/alecthomas/chroma#supported-languages)。
|
||||
|
||||
@ -95,7 +95,7 @@ Open source projects powered by Hextra
|
||||
>}}
|
||||
|
||||
{{< card
|
||||
link="https://github.com/remysheppard/lutheran-confessions"
|
||||
link="https://lutheranconfessions.org/"
|
||||
title="LutheranConfessions"
|
||||
image="https://github.com/imfing/hextra/assets/5097752/ad6625e4-88cd-4cad-b102-5399997d0359"
|
||||
imageStyle="object-fit:cover; aspect-ratio:16/9;"
|
||||
|
||||
@ -22,22 +22,17 @@ languages:
|
||||
languageName: English
|
||||
weight: 1
|
||||
title: Hextra
|
||||
zh-cn:
|
||||
languageName: 简体中文
|
||||
languageCode: zh-CN
|
||||
weight: 2
|
||||
title: Hextra
|
||||
fa:
|
||||
languageName: فارسی
|
||||
languageCode: fa
|
||||
languageDirection: rtl
|
||||
weight: 2
|
||||
title: هگزترا
|
||||
ja:
|
||||
languageName: 日本語
|
||||
languageCode: ja
|
||||
weight: 3
|
||||
title: Hextra
|
||||
zh-cn:
|
||||
languageName: 简体中文
|
||||
languageCode: zh-CN
|
||||
weight: 4
|
||||
title: Hextra
|
||||
title: هگزترا
|
||||
|
||||
module:
|
||||
hugoVersion:
|
||||
@ -49,17 +44,11 @@ module:
|
||||
- path: github.com/imfing/hextra
|
||||
|
||||
markup:
|
||||
highlight:
|
||||
noClasses: false
|
||||
goldmark:
|
||||
renderer:
|
||||
unsafe: true
|
||||
extensions:
|
||||
passthrough:
|
||||
delimiters:
|
||||
block: [['\[', '\]'], ['$$', '$$']]
|
||||
inline: [['\(', '\)']]
|
||||
enable: true
|
||||
highlight:
|
||||
noClasses: false
|
||||
|
||||
enableInlineShortcodes: true
|
||||
|
||||
@ -184,4 +173,3 @@ params:
|
||||
# emitMetadata: 0
|
||||
# inputPosition: top
|
||||
# lang: en
|
||||
# theme: noborder_dark
|
||||
|
||||
@ -197,8 +197,6 @@
|
||||
"dark:placeholder:hx-text-gray-400",
|
||||
"data-[state=closed]:hx-hidden",
|
||||
"data-[state=open]:hx-hidden",
|
||||
"data-[state=selected]:dark:hx-border-primary-500",
|
||||
"data-[state=selected]:dark:hx-text-primary-600",
|
||||
"data-[state=selected]:hx-block",
|
||||
"data-[state=selected]:hx-border-primary-500",
|
||||
"data-[state=selected]:hx-text-primary-600",
|
||||
@ -230,7 +228,6 @@
|
||||
"hextra-code-block",
|
||||
"hextra-code-copy-btn",
|
||||
"hextra-code-copy-btn-container",
|
||||
"hextra-custom-footer",
|
||||
"hextra-feature-card",
|
||||
"hextra-feature-grid",
|
||||
"hextra-filetree",
|
||||
@ -333,7 +330,6 @@
|
||||
"hx-gap-x-1.5",
|
||||
"hx-gap-y-2",
|
||||
"hx-grid",
|
||||
"hx-grid-cols-1",
|
||||
"hx-group",
|
||||
"hx-group/code",
|
||||
"hx-group/copybtn",
|
||||
@ -546,7 +542,6 @@
|
||||
"language-options",
|
||||
"language-switcher",
|
||||
"last-of-type:hx-mb-0",
|
||||
"lg:hx-grid-cols-3",
|
||||
"lntable",
|
||||
"lntd",
|
||||
"ltr:before:hx-left-0",
|
||||
@ -579,7 +574,6 @@
|
||||
"max-sm:hx-grid-cols-1",
|
||||
"max-xl:hx-hidden",
|
||||
"md:hx-aspect-[1.1/1]",
|
||||
"md:hx-grid-cols-2",
|
||||
"md:hx-h-[calc(100vh-var(--navbar-height)-var(--menu-height))]",
|
||||
"md:hx-hidden",
|
||||
"md:hx-inline-block",
|
||||
@ -643,8 +637,7 @@
|
||||
"subheading-anchor",
|
||||
"success-icon",
|
||||
"theme-toggle",
|
||||
"xl:hx-block",
|
||||
"xl:hx-grid-cols-4"
|
||||
"xl:hx-block"
|
||||
],
|
||||
"ids": null
|
||||
}
|
||||
|
||||
@ -1,6 +0,0 @@
|
||||
documentation: "ドキュメント"
|
||||
showcase: "展示"
|
||||
blog: "ブログ"
|
||||
about: "概要"
|
||||
more: "もっと見る"
|
||||
hugoDocs: "Hugo ドキュメント ↗"
|
||||
@ -1,11 +0,0 @@
|
||||
{{- $version := .Get "version" | default "" -}}
|
||||
{{- $icon := .Get "icon" | default "" -}}
|
||||
{{- $defaultLink := cond (eq $version "") "https://github.com/imfing/hextra/tree/main" (printf "https://github.com/imfing/hextra/releases/tag/%s" $version) -}}
|
||||
{{- $link := .Get "link" | default $defaultLink -}}
|
||||
{{- $content := cond (eq $version "") "New in main branch" (printf "New in %s" $version) -}}
|
||||
|
||||
<div style="margin-top: 1rem; display: inline-flex;">
|
||||
<a href="{{ $link }}" title="{{ $link | plainify }}" target="_blank">
|
||||
{{- partial "shortcodes/badge" (dict "content" $content "border" true "icon" $icon) -}}
|
||||
</a>
|
||||
</div>
|
||||
@ -5,7 +5,7 @@ copyright: "© 2024 Hextra Project."
|
||||
dark: "Meusi"
|
||||
editThisPage: "Hariri ukurasa huu kwenye GitHub →"
|
||||
lastUpdated: "Ilisasishwa mwisho"
|
||||
light: "Meupe"
|
||||
light: "Nuru"
|
||||
noResultsFound: "Hakuna matokeo yalipopatikana."
|
||||
onThisPage: "Kwenye ukurasa huu"
|
||||
poweredBy: "Inaendeshwa na Hextra"
|
||||
|
||||
@ -1,13 +1,12 @@
|
||||
{{- $class := .Attributes.class | default "" -}}
|
||||
{{- $filename := .Attributes.filename | default "" -}}
|
||||
{{- $base_url := .Attributes.base_url | default "" -}}
|
||||
{{- $lang := .Attributes.lang | default .Type -}}
|
||||
|
||||
|
||||
<div class="hextra-code-block hx-relative hx-mt-6 first:hx-mt-0 hx-group/code">
|
||||
{{- partial "components/codeblock" (dict "filename" $filename "lang" $lang "base_url" $base_url "content" .Inner "options" .Options) -}}
|
||||
{{ partial "components/codeblock" (dict "filename" $filename "lang" $lang "content" .Inner "options" .Options) }}
|
||||
|
||||
{{- if or (eq site.Params.highlight.copy.enable nil) (site.Params.highlight.copy.enable) -}}
|
||||
{{- partialCached "components/codeblock-copy-button" (dict "filename" $filename) $filename -}}
|
||||
{{- end -}}
|
||||
{{- if or (eq site.Params.highlight.copy.enable nil) (site.Params.highlight.copy.enable) }}
|
||||
{{- partialCached "components/codeblock-copy-button" (dict "filename" $filename) $filename }}
|
||||
{{ end }}
|
||||
</div>
|
||||
|
||||
@ -1,30 +0,0 @@
|
||||
{{ define "main" }}
|
||||
<div class='hx-mx-auto hx-flex {{ partial "utils/page-width" . }}'>
|
||||
{{ partial "sidebar.html" (dict "context" . "disableSidebar" true "displayPlaceholder" true) }}
|
||||
{{ partial "toc.html" (dict "Params" (dict "toc" false)) }}
|
||||
<article class="hx-w-full hx-break-words hx-flex hx-min-h-[calc(100vh-var(--navbar-height))] hx-min-w-0 hx-justify-center hx-pb-8 hx-pr-[calc(env(safe-area-inset-right)-1.5rem)]">
|
||||
<main class="hx-w-full hx-min-w-0 hx-max-w-6xl hx-px-6 hx-pt-4 md:hx-px-12">
|
||||
<br class="hx-mt-1.5 hx-text-sm" />
|
||||
{{ if .Title }}<h1 class="hx-text-center hx-mt-2 hx-text-4xl hx-font-bold hx-tracking-tight hx-text-slate-900 dark:hx-text-slate-100">{{ .Title }}</h1>{{ end }}
|
||||
<div class="hx-mb-16"></div>
|
||||
<div class="content">
|
||||
{{ .Content }}
|
||||
</div>
|
||||
<div class="hx-grid hx-grid-cols-1 md:hx-grid-cols-2 lg:hx-grid-cols-3 xl:hx-grid-cols-4 hx-gap-4">
|
||||
{{ range .Data.Terms }}
|
||||
<div class="hx-w-full">
|
||||
<a
|
||||
href="{{ .Page.RelPermalink }}"
|
||||
title="{{ .Page.LinkTitle }}"
|
||||
class="hx-font-medium hover:hx-text-primary-600"
|
||||
>
|
||||
{{- .Page.LinkTitle -}}
|
||||
<span class="hx-text-sm hx-text-gray-500"> {{ .Count }}</span>
|
||||
</a>
|
||||
</div>
|
||||
{{ end }}
|
||||
</div>
|
||||
</main>
|
||||
</article>
|
||||
</div>
|
||||
{{ end }}
|
||||
@ -1,33 +0,0 @@
|
||||
{{ define "main" }}
|
||||
<div class='hx-mx-auto hx-flex {{ partial "utils/page-width" . }}'>
|
||||
{{ partial "sidebar.html" (dict "context" . "disableSidebar" true "displayPlaceholder" true) }}
|
||||
{{ partial "toc.html" (dict "Params" (dict "toc" false)) }}
|
||||
<article class="hx-w-full hx-break-words hx-flex hx-min-h-[calc(100vh-var(--navbar-height))] hx-min-w-0 hx-justify-center hx-pb-8 hx-pr-[calc(env(safe-area-inset-right)-1.5rem)]">
|
||||
<main class="hx-w-full hx-min-w-0 hx-max-w-6xl hx-px-6 hx-pt-4 md:hx-px-12">
|
||||
<br class="hx-mt-1.5 hx-text-sm" />
|
||||
{{ if .Title }}<h1 class="hx-text-center hx-mt-2 hx-text-4xl hx-font-bold hx-tracking-tight hx-text-slate-900 dark:hx-text-slate-100">{{ .Title }}</h1>{{ end }}
|
||||
<div class="hx-mb-16"></div>
|
||||
<div class="content">
|
||||
{{ .Content }}
|
||||
</div>
|
||||
<div>
|
||||
{{- range .Pages -}}
|
||||
<div>
|
||||
<h3>
|
||||
<a
|
||||
style="color: inherit; text-decoration: none;"
|
||||
class="hx-block hx-font-semibold hx-mt-8 hx-text-2xl"
|
||||
href="{{ .RelPermalink }}"
|
||||
title="{{ .LinkTitle }}"
|
||||
>
|
||||
{{ .Title }}
|
||||
</a>
|
||||
</h3>
|
||||
<p class="hx-opacity-50 hx-text-sm hx-leading-7">{{ partial "utils/format-date" .Date }}</p>
|
||||
</div>
|
||||
{{- end -}}
|
||||
</div>
|
||||
</main>
|
||||
</article>
|
||||
</div>
|
||||
{{ end }}
|
||||
@ -1,27 +1,11 @@
|
||||
{{ $filename := .filename | default "" -}}
|
||||
{{ $base_url := .base_url | default "" -}}
|
||||
{{ $lang := .lang | default "" }}
|
||||
{{ $content := .content }}
|
||||
{{ $options := .options | default (dict) }}
|
||||
|
||||
{{- if $filename -}}
|
||||
<div class="filename not-prose" dir="auto">
|
||||
{{- if $base_url -}}
|
||||
|
||||
{{- $base_url = strings.TrimSuffix "/" $base_url -}}
|
||||
{{- $filename = strings.TrimPrefix "/" $filename -}}
|
||||
{{- $file_url := urls.JoinPath $base_url $filename -}}
|
||||
|
||||
<a class="hx-no-underline hx-inline-flex hx-items-center hx-gap-1" href="{{ $file_url }}" target="_blank" rel="noopener noreferrer">
|
||||
<span>{{- $filename -}}</span>
|
||||
{{- partial "utils/icon" (dict "name" "external-link" "attributes" "height=1em") -}}
|
||||
</a>
|
||||
{{- else -}}
|
||||
{{- $filename -}}
|
||||
{{- end -}}
|
||||
</div>
|
||||
<div class="filename" dir="auto">{{ $filename }}</div>
|
||||
{{- end -}}
|
||||
|
||||
{{- if transform.CanHighlight $lang -}}
|
||||
<div>{{- highlight $content $lang $options -}}</div>
|
||||
{{- else -}}
|
||||
|
||||
@ -8,17 +8,8 @@
|
||||
* This solution was created with reference to:
|
||||
* https://github.com/giscus/giscus/issues/336#issuecomment-1214366281
|
||||
*/
|
||||
function getHugoTheme() {
|
||||
return localStorage.getItem("color-theme");
|
||||
}
|
||||
|
||||
function getGiscusTheme() {
|
||||
let giscusTheme = "{{ (string .theme) | default `light` }}";
|
||||
if(getHugoTheme() == 'light') {
|
||||
return giscusTheme.replace('dark', 'light');
|
||||
} else {
|
||||
return giscusTheme.replace('light', 'dark');
|
||||
}
|
||||
return localStorage.getItem("color-theme");
|
||||
}
|
||||
|
||||
function setGiscusTheme() {
|
||||
|
||||
@ -1,7 +1,5 @@
|
||||
{{- $enableFooterSwitches := .Scratch.Get "enableFooterSwitches" | default false -}}
|
||||
{{- $displayThemeToggle := site.Params.theme.displayToggle | default true -}}
|
||||
{{- $footerSwitchesVisible := and $enableFooterSwitches (or hugo.IsMultilingual $displayThemeToggle) -}}
|
||||
{{- $copyrightSectionVisible := or (.Site.Params.footer.displayPoweredBy | default true) .Site.Params.footer.displayCopyright -}}
|
||||
|
||||
{{- $copyright := (T "copyright") | default "© 2024 Hextra." -}}
|
||||
{{- $poweredBy := (T "poweredBy") | default "Powered by Hextra" -}}
|
||||
@ -17,7 +15,7 @@
|
||||
|
||||
|
||||
<footer class="hextra-footer hx-bg-gray-100 hx-pb-[env(safe-area-inset-bottom)] dark:hx-bg-neutral-900 print:hx-bg-transparent">
|
||||
{{- if $footerSwitchesVisible -}}
|
||||
{{- if $enableFooterSwitches -}}
|
||||
<div class="hx-mx-auto hx-flex hx-gap-2 hx-py-2 hx-px-4 {{ $footerWidth }}">
|
||||
{{- partial "language-switch.html" (dict "context" .) -}}
|
||||
{{- with $displayThemeToggle }}{{ partial "theme-toggle.html" }}{{ end -}}
|
||||
@ -26,21 +24,14 @@
|
||||
<hr class="dark:hx-border-neutral-800" />
|
||||
{{- end -}}
|
||||
{{- end -}}
|
||||
<div
|
||||
class="hextra-custom-footer {{ $footerWidth }} hx-pl-[max(env(safe-area-inset-left),1.5rem)] hx-pr-[max(env(safe-area-inset-right),1.5rem)] hx-text-gray-600 dark:hx-text-gray-400"
|
||||
>
|
||||
{{- partial "custom/footer.html" (dict "context" . "switchesVisible" $footerSwitchesVisible "copyrightVisible" $copyrightSectionVisible) -}}
|
||||
<div
|
||||
class="{{ $footerWidth }} hx-mx-auto hx-flex hx-justify-center hx-py-12 hx-pl-[max(env(safe-area-inset-left),1.5rem)] hx-pr-[max(env(safe-area-inset-right),1.5rem)] hx-text-gray-600 dark:hx-text-gray-400 md:hx-justify-start"
|
||||
>
|
||||
<div class="hx-flex hx-w-full hx-flex-col hx-items-center sm:hx-items-start">
|
||||
{{- if (.Site.Params.footer.displayPoweredBy | default true) }}<div class="hx-font-semibold">{{ template "theme-credit" $poweredBy }}</div>{{ end }}
|
||||
{{- if .Site.Params.footer.displayCopyright }}<div class="hx-mt-6 hx-text-xs">{{ $copyright | markdownify }}</div>{{ end }}
|
||||
</div>
|
||||
{{- if $copyrightSectionVisible -}}
|
||||
<div
|
||||
class="{{ $footerWidth }} hx-mx-auto hx-flex hx-justify-center hx-py-12 hx-pl-[max(env(safe-area-inset-left),1.5rem)] hx-pr-[max(env(safe-area-inset-right),1.5rem)] hx-text-gray-600 dark:hx-text-gray-400 md:hx-justify-start"
|
||||
>
|
||||
<div class="hx-flex hx-w-full hx-flex-col hx-items-center sm:hx-items-start">
|
||||
{{- if (.Site.Params.footer.displayPoweredBy | default true) }}<div class="hx-font-semibold">{{ template "theme-credit" $poweredBy }}</div>{{- end -}}
|
||||
{{- if .Site.Params.footer.displayCopyright }}<div class="hx-mt-6 hx-text-xs">{{ $copyright | markdownify }}</div>{{- end -}}
|
||||
</div>
|
||||
</div>
|
||||
{{- end -}}
|
||||
</div>
|
||||
</footer>
|
||||
|
||||
{{- define "theme-credit" -}}
|
||||
|
||||
@ -2,7 +2,6 @@
|
||||
{{- $type := .type -}}
|
||||
{{- $class := .class | default "" -}}
|
||||
{{- $border := .border | default false -}}
|
||||
{{- $icon := .icon | default "" -}}
|
||||
|
||||
{{- $defaultClass := "hx-text-gray-600 hx-bg-gray-100 dark:hx-bg-neutral-800 dark:hx-text-neutral-200 hx-border-gray-200 dark:hx-border-neutral-700" -}}
|
||||
{{- $warningClass := "hx-border-yellow-100 hx-bg-yellow-50 hx-text-yellow-900 dark:hx-border-yellow-200/30 dark:hx-bg-yellow-700/30 dark:hx-text-yellow-200" -}}
|
||||
@ -12,9 +11,6 @@
|
||||
{{- $borderClass := cond (eq $border true) "hx-border" "" -}}
|
||||
{{- $badgeClass := cond (eq $type "info") $infoClass (cond (eq $type "warning") $warningClass (cond (eq $type "error") $errorClass $defaultClass)) -}}
|
||||
<div class="hextra-badge {{ $class }}">
|
||||
<div class="hx-inline-flex hx-gap-1 hx-items-center hx-rounded-full hx-px-2.5 hx-leading-6 hx-text-[.65rem] {{ $borderClass }} {{ $badgeClass }}">
|
||||
{{- with $icon -}}{{- partial "utils/icon" (dict "name" . "attributes" "height=12") -}}{{- end -}}
|
||||
{{- $content -}}
|
||||
</div>
|
||||
<div class="hx-inline-flex hx-items-center hx-rounded-full hx-px-2.5 hx-leading-6 hx-text-[.65rem] {{ $borderClass }} {{ $badgeClass }}">{{- $content -}}</div>
|
||||
</div>
|
||||
{{- /* Strip trailing newline. */ -}}
|
||||
|
||||
@ -3,7 +3,6 @@
|
||||
{{- $type := .Get "type" | default "" -}}
|
||||
{{- $class := .Get "class" | default "" -}}
|
||||
{{- $link := .Get "link" | default "" -}}
|
||||
{{- $icon := .Get "icon" | default "" -}}
|
||||
|
||||
{{- if $link -}}
|
||||
<a href="{{ $link }}" title="{{ $content | plainify }}" target="_blank">
|
||||
@ -12,7 +11,6 @@
|
||||
"type" $type
|
||||
"class" $class
|
||||
"border" true
|
||||
"icon" $icon
|
||||
)
|
||||
-}}
|
||||
</a>
|
||||
@ -22,7 +20,6 @@
|
||||
"type" $type
|
||||
"class" $class
|
||||
"border" true
|
||||
"icon" $icon
|
||||
)
|
||||
-}}
|
||||
{{- end -}}
|
||||
|
||||
@ -13,18 +13,30 @@
|
||||
{{/* Image processing options */}}
|
||||
{{- $method := .Get "method" | default "Resize" | humanize -}}
|
||||
{{- $options := .Get "options" | default "800x webp q80" -}}
|
||||
{{- $process := .Get "process" | default (printf "%s %s" $method $options) -}}
|
||||
|
||||
{{- with or (.Page.Resources.Get $image) (resources.Get $image) -}}
|
||||
{{/* Retrieve the $image resource from local or global resources */}}
|
||||
{{- $processed := .Process $process -}}
|
||||
{{- $width = $processed.Width -}}
|
||||
{{- $height = $processed.Height -}}
|
||||
{{- $image = $processed.RelPermalink -}}
|
||||
{{ else }}
|
||||
{{/* Otherwise, use relative link of the image */}}
|
||||
{{- if hasPrefix $image "/" -}}
|
||||
{{- $image = relURL (strings.TrimPrefix "/" $image) -}}
|
||||
{{- if and $image (not (urls.Parse $image).Scheme) -}}
|
||||
{{/* Process images in assets */}}
|
||||
{{- with resources.Get $image -}}
|
||||
{{- $processed := "" -}}
|
||||
{{- if eq $method "Resize" -}}
|
||||
{{- $processed = (.Resize $options) -}}
|
||||
{{- else if eq $method "Fit" -}}
|
||||
{{- $processed = (.Fit $options) -}}
|
||||
{{- else if eq $method "Fill" -}}
|
||||
{{- $processed = (.Fill $options) -}}
|
||||
{{- else if eq $method "Crop" -}}
|
||||
{{- $processed = (.Crop $options) -}}
|
||||
{{- else -}}
|
||||
{{- errorf "Invalid image processing command: Must be one of Crop, Fit, Fill or Resize." -}}
|
||||
{{- end -}}
|
||||
{{- $width = $processed.Width -}}
|
||||
{{- $height = $processed.Height -}}
|
||||
{{- $image = $processed.RelPermalink -}}
|
||||
{{- else -}}
|
||||
{{/* Otherwise, use relative link of the image */}}
|
||||
{{- if hasPrefix $image "/" -}}
|
||||
{{- $image = relURL (strings.TrimPrefix "/" $image) -}}
|
||||
{{- end -}}
|
||||
{{- end -}}
|
||||
{{- end -}}
|
||||
|
||||
|
||||
@ -9,7 +9,7 @@
|
||||
<div class="hx-mt-4 hx-flex hx-w-max hx-min-w-full hx-border-b hx-border-gray-200 hx-pb-px dark:hx-border-neutral-800">
|
||||
{{- range $i, $item := $items -}}
|
||||
<button
|
||||
class="hextra-tabs-toggle data-[state=selected]:hx-border-primary-500 data-[state=selected]:hx-text-primary-600 data-[state=selected]:dark:hx-border-primary-500 data-[state=selected]:dark:hx-text-primary-600 hx-mr-2 hx-rounded-t hx-p-2 hx-font-medium hx-leading-5 hx-transition-colors -hx-mb-0.5 hx-select-none hx-border-b-2 hx-border-transparent hx-text-gray-600 hover:hx-border-gray-200 hover:hx-text-black dark:hx-text-gray-200 dark:hover:hx-border-neutral-800 dark:hover:hx-text-white"
|
||||
class="hextra-tabs-toggle data-[state=selected]:hx-border-primary-500 data-[state=selected]:hx-text-primary-600 hx-mr-2 hx-rounded-t hx-p-2 hx-font-medium hx-leading-5 hx-transition-colors -hx-mb-0.5 hx-select-none hx-border-b-2 hx-border-transparent hx-text-gray-600 hover:hx-border-gray-200 hover:hx-text-black dark:hx-text-gray-200 dark:hover:hx-border-neutral-800 dark:hover:hx-text-white"
|
||||
role="tab"
|
||||
type="button"
|
||||
aria-controls="tabs-panel-{{ $i }}"
|
||||
|
||||
Reference in New Issue
Block a user